
Finished Project: Tide Pool Tote Bag
I made this cheerful beachy tote bag as a sample for The Black Squirrel Berkeley for the 2024 Bay Area Yarn Crawl. The finished object is so summery in a fruit smoothie sort of way and I’m pleased with how it turned out.
Pattern – “The Tide Pool Tote” by Ola Ogunlolu @ola.bout.handmade for Hobium Yarns. Tide pools / tidepools are just great flavor text for pattern descriptors 😛 (see my Tidepool Beanie)

Notes
Overall, I enjoyed making this bag. The slip stitch rounds and chains for the handle were a little hard on my hands but generally the process felt smooth and there wasn’t anything fiddly. The construction is simple enough I didn’t need to frequently consult the pattern.
I found the pattern to be fine for a free pattern. The design was cute classic beach style and I think would make a reasonably functional bag, as long as you’re okay with it being somewhat floppy and with the openwork from the shell rows. If you like the look of the bag, I would recommend this project.
It might be fiddly to do the bottom panel if you haven't made a similarly constructed item before, but otherwise it doesn't have any special techniques that require explaining to anyone who has done a project in the round.
It contained a few (non catastrophic) copy-editing sort of errors and did not provide finished object measurements or gauge but given that it's a basic tote, I was still able to turn out the project with no issue.
The most annoying thing was actually that I had to always navigate directly to the URL because when I try accessing the Hobium blog through google search results, it has an awful spam pop up sort of ad page.
If I were to make this again, I’d make these changes:
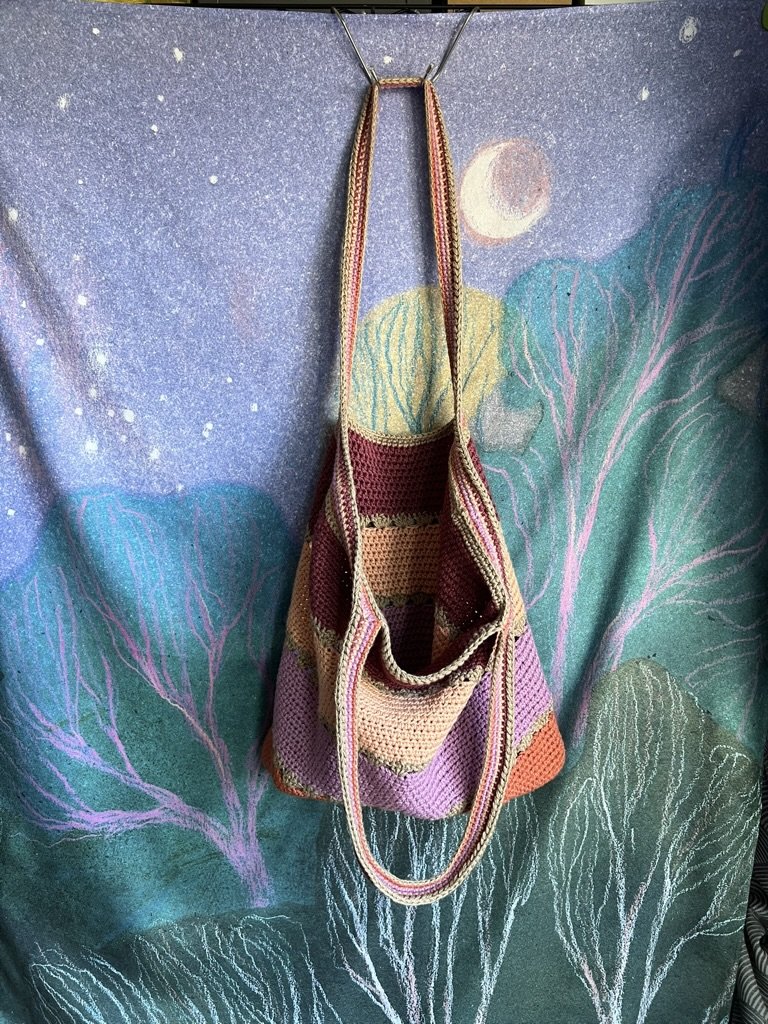
Crochet the bottom panel rounds in slip stitches instead of hdc. This would be a pain in the ass, but less annoying than finding and incorporating an appropriately sized bag bottom for adding structural integrity. The bags in the hanging photos have a pencil case in them which is giving the base more shape.
Make the first row that creates the handles in the same color as the first stripe, and add a round of sl st around the inside of the handles. This would look smoother and also add some structural reinforcement.
Could be fun to do a smaller version with the striped handle where the wide stripes are neutral and the shells are the contrast colors. Could also do granny stitch instead of shells and do 1-3 colors for the accent sections.
Modifications
Body
Finished all sections with invisible/continuous slip stitch (where you finish off the last stitch then weave in the end into the second stitch in that round to simulate a slip stitch)
Started the shell rows with a standing dc instead of ch 3 (at least the last two – the first one I did according to the pattern). Using a standing dc looks more seamless.
Bottom of bag done in trim color (Sand) instead of the same color as the bottom stripe. Pattern didn’t specify the color in that step and I assumed it was the handle color. If you use the same color as the bottom stripe as directed, it will be less obvious if the bag is deformed at the bottom when you’re carrying it with less stuff.
After working the first row of the bottom stripe but before I turned it inside out, the project looked like this:
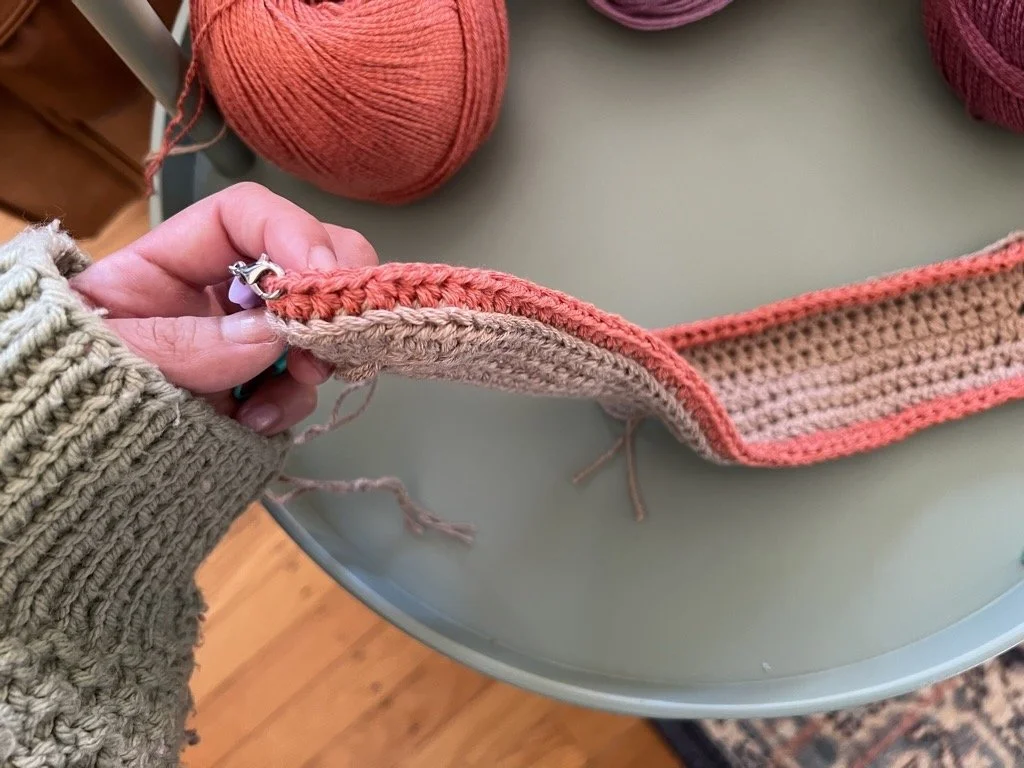
Then after flipping, the unused loop from the outermost round of the bottom panel will be on the inside so it looks like this:

Turned work to do the BLO round going clockwise, then turned the whole thing inside out so the front loops ridge ends up on the inside. This means the body of the bag is still worked counterclockwise (you work into the side of the bag further from you, inserting the hook from the inside of the bag).
This also results in the side of the bag in the pattern stock photo that is on the outside is now the inside texture for my version, although personally I also liked the slightly softer look of the side of the fabric i have as the “right side’.
I don’t know how it would affect long term stability of the bag, but I do find that the way the edge stretches when the ridge is on the outside as it would be if you followed the pattern exactly seems like it might stretch out in a holey-er way with use.
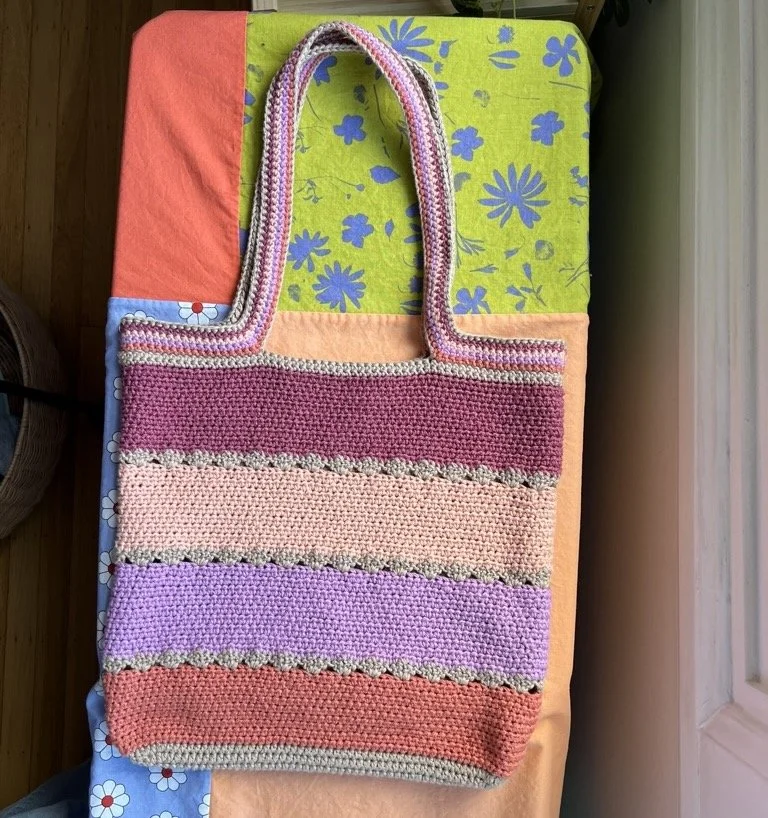
The flat lay image (and the header image) is how I constructed it “inside out” from recommended. The image after is the bag with the original “right side” out.

Handles

I had plenty of each color left over so I thought it’d be fun to make the handle with rainbow-like stripes.
Change row 42 (the one with the ch 100) to sl st instead of sc, and worked them in in opposite direction (counterclockwise).
Turned back to working clockwise (same as bag body rounds) for the subsequent rows. Worked the round after the ch 100 into the back bumps of the chains.
Then, instead of more sc rounds in same color as the shell rows, I did one round each of sc in the four stripe colors.
Finish handles with one round of yarn-over slip stitch (gives an i-cord finish look)
Specs
Yarn
Universal Yarn - Bamboo Pop Sport

This yarn is marketed as sport weight, and I held it double (center pull and outside pull on one cake).
50% cotton / 50% bamboo
10-ply, 292 yds / 100g
Recommended knitting needle size US 4-5 (3.5-4 mm), crochet hook size US G (4 mm).
The yarn was provided since this was a shop sample and I did return the leftover skeins.
Each 100 g skein retails for $11.00 plus tax, so the cost of the project with five colors is $55.00 plus tax. If you used fewer colors you could go with just four skeins at $44.00.
I realize now that I forgot to measure this but the finished project including yarn ends weighed 364 g. I also was apparently too eager to get started but I didn’t weigh the skeins before starting. Based on a spot-check at the store, these are pretty consistently 102 g each so assuming that I used the following quantities for each coloraway:
Sand 110 (tan) – 74 g
Quartz 138 (lilac) – 76 g
Winter Squash 129 (orange-coral) – 63 g
Apricot Slush 135 (light peach) – 65 g
Brambles (burgundy) – 73 g
I found that the yarn in person looks very different from the Universal Yarn stock photos.
Theoretically I should have used within 2-5 g the same amount of every color except for Sand, but I was crocheting faster than I’d normally go for this project and I did each color band at a different sitting and must have used a different tension. However I don’t think the bands are at a noticeable different gauge in the finished object.
This yarn was lovely to work with and I would definitely use it again held double for this type of bag. I think it could also work well for tight gauge granny square bags and accessories.
The pattern uses standard “sl st to first st, ch 1” to start new rows in the round without changing directions each row, which does result in a diagonal “seam”. I found the combination of holding the yarn double with the slight heathering due to the different fiber types taking dye differently made the seam much less noticeable, to the point where I’d say it’s not worth doing any of the fiddlier techniques out there for seamless look rounds given that this is in hdc and held double in a drapey and relatively smooth yarn.
It’s softer and less scratchy to crochet with than 100% cotton (that isn’t mercerized or a really fancy Pima cotton) but still felt sturdy enough to use for a bag. I think the tote as I made it would be suitable for general everyday use, but not to haul heavy groceries or books.
Hook
4.0 mm hook as specified in the pattern.
Time Investment
Just for reference – of course, depending on the materials and your own technique and preference this will vary.
It took me about 15 minutes on average including counting to do one of the regular hdc rounds in the body of the bag and about 30 minutes to do each shell round. I made a conscious effort to crochet quickly, but I would take breaks between sections.
So that's at least 10 hours not even including the handles and base.