
Free Crochet Pattern: Tidepool Beanie Hat (Light)
If you love the look of the worsted weight Tidepool Beanie but wished for a lighter weight version that you can wear in warmer weather, then this one’s for you! The same wavy rib pattern hat, but scaled for fingering weight yarn.
View pattern page on Ravelry here.
A condensed version of the pattern suitable for printing is available as a free PDF download here.
To keep patterns accessible they are free by default, but if you would like to pay for them or otherwise send me a tip, you can do so through this listing.
💕 Thank you!
Most of the instructions here will be identical to the original pattern, so feel free to skip the special stitches and techniques sections if you’re already familiar with the pattern repeat and finishing.

Sizing
The hat should fit adults with a 22”-24” head circumference. Finished hats measure 10” wide when laid flat, and are meant to fit with at least 2” of negative ease. The finished hats are 11” long and intended to be worn with a 2”-3” cuff.
Length is determined by the foundation chain and row gauge determines the width.
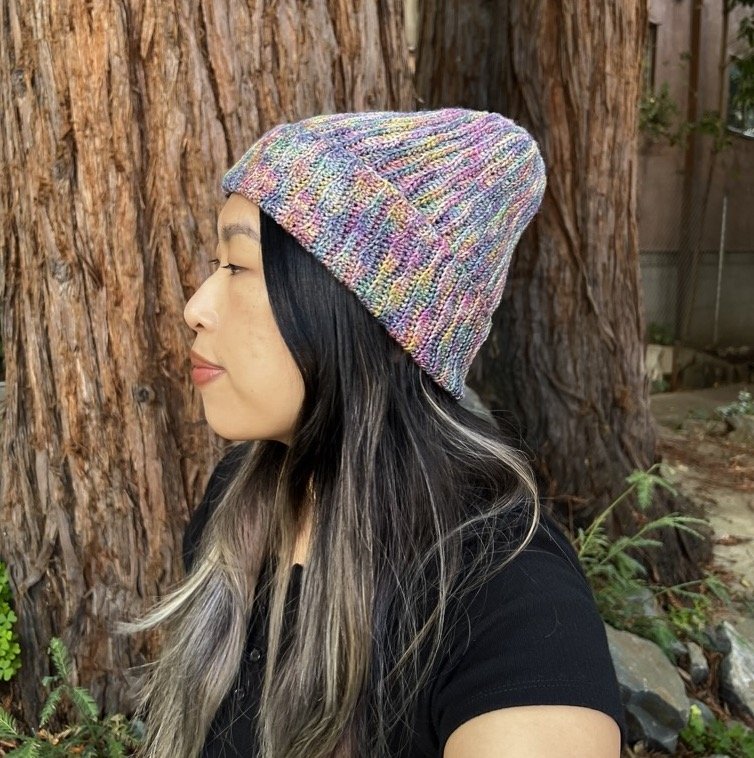
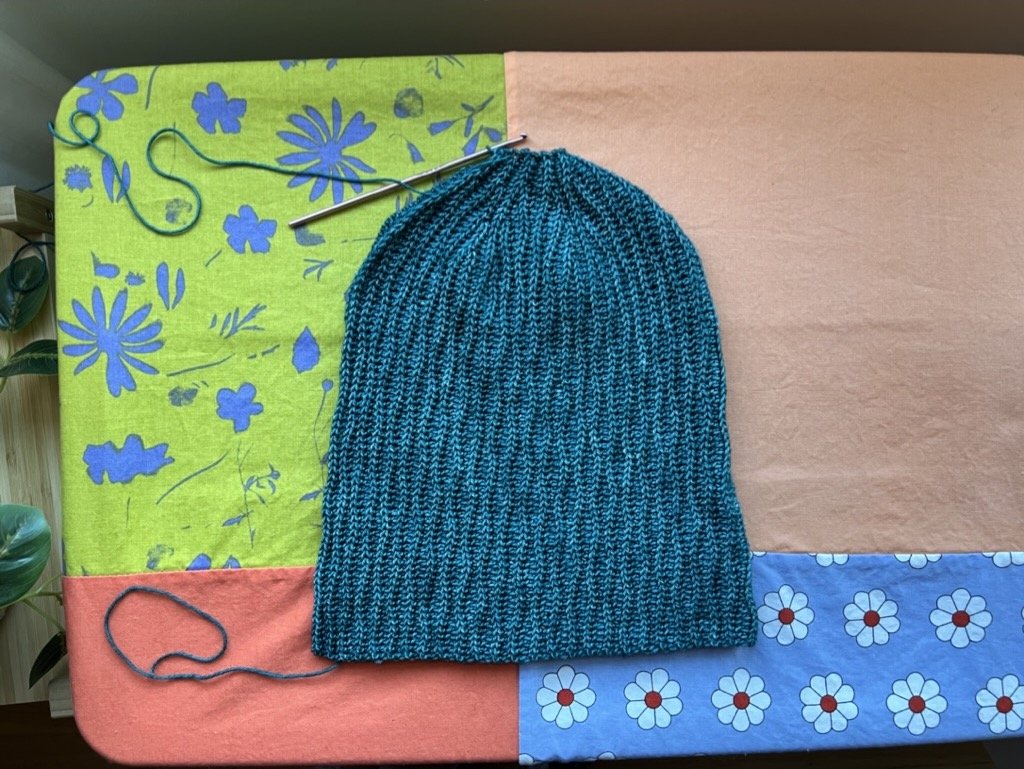
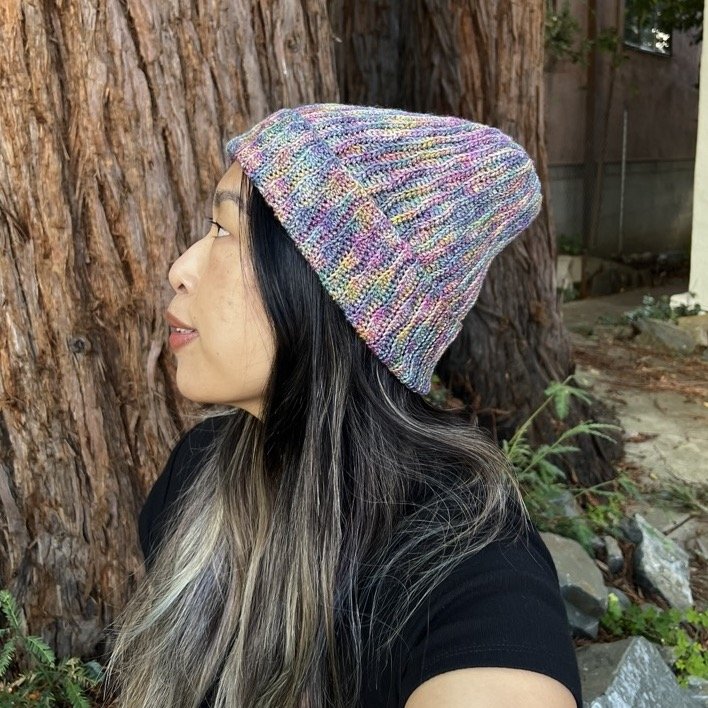
For reference I am in the photo wearing the beanie, and my head circumference is (to my best attempts at measuring it) 23”.
Pattern Overview
This pattern is written in US crochet terms and uses standard CYC abbrevations.
ch = chain
slst = slip stitch
sc = single crochet
hdc = half-double crochet
dc = double crochet
blo = back loop only
Gauge – (20 rows in pattern = 4”) and (28 stitches = 4”) for fingering weight yarn with a suggested 3.5 mm crochet hook.
Stitches used – ch, sc, hdc, dc, yarn over slip stitch, working in back loops only. This pattern does not include tutorials for basic stitches (ch, sc, hdc, dc) or working into back loops but includes instructions for yarn over slip stitch.
Construction – The hat is worked in a single piece, with the rows running vertically (so it grows width-wise as it works up). The crown is shaped using short rows.
Finishing – The fabric is joined into a tube with with a seam of single crochet. There is an additional ~2” of hand sewing (mattress stitch suggested) to close the hole at the top. With the suggested construction, you will need to weave in 4 ends.
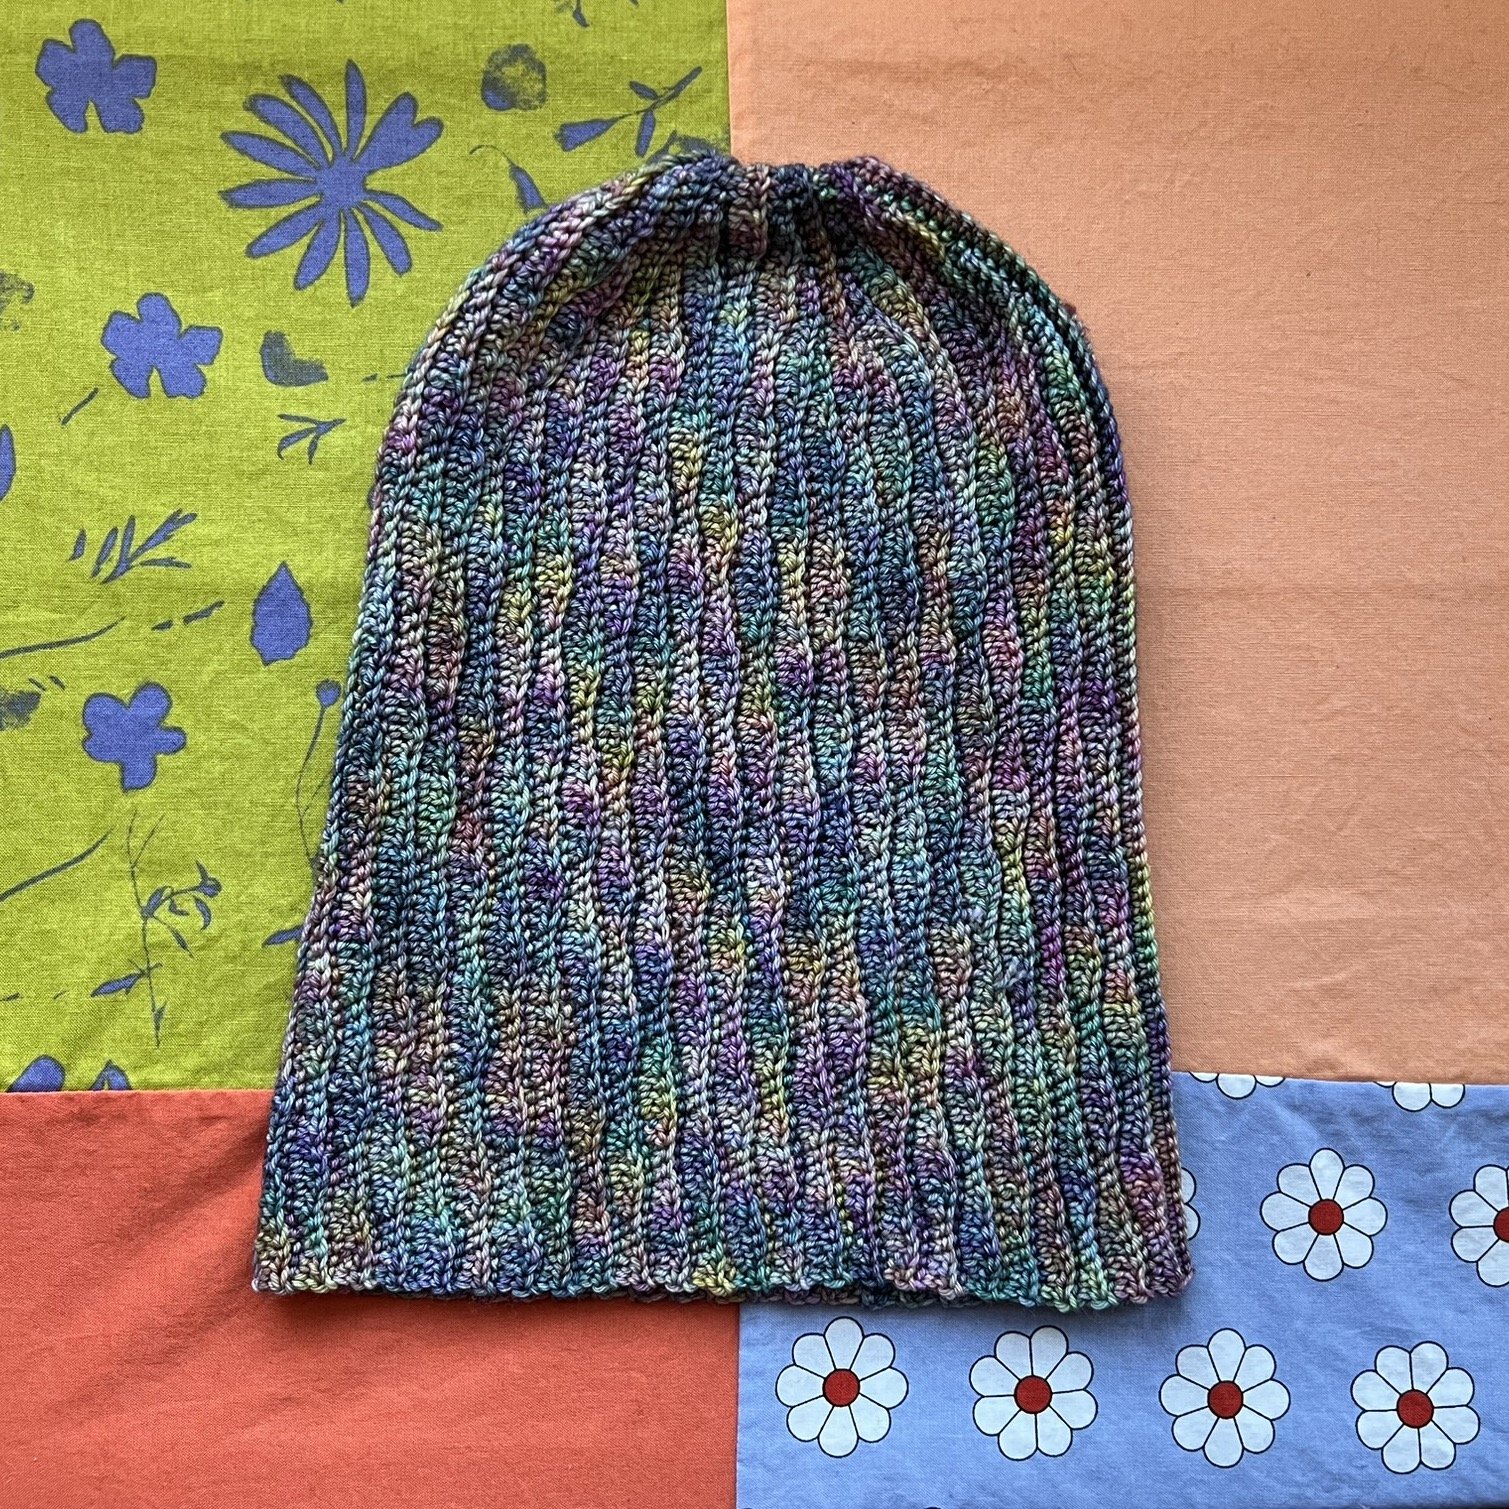
Completed beanie (uncuffed) right side out:

Completed beanie wrong side out:
🧶 Materials
Yarn and Crochet Hook
Solid, tonal, and variegated yarns all look great in this pattern, though the wavy design will be most highlighted with a solid color. The effect is reminiscent of faux cable brioche knitting. This uses under 100 g of yarn, so it’s great for stash busting!
You can use yarnsub.com to find a yarn that will work up similarly.
3.5 mm crochet hook. I crochet relatively tightly so you may want to try a 3.0 mm if you generally work with a loose tension.
Yardage – approximately 350-380 yd.
The samples were made with under 1 skein each of Malabrigo Ultimate Sock, which is a 4-ply yarn made of 75% superwash merino wool, 25% nylon. It runs 420 yds / 100 g and usually retails around $20.00 for one 100 g skein.
The rainbow hat in the modeled and completed photos is in the “Arco Iris” colorway, and the yarn of the teal hat in the step by step photos is in the “Teal Feather” colorway.
Additional tools
Besides yarn, you will need:
Tapestry needle / Darning needle – to sew the top of the beanie shut and weave in the yarn ends. You can use a smaller crochet hook or regular pointy sewing needle, but a tapestry needle will make this easier.
Measuring tape – to check your gauge.
Scissors
Detergent appropriate for the yarn you are using – Specifically, if you’re using wool, make sure your detergent is wool safe. I usually use the Soak brand’s unscented detergent.
🪡 Techniques
Yarn Over Slip Stitch
This is one of my favorite crochet stitches to add a knit look and some drape to crocheted fabric, and it’s no harder than a half-double crochet. In fact, I would describe this stitch (abbreviated from here on out as “yoslst”) as “yoslst is to slst, as hdc is to sc”. As the name implies, it’s literally just a slip stitch but with a yarn over. Sometimes this stitch is also called “hdc slip stitch”.
To make one yoslst:
Yarn over.
Insert hook into next stitch.
Yarn over and pull up a loop. There should now be three loops on the hook. Note that at this point, the steps are identical to making a hdc.
Pull the loop you made in step 3 through the other two loops to finish off the stitch.
To keep your stitches even, make sure to tension the yarn so that the yarn over is the same tension as the rest of the loops in each stitch.
For reference, here is a swatch of yoslst in the back loop with alternating color rows (in a worsted weight cotton yarn). In the first photo the foundation chain is on the bottom and was started at the lower left corner of the piece.


Make sure you’re working through the back loop of the stitch, as there are v’s formed by the front loop + back loop, but also the front loop + yarn over parts of each stitch.

Yarn Over Slip Stitch Join
When working a yoslst into a stitch directly after a short row ends, the stitch is slightly modified to reduce holes in the fabric. It’s essentially an invisible decrease over the turning chain.
Before you start, identify the turning chain so that you are working into that and not the stitch directly before it. The following shows a stitch marker in the turning chain of the short row that was just finished (photos are of worsted weight yarn):

Yarn over.
Insert your hook in the loop of previous row’s turning chain.
Insert the hook into the back loop of the next available stitch (i.e. if you are on row 6, you start out working the stitches into row 5, but after row 5 runs out, you start working into row 1).
Yarn over and pull up a loop. There should now be four loops on the hook.
Pull the last loop you made through the other three loops.
It should look like this after step 2 (insert into the turning chain):

After completing step 3:
After pulling a new yarn-over through all these loops, your completed yoslst join should look like this:
Mattress Stitch
I used a mattress stitch to sew up the horizontal seam at the top of the hat. This stitch is sewn by pulling the needle from the inside to the outside on alternating sides, like how you would thread a shoelace. Pictured below is a mock-up of just the top of a hat where the seam is worked in a different yarn. Note this sample is in worsted weight yarn and has been turned inside-out.

I like this stitch because it pulls evenly on both sides of the seam, but it shouldn’t matter too much if you want to just sc the seam closed or use a whip stitch.
I don’t fuss too much about where exactly I work each stitch into, as long as it comes out to about one stitch per row. Below is an image of a mattress seam pulled tight, with the work still inside-out.

When the work is turned right-side out, less of the seam is visible (and it shouldn’t be noticeable when you stitch it with the same yarn).

📝 Pattern
Pattern Notes
Odd numbered rows work towards the bottom of the hat, and even numbered rows work toward the top.
The “right side” of the fabric (the side that faces outwards on the finished hat as pictured) is the side where the yoslst is raised. But if you like how the other side looks more, you can totally use that as the outside. Just make sure to crochet the side seam on the opposite side so it isn’t visible.
All rows end in “chain 1 and turn”, and this chain does not count as a stitch for the row.
ALL STITCHES ARE MADE IN THE BACK LOOP ONLY, except the last stitch in every odd numbered row (the row that ends at the bottom of the hat) is worked into both loops (to create a smoother edge).
If the text says
R01 [55] – 8 sc, 2 hdc, (3 dc, 2 hdc, 3 sc, 2 hdc)*4, 3 dc, 2 hdc
This is read as “for Row 1, there is a total of 55 stitches not including the turning chain” and the stitches with the repeats expanded are:
8 single crochet, 2 half-double crochet,
3 double crochet, 2 half-double crochet, 3 single crochet, 2 half-double crochet,
3 double crochet, 2 half-double crochet, 3 single crochet, 2 half-double crochet,
3 double crochet, 2 half-double crochet, 3 single crochet, 2 half-double crochet,
3 double crochet, 2 half-double crochet, 3 single crochet, 2 half-double crochet,
3 double crochet, 2 half-double crochet
Swatch Pattern
If you don’t swatch, you should at least measure the width of the completed segment after finishing R16 and check that it measures ~3.3” across and 11” at the longest point.
But if you do want to make a swatch, you can use the following pattern.
All rows end in “ch 1 and turn” and the ch 1 does not count as a stitch.
All stitches are worked in the back loop only.
R0 [37] – Ch 37.
R1 [37] – 2 hdc, (3 sc, 2 hdc, 3 dc, 2 hdc)*3, 3 sc, 2 hdc.
R2 [37] – 37 yoslst.
R3 [37] – 2 hdc, (3 dc, 2 hdc, 3 sc, 2 hdc)*3, 3 dc, 2 hdc.
R4 [37] – 37 yoslst.
Repeat R1-R4 until your swatch measures at least 4” tall.
Gauge on washed and dried swatch is (20 rows in pattern = 4”) and (28 stitches = 4”). If you are at a slightly tighter tension than this before washing/stretching, that’s probably fine. To learn more about gauge swatching and tension, see this article over at Interweave.
Here’s a sample of the wavy rib pattern with alternating rows worked in different colors in a worsted weight cotton yarn for visibility:

And the same swatch from the back.

Beanie Pattern!
Don’t forget –
All rows end in “ch 1 and turn” and the turning chain is not counted as a stitch.
All stitches in back loop only, except the last stitch in every odd numbered row (the row that ends at the bottom of the hat) is worked into both loops (to create a smoother edge).
R00 [75] 📝 Leave a starting tail of yarn at least 6” to ensure you are able to weave in the end. – 75 ch for foundation chain.
R01 [75] – 13 sc, 2 hdc, (3 dc, 2 hdc, 3 sc, 2 hdc)*6.
R02 [60] – 60 yoslst.
R03 [60] – (3 sc, 2 hdc, 3 dc, 2 hdc)*6.
R04 [65] – 60 yoslst, 1 yoslst join, 4 yoslst.
R05 [65] – (3 sc, 2 hdc, 3 dc, 2 hdc)*6, 3 sc, 2 hdc.
R06 [70] – 65 yoslst, 1 yoslst join, 4 yoslst.
R07 [70] – (3 sc, 2 hdc, 3 dc, 2 hdc)*7.
R08 [75] – 70 yoslst, 1 yoslst join, 4 yoslst.
R09 [75] – (3 sc, 2 hdc, 3 dc, 2 hdc)*7, 3 sc, 2 hdc.
R10 [70] – 70 yoslst.
R11 [70] – (3 sc, 2 hdc, 3 dc, 2 hdc)*7.
R12 [65] – 65 yoslst.
R13 [65] – (3 sc, 2 hdc, 3 dc, 2 hdc)*6, 3 sc, 2 hdc.
R14 [60] – 60 yoslst.
R15 [60] – (3 sc, 2 hdc, 3 dc, 2 hdc)*6.
R16 [75]– 60 yoslst, (1 yoslst join, 4 yoslst)*3.
After R16 the hat should be approximately triangle shaped. The segment should measure about 3.3” wide.
Work R01-R16 five additional times for a total of 96 rows in the whole hat (plus the foundation chain).
If you want to make it smaller, you can seam it up after working only 80 rows and it should have a circumference around 16” and fit better for a head circumference of 18”-20”.
Don’t cut your yarn (yet) after completing the last segment!
Size modifications
The row height affects the hat circumference. You can change the hat circumference (I recommend not changing it more than +/- 1”, otherwise the hat may be too stiff or floppy) by adjusting gauge.
Wider hat: Size up your hook and/or use a thicker yarn
Narrower hat: Size down your hook and/or use a thinner yarn.
You can then adjust the length of the hat by adding or removing stitches in the foundation chain according to your swatch.
Keep the 10 stitches on the crown end of the hat consistent with the pattern. Extend the rows by adding stitches on the side that will be the bottom of the hat.
The length of the foundation chain should be a multiple of 5 in order to keep the bottom edge all hdc.
For example you might calculate that your foundation chain needs to be 65 stitches instead of 75 to hit 11”, or maybe you just want the hat shorter so it fits more closely on your head. Then your edited R01 would be “R01 [65] – 13 sc, 2 hdc, (3 dc, 2 hdc, 3 sc, 2 hdc)*6, 3 dc, 2 hdc.”
Reference Photos
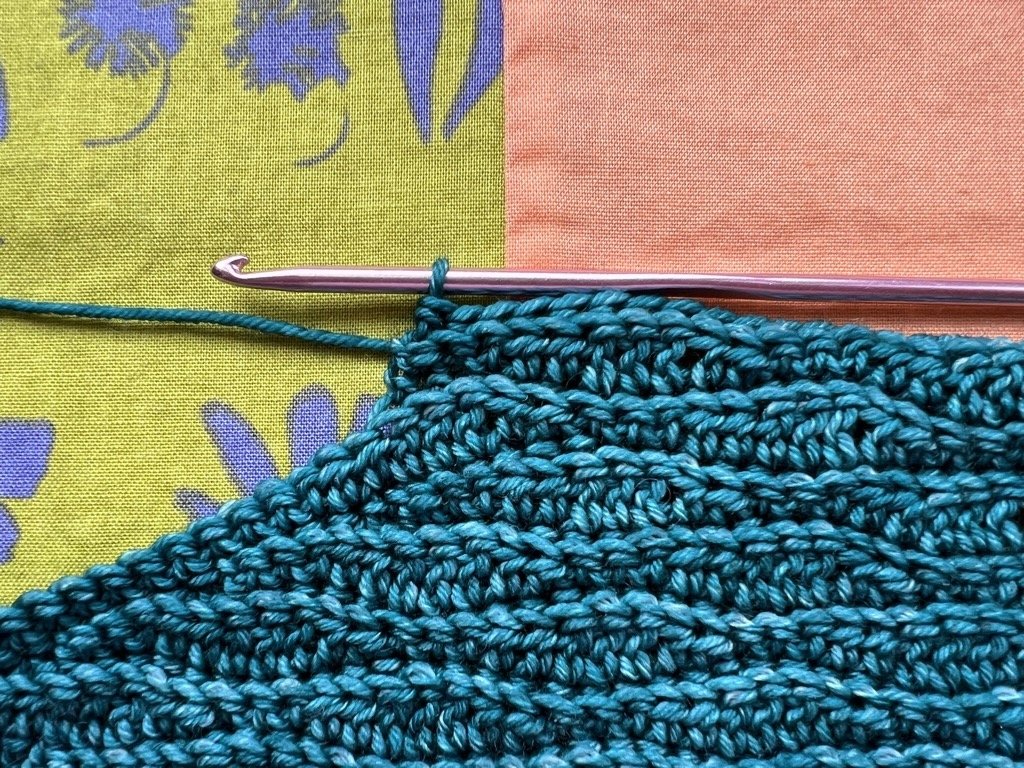
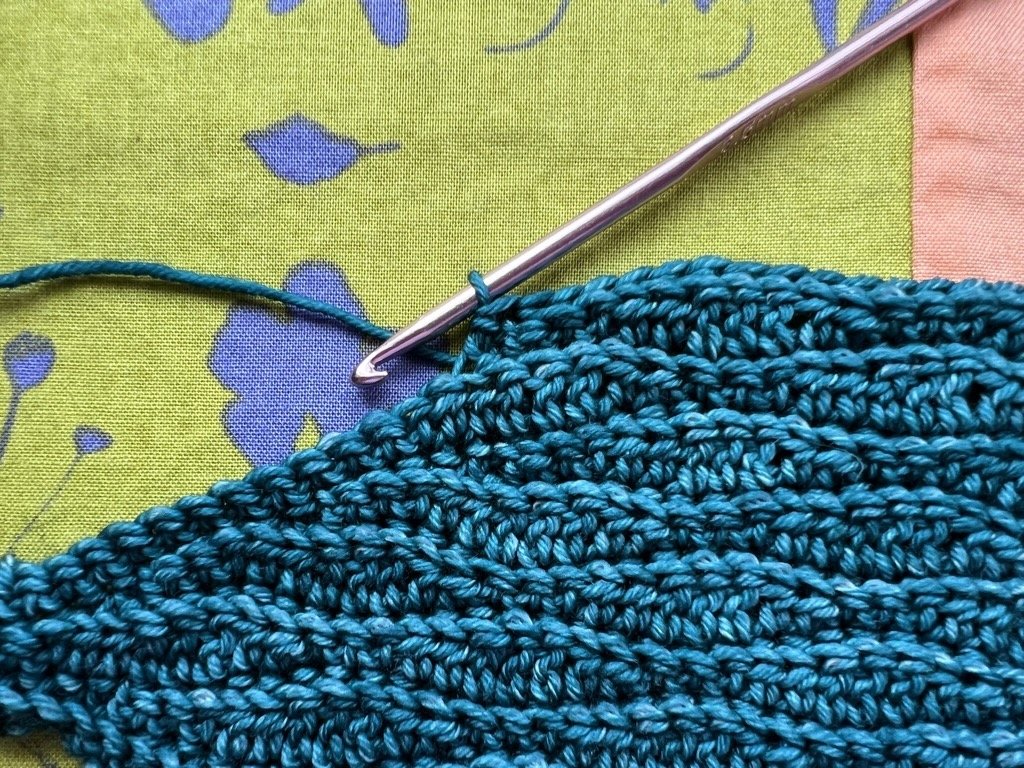
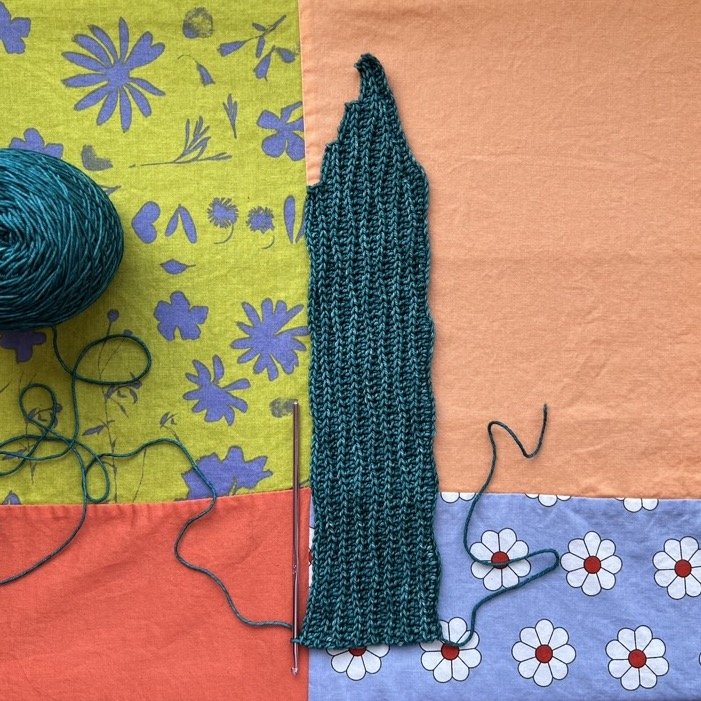
After you have completed the foundation chain, R01, and R02, the start of the beanie should look like this:
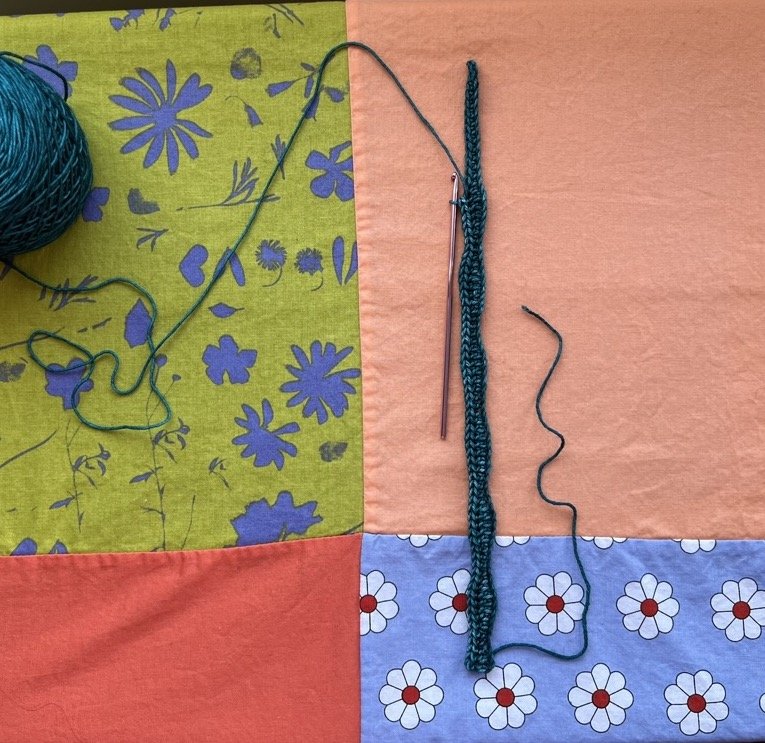
R02 (row of yoslst) completed.
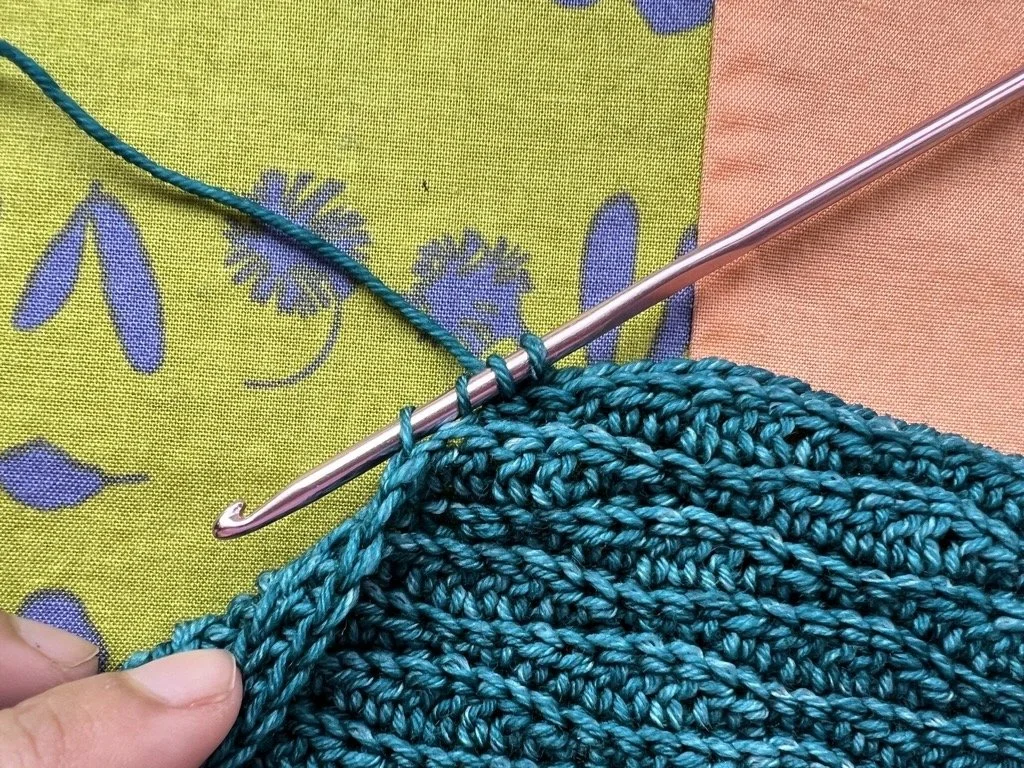
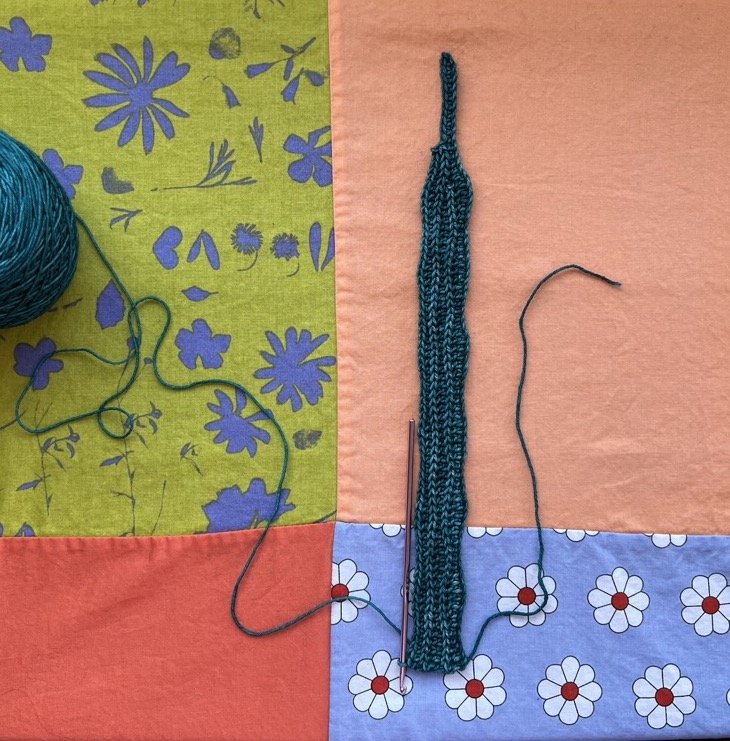
Instead of going all the way to the other end, after doing the first row of yoslst, you will turn and start the short rows so that after completing R03 it looks like this:

R03 completed
For R04 you will work the row of yoslst past the previous row:

R04 completed
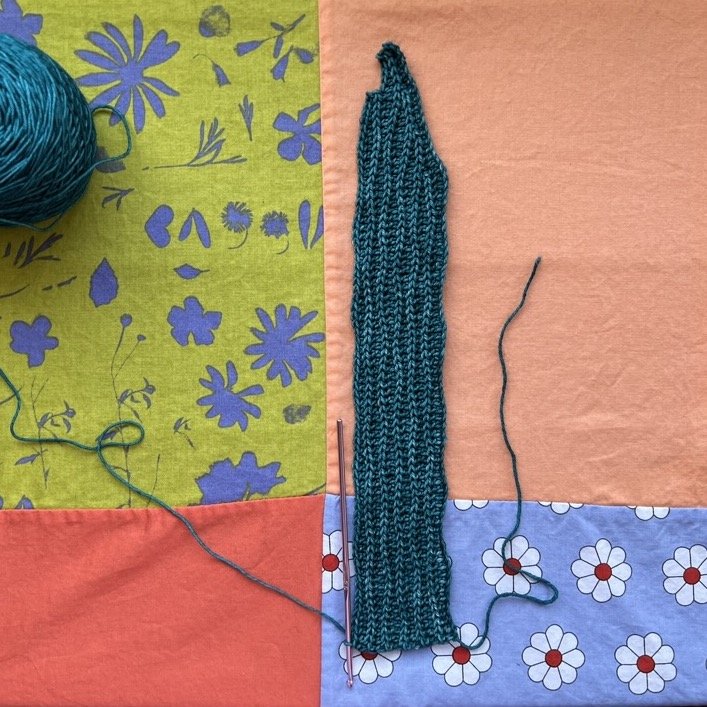
So when R05 is completed you will have another (slightly longer) short row:
R05 completed
After R06 is completed:

R07 completed:

For R08 you will crochet the full length row:

R09 completed:

And with R10 you are back to doing short rows, except now instead of getting progressively longer, they’ll get shorter to mirror the first half of the segment. R10 completed:

R11 completed:
R12 and R13 completed:

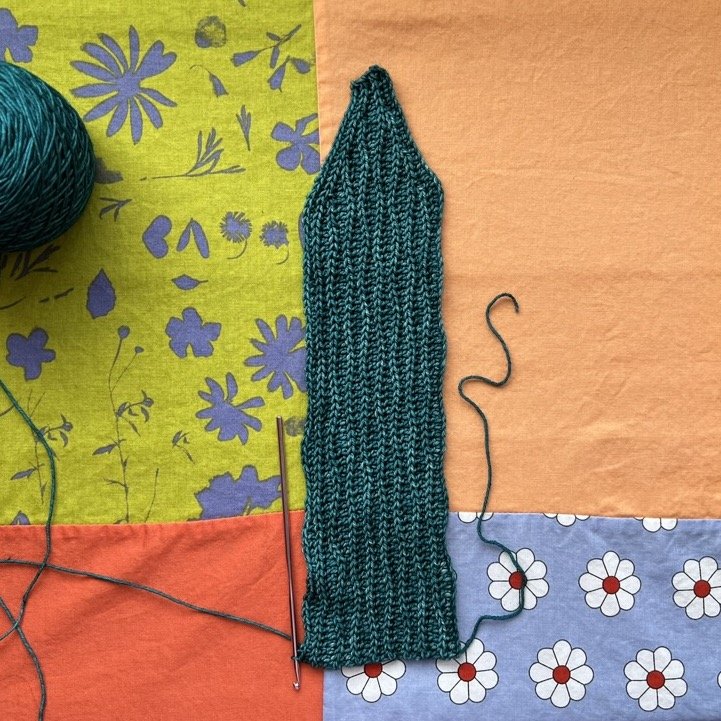
R14 and R15 completed:
For R16 (last row of the first segment) and R17 (first row of the second segment) you will be crocheting along the entire length of the segment.
After R16 is completed:

R17 completed:
For R18-R19 you start working short rows again. R19 completed:

R23 completed:

Two segments (the foundation chain and 32 rows) completed:
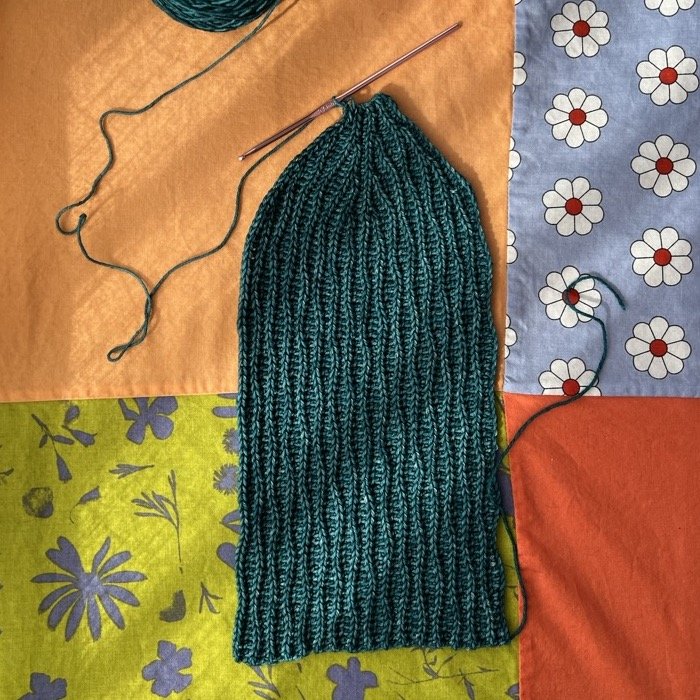
Beanie fabric (six segments) completed. The shaping to make it round in 3D means the fabric will pucker when you try to lay the whole thing out flat:

Finished fabric folded in half:
Finishing
The following describes the method I used as I liked the combination of convenience of sc for the side seam where it’s easy to see the stitches you need to work into, and a more low-profile mattress stitch for the top
You can alternatively cut the yarn after finishing the last section and either sc or mattress stitch the side and top shut in a single seam.
Fold the hat lengthwise so that the wrong side of the fabric is on the outside:

Ch 1, and seam the hat with a row of 75 sc working from the top of the hat to the bottom. Work each sc through the foundation chain and the back loop of the final row like this:

When the seam is completed it should look like this:


Leave a ~6” long tail and cut the yarn. Finish off by pulling the tail all the way through the last stitch.
Weave in the two tails/ends. I suggest weaving them in along the raised side of the closest yoslst row, so they are more hidden when the brim is folded up. Don’t cut the ends yet.
The top will still be open at this point:
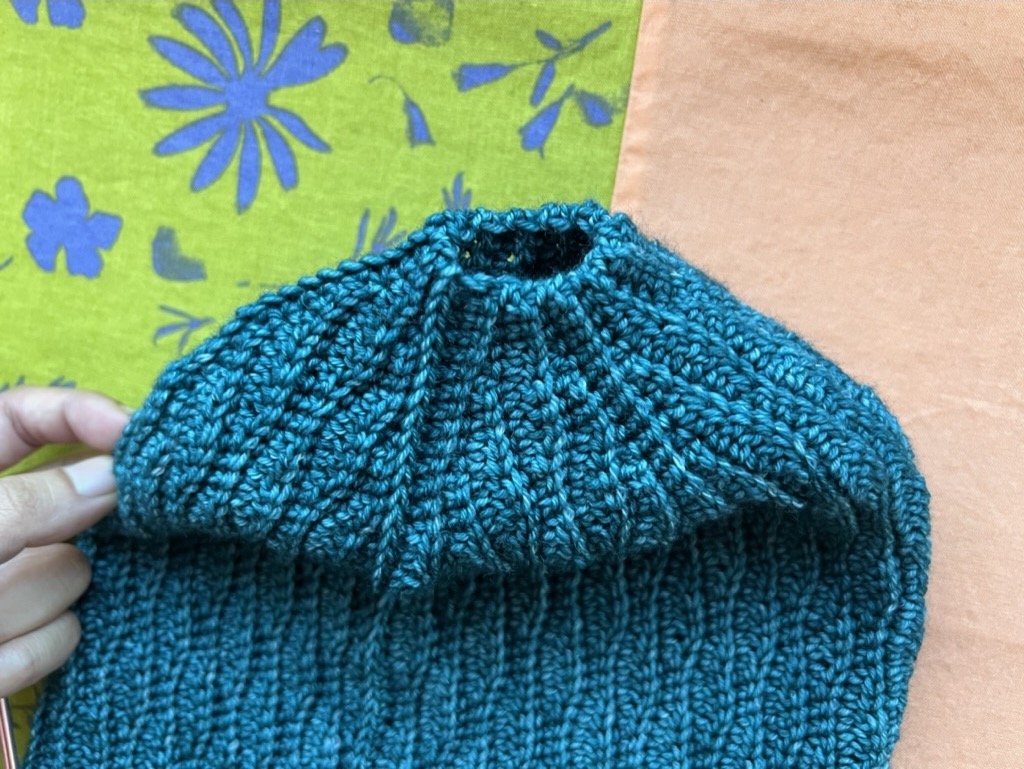
Cut a piece of yarn about 10” long and use it to seam the hole at the top of the hat using mattress stitch:

Weave in the ends from the top seam, then wash and dry your beanie according to the instructions on your yarn. (I hand washed with a no-rinse detergent, removed excess water by running the beanie in a salad spinner, then laid it flat to dry.) Cut any remaining yarn ends.
🎉 and you’re done!
Sharing
I’d love to see your finished hats!
If you’re sharing your beanie on Instagram, use the tag #tidepoolcrochetbeanie and tag me @margaretmakesthings
Changelog
2024-06-10 Add link to PDF download.