
Free Crochet Pattern: Fairy Mesh Scarf
Become your most magical, ethereal self with the Fairy Mesh Scarf! The scarf is a two row repeat that creates a beautiful organic feeling mesh structure. It’s a great way to use fluffy lace weight yarn, but you can also make it with fingering weight yarn.
Measurements – Finished scarf dimensions are approximately 10” wide and 72” long for the fluffy lace weight version and 7” wide x 72” long for the fingering weight version.
Stitches used – (in US crochet terms) chain, single crochet, double crochet.
Construction – The scarf is worked in rows (with a 2 row repeat). The scarf grows lengthwise as rows are added.
Materials – 2 stitch markers and a 3.0 mm hook. (Each row in pattern should be approximately 0.6” tall)
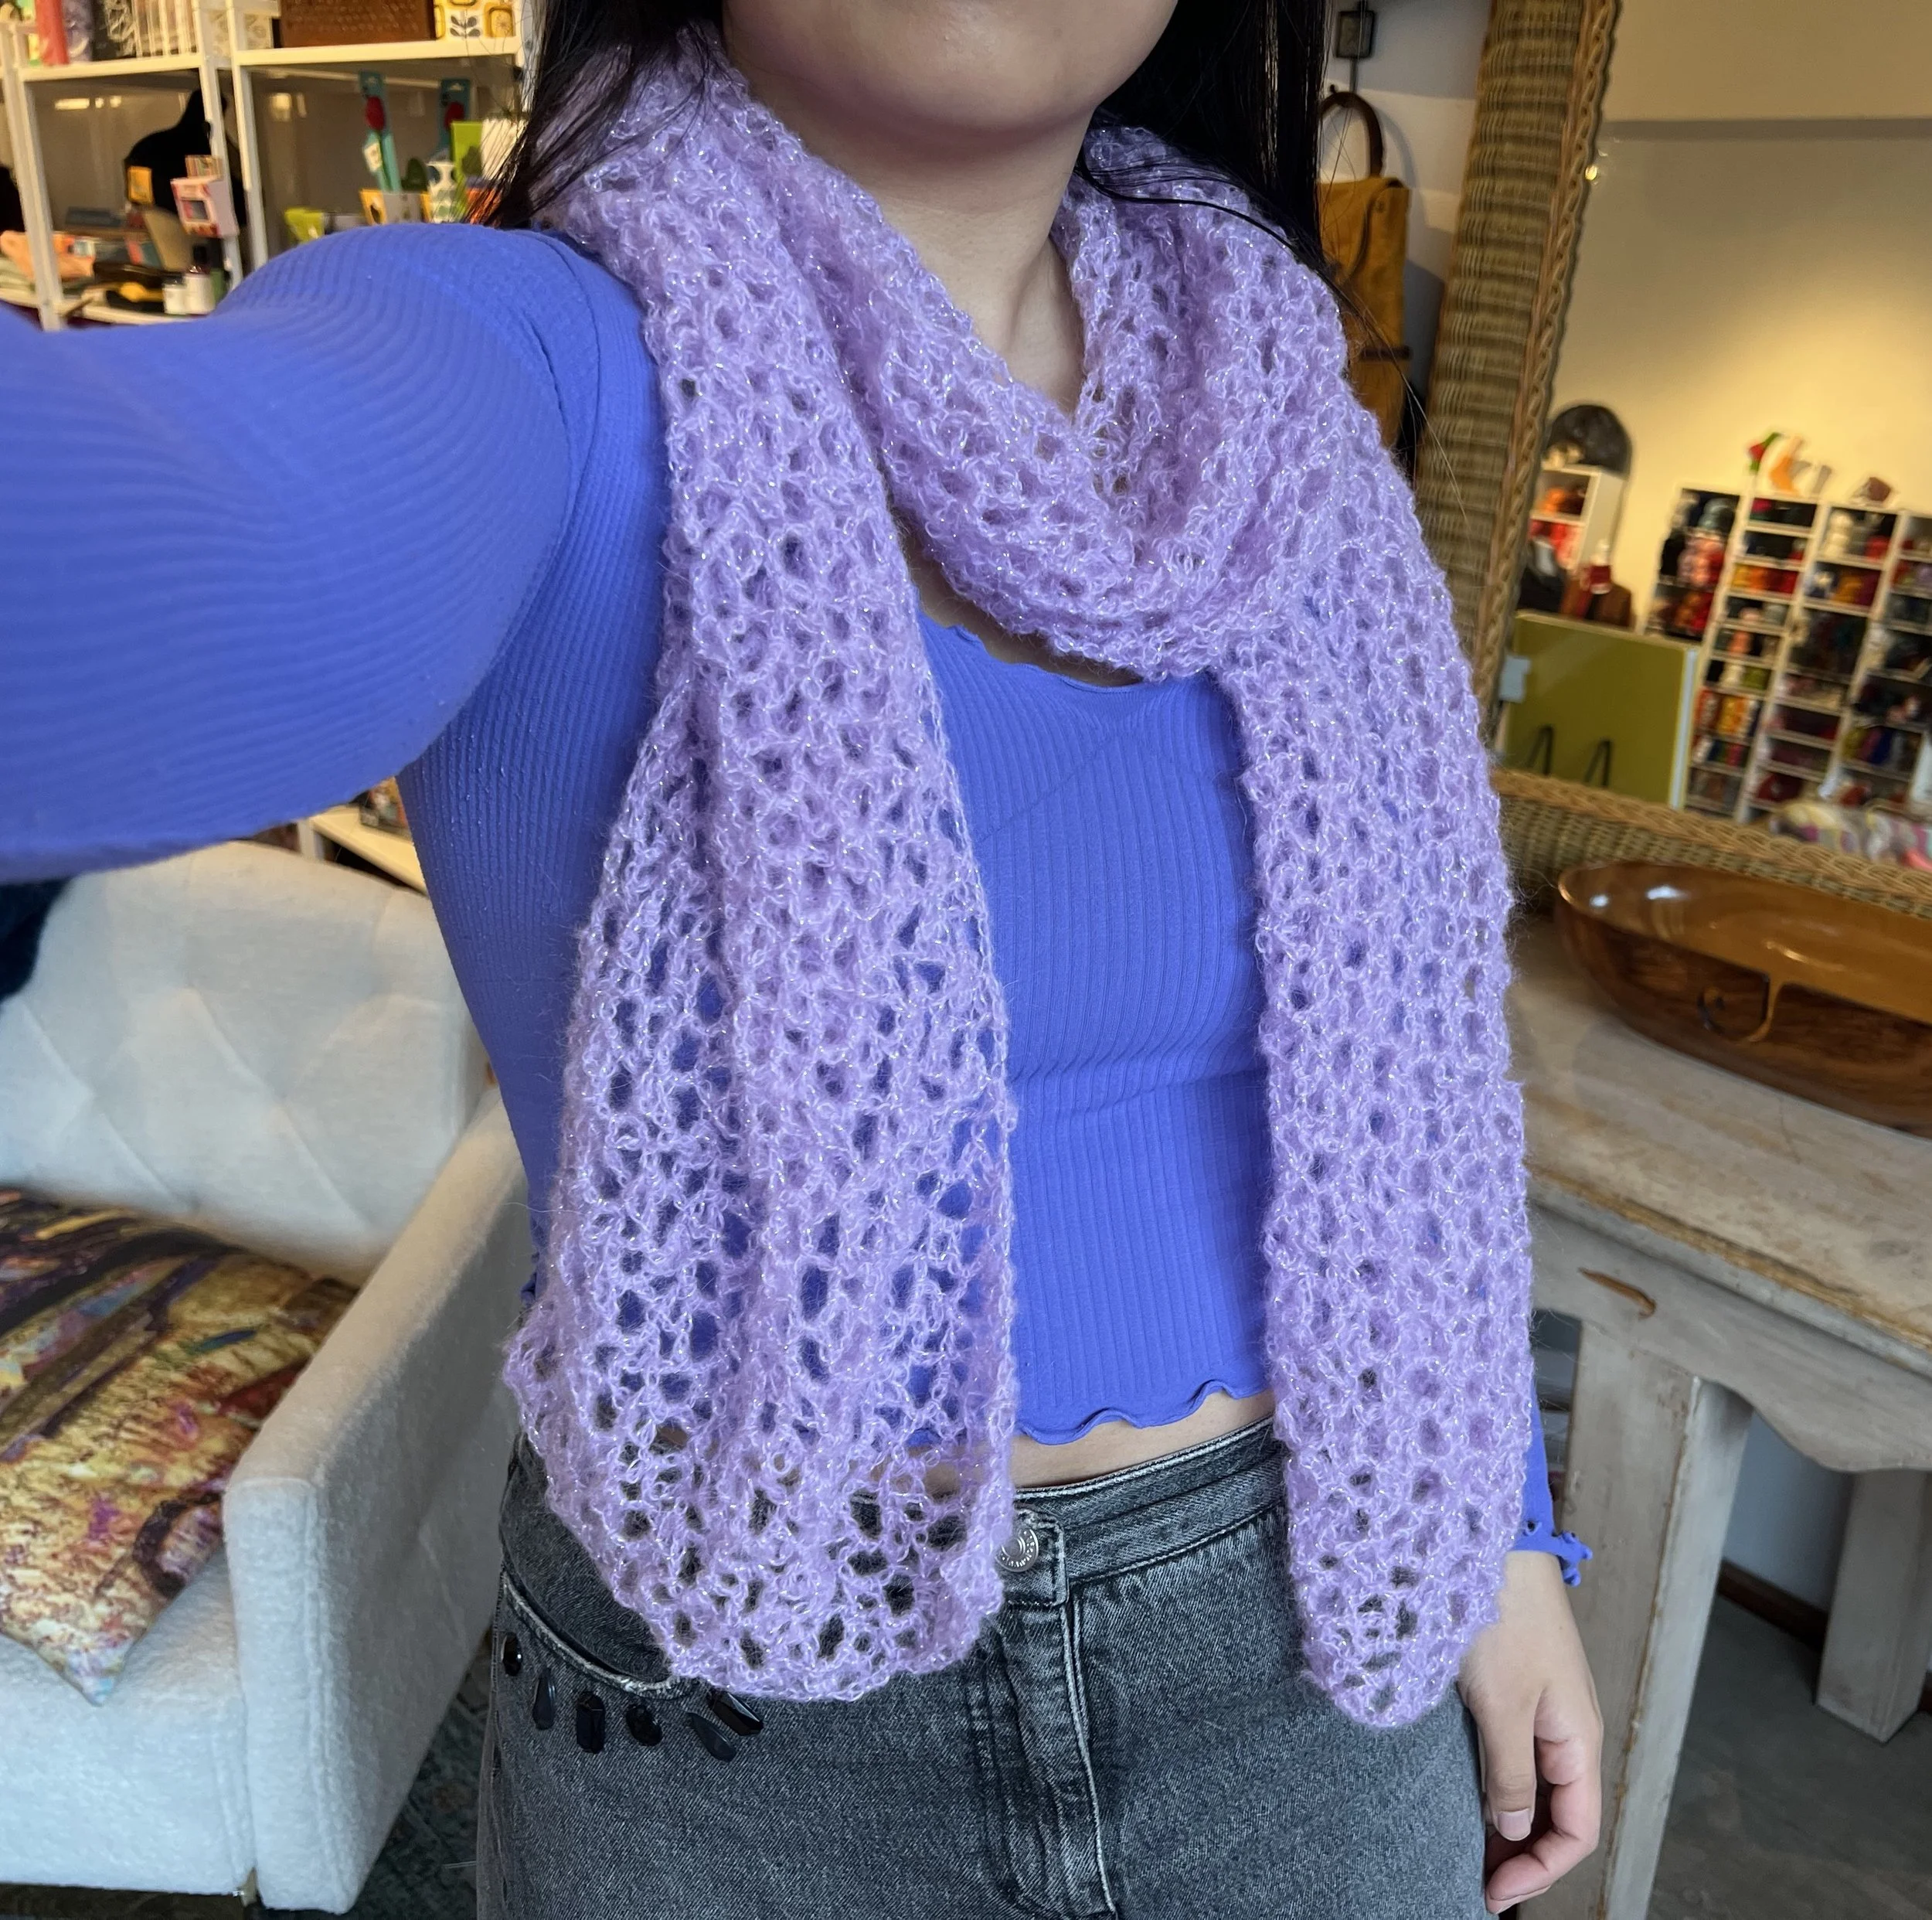
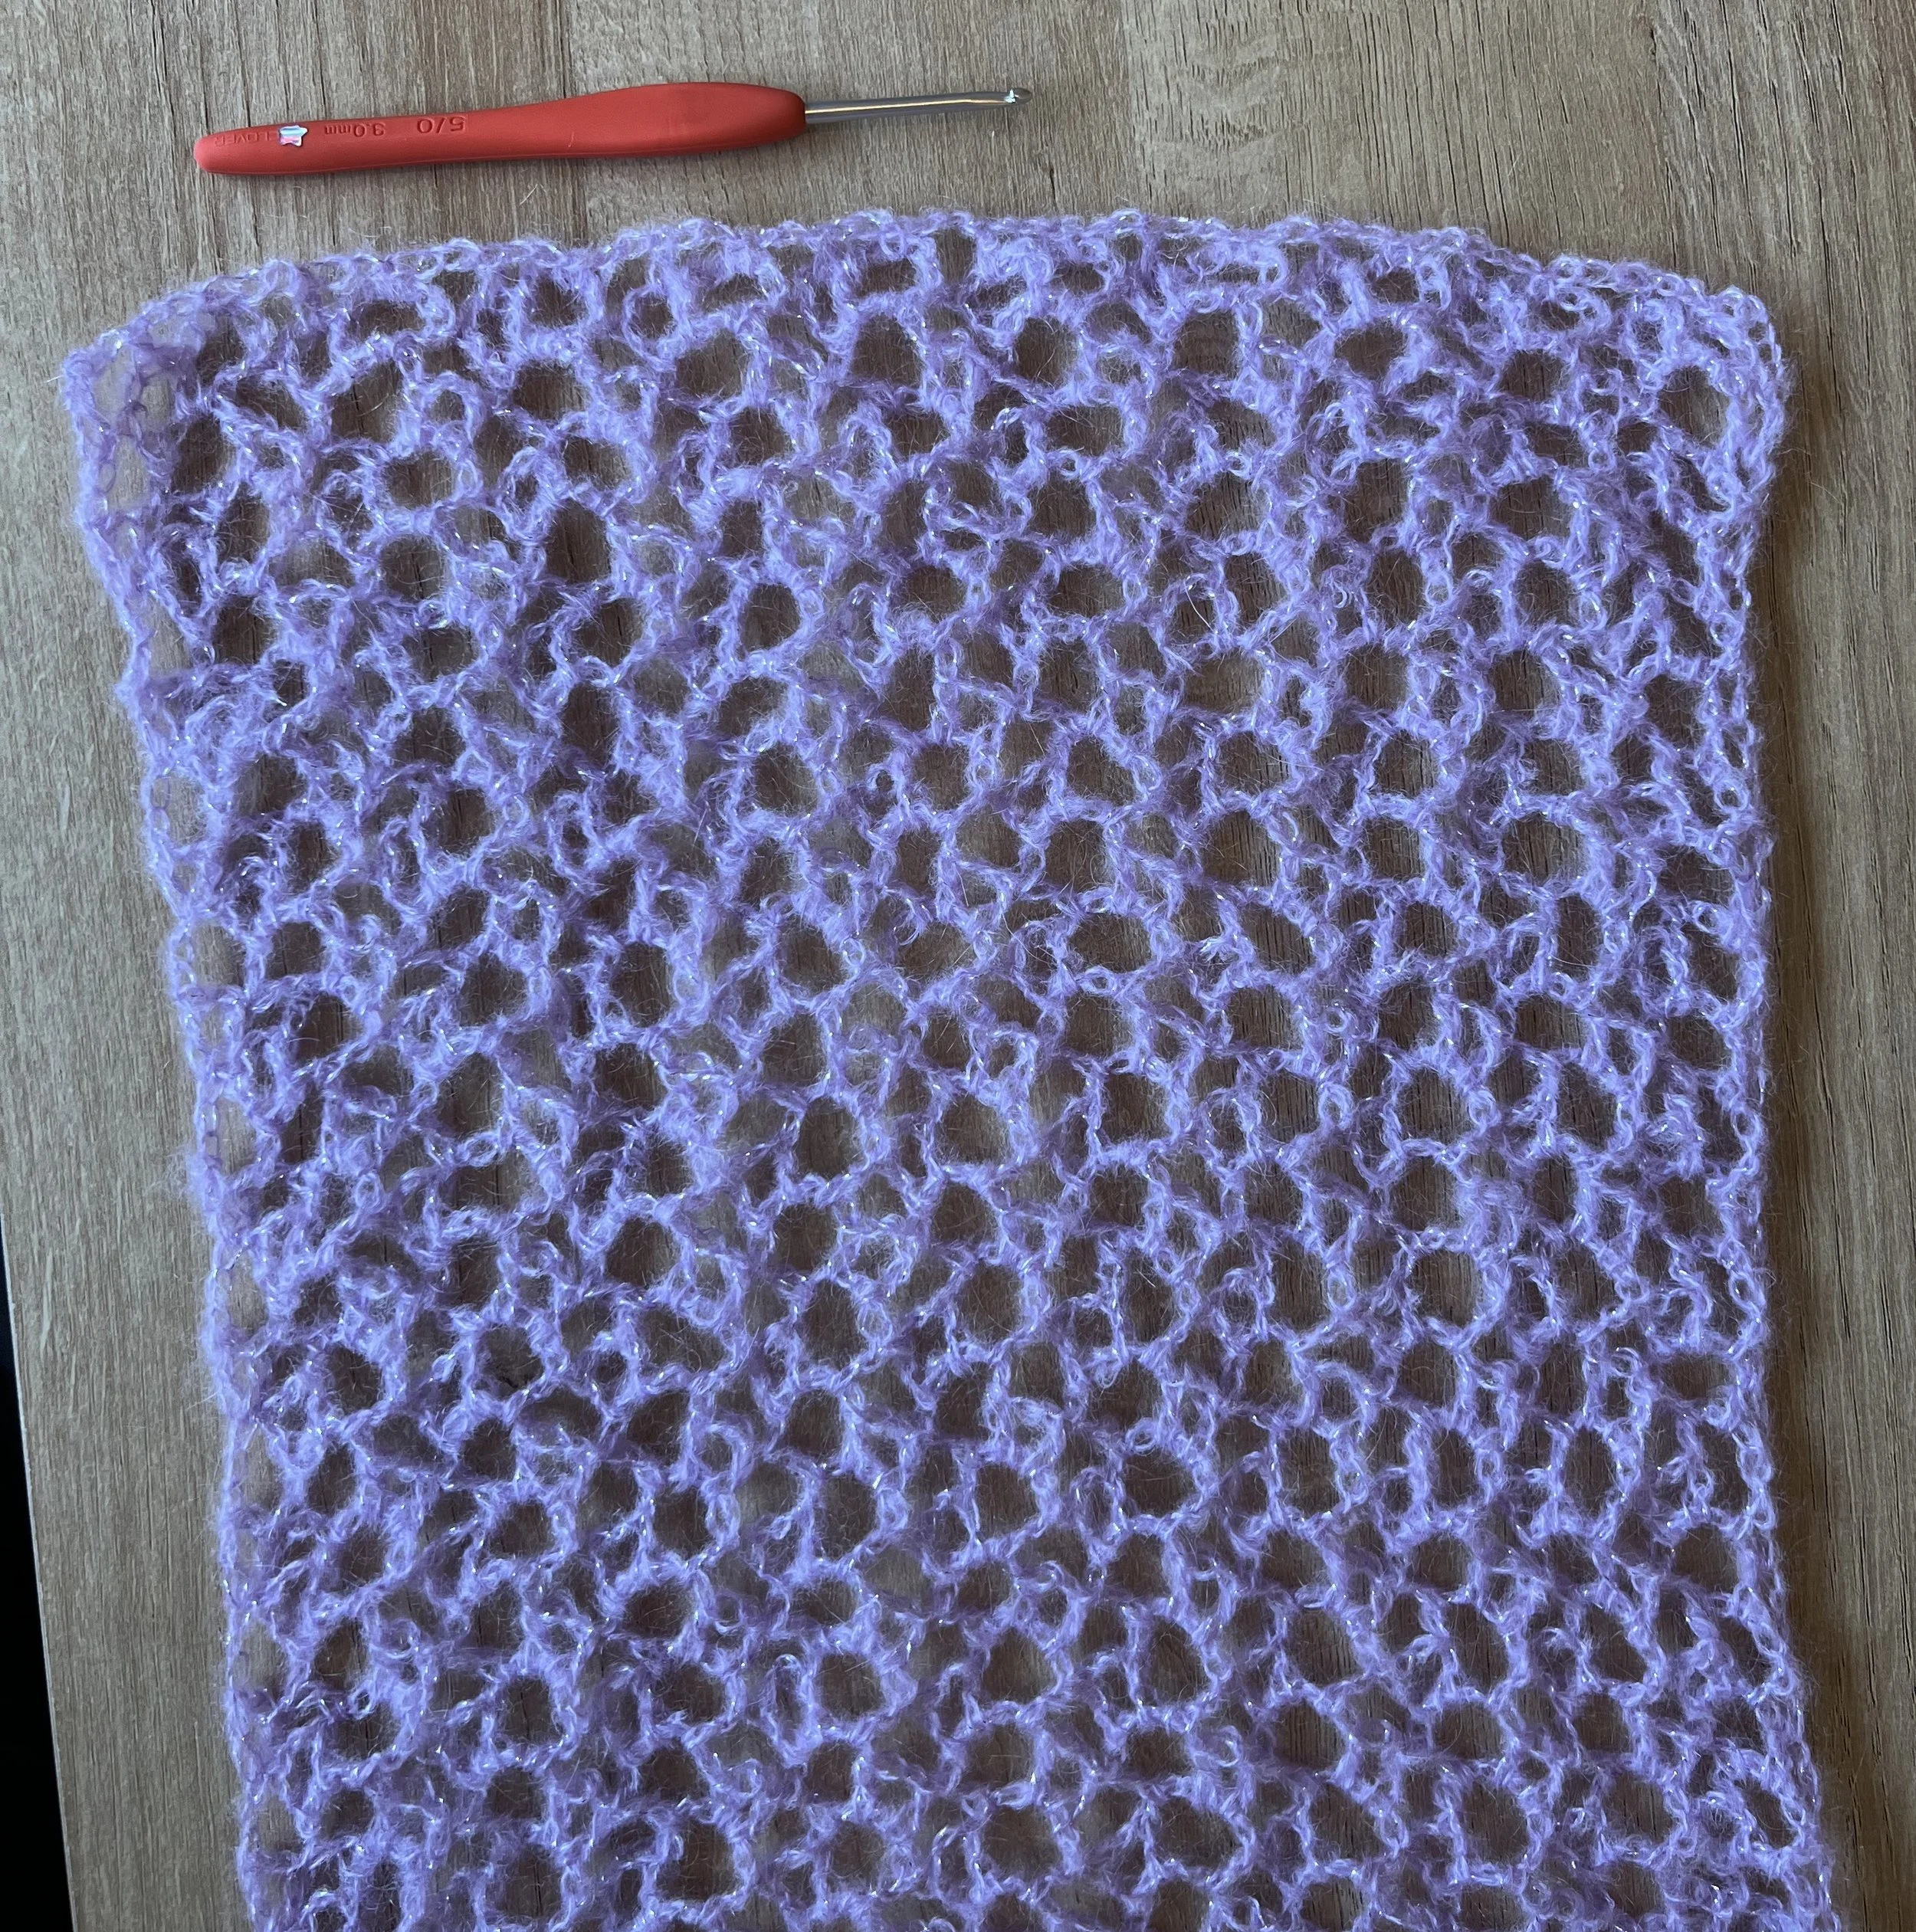
540 yd (60 g) of Hobbii Diablo Glitter (the sample above was made in colorway Syringa Silver) or another fluffy lace weight yarn – start with a foundation chain of 67 ch for a scarf about 10” wide (measured when laid flat, but not pinned taut). For more (non-sparkly) colors, use regular Hobbii Diablo.
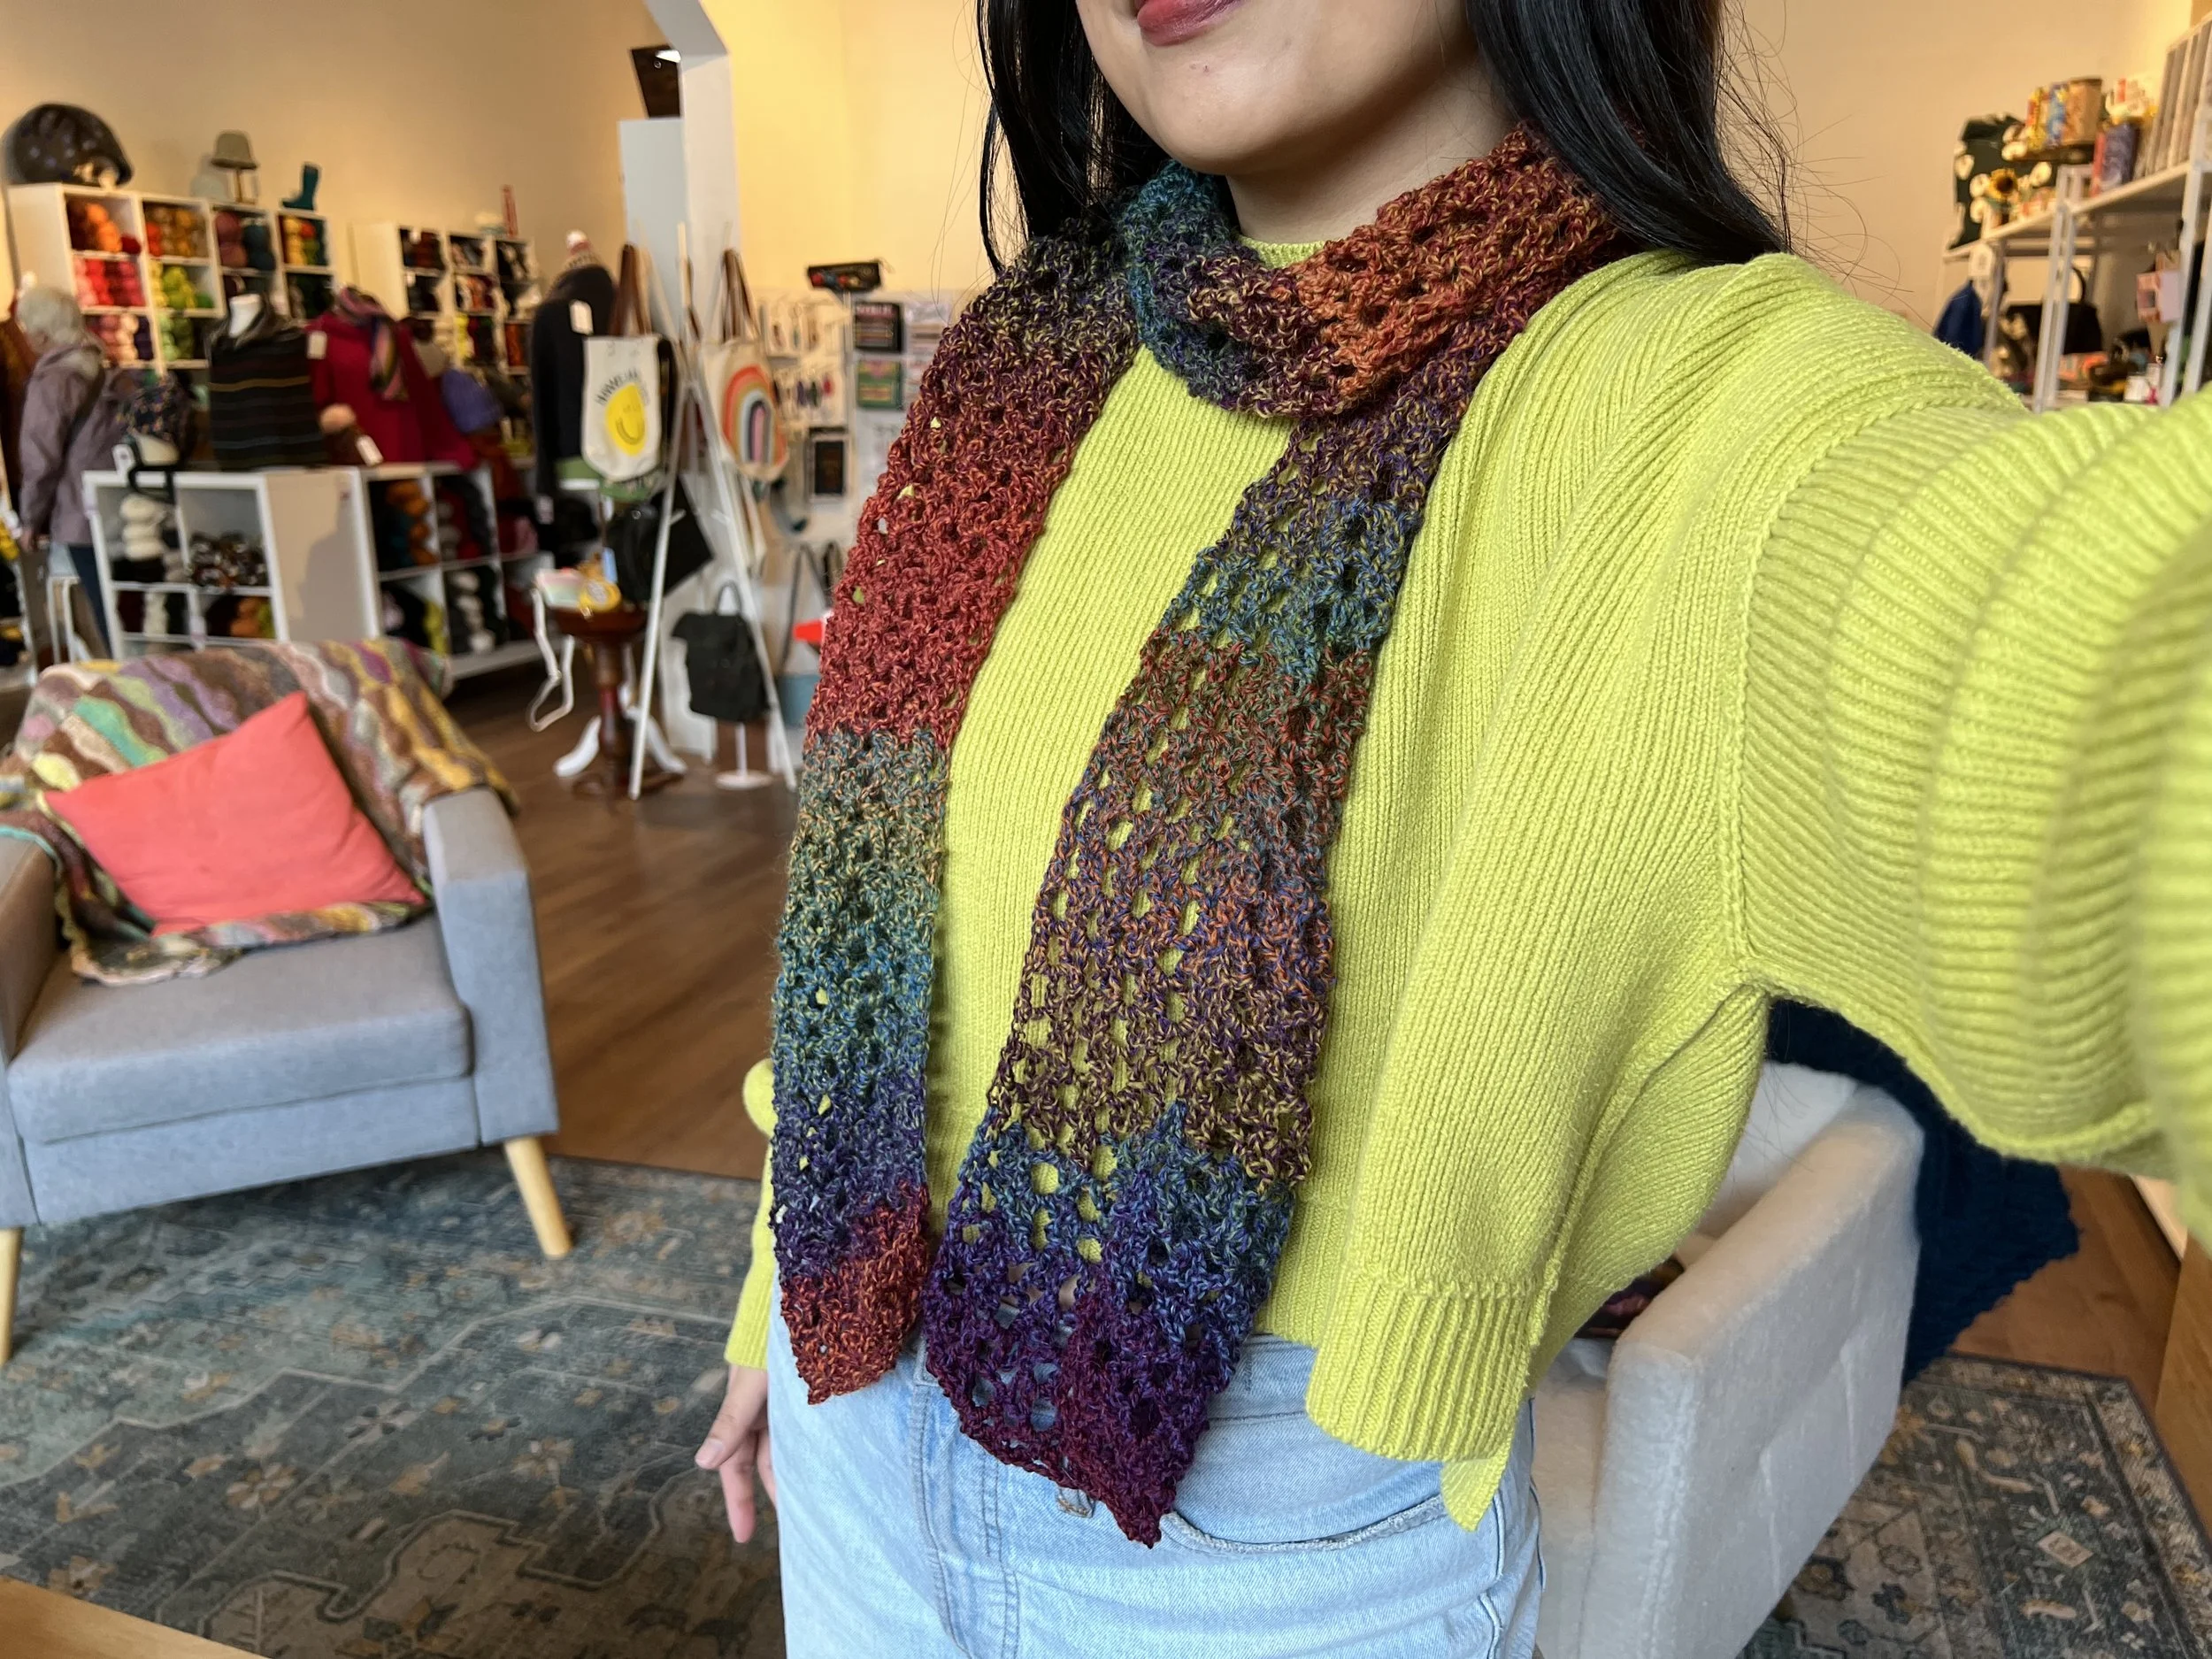
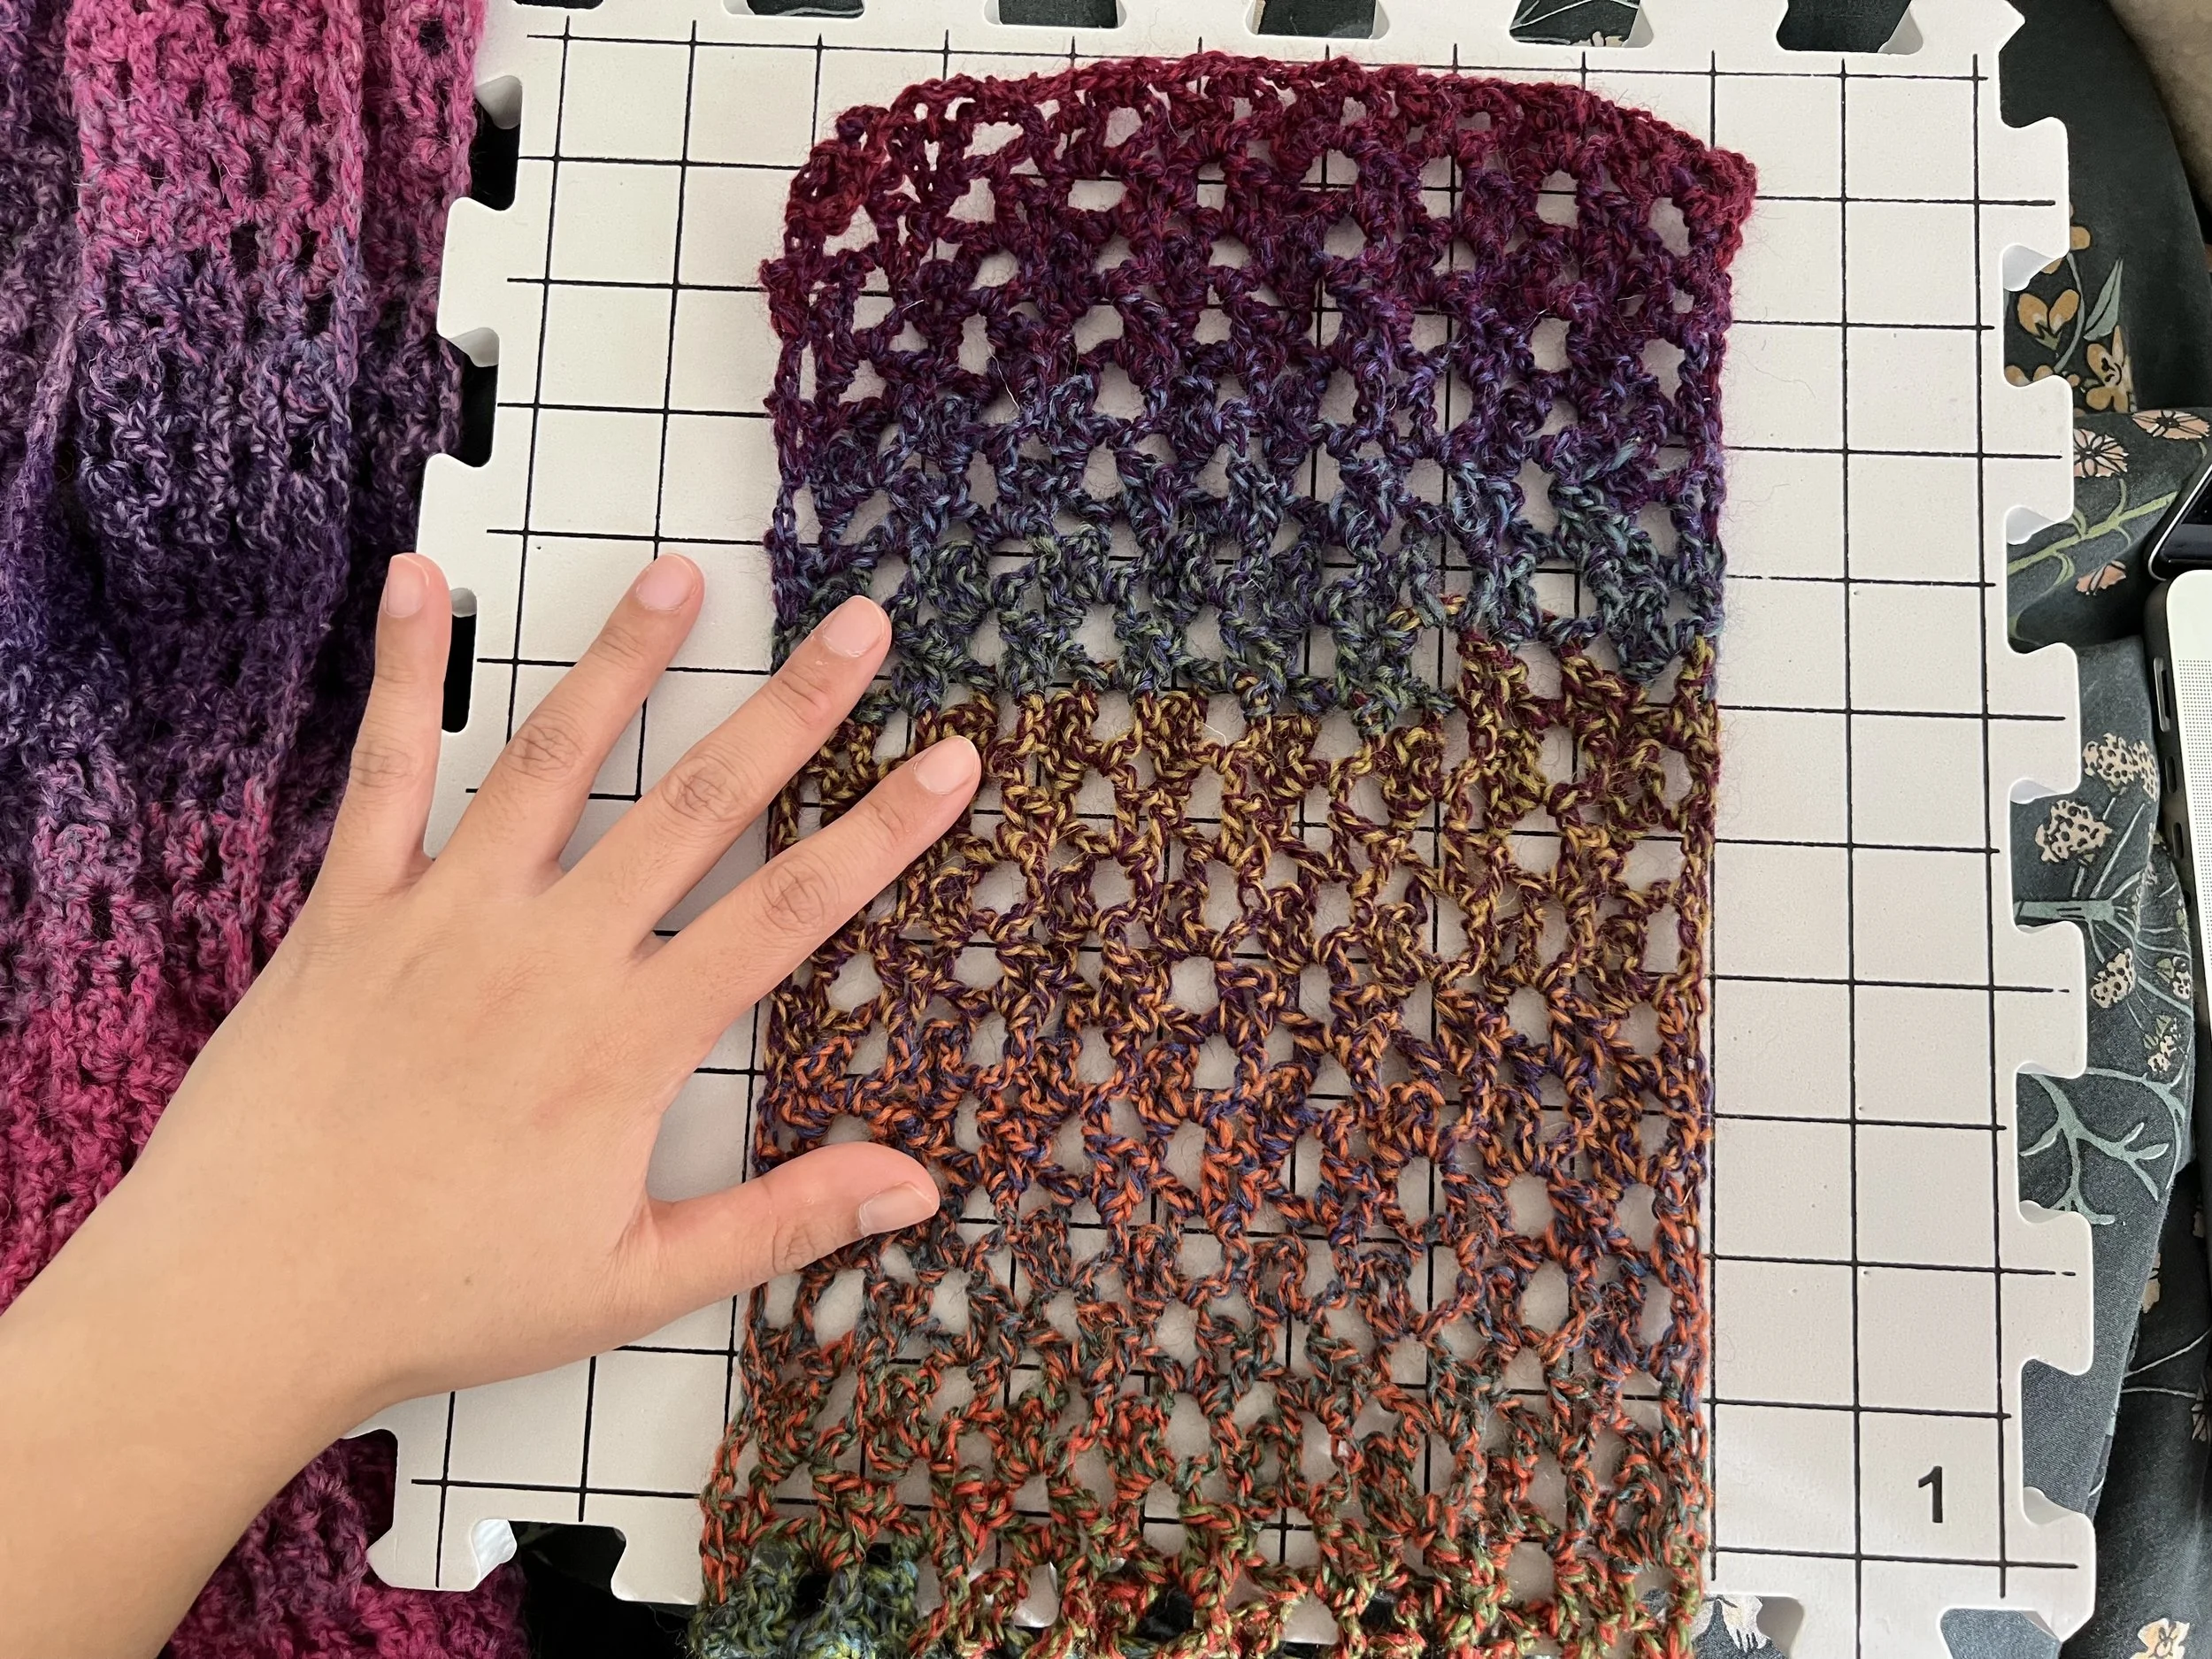
Alternatively, 430 yd (100 g) of Queensland Perth (the sample pictured below was made in colorway Kings Canyon) or another fingering weight yarn – start with a foundation chain of 55 ch for a scarf about 7” wide (measured when laid flat, but not pinned taut)
If you’d like a printable condensed version of this pattern, you can download a PDF for free in my store or on Ravelry.
To keep patterns accessible they are free by default, but if you would like to pay for them or otherwise send me a tip, you can do so through this listing.
💕 Thank you!
Pattern Syntax
This pattern uses US Crochet Terms.
ch = Chain stitch
dc = Double crochet stitch
sc = Single crochet stitch
ch space = “Chain space”, i.e. the gap under a series of chain stitches in the previous row.
n-ch-space = e.g. “2-ch-space” or “5-ch-space”. Refers to a ch space made up of n chains.
Mesh cluster = 1 dc, 2 ch, 1 dc, 5 ch, 1 dc
Mesh cluster (for R1 only) = In the same stitch make (1 dc, 2 ch, 1 dc), 5 ch, skip 1 stitch, 1 dc.
Pattern Notes
As you wear it, the scarf will relax to become slightly longer and narrower than when it’s laid flat. Given measurements are taken when the scarf is laid flat but not pinned out taut.
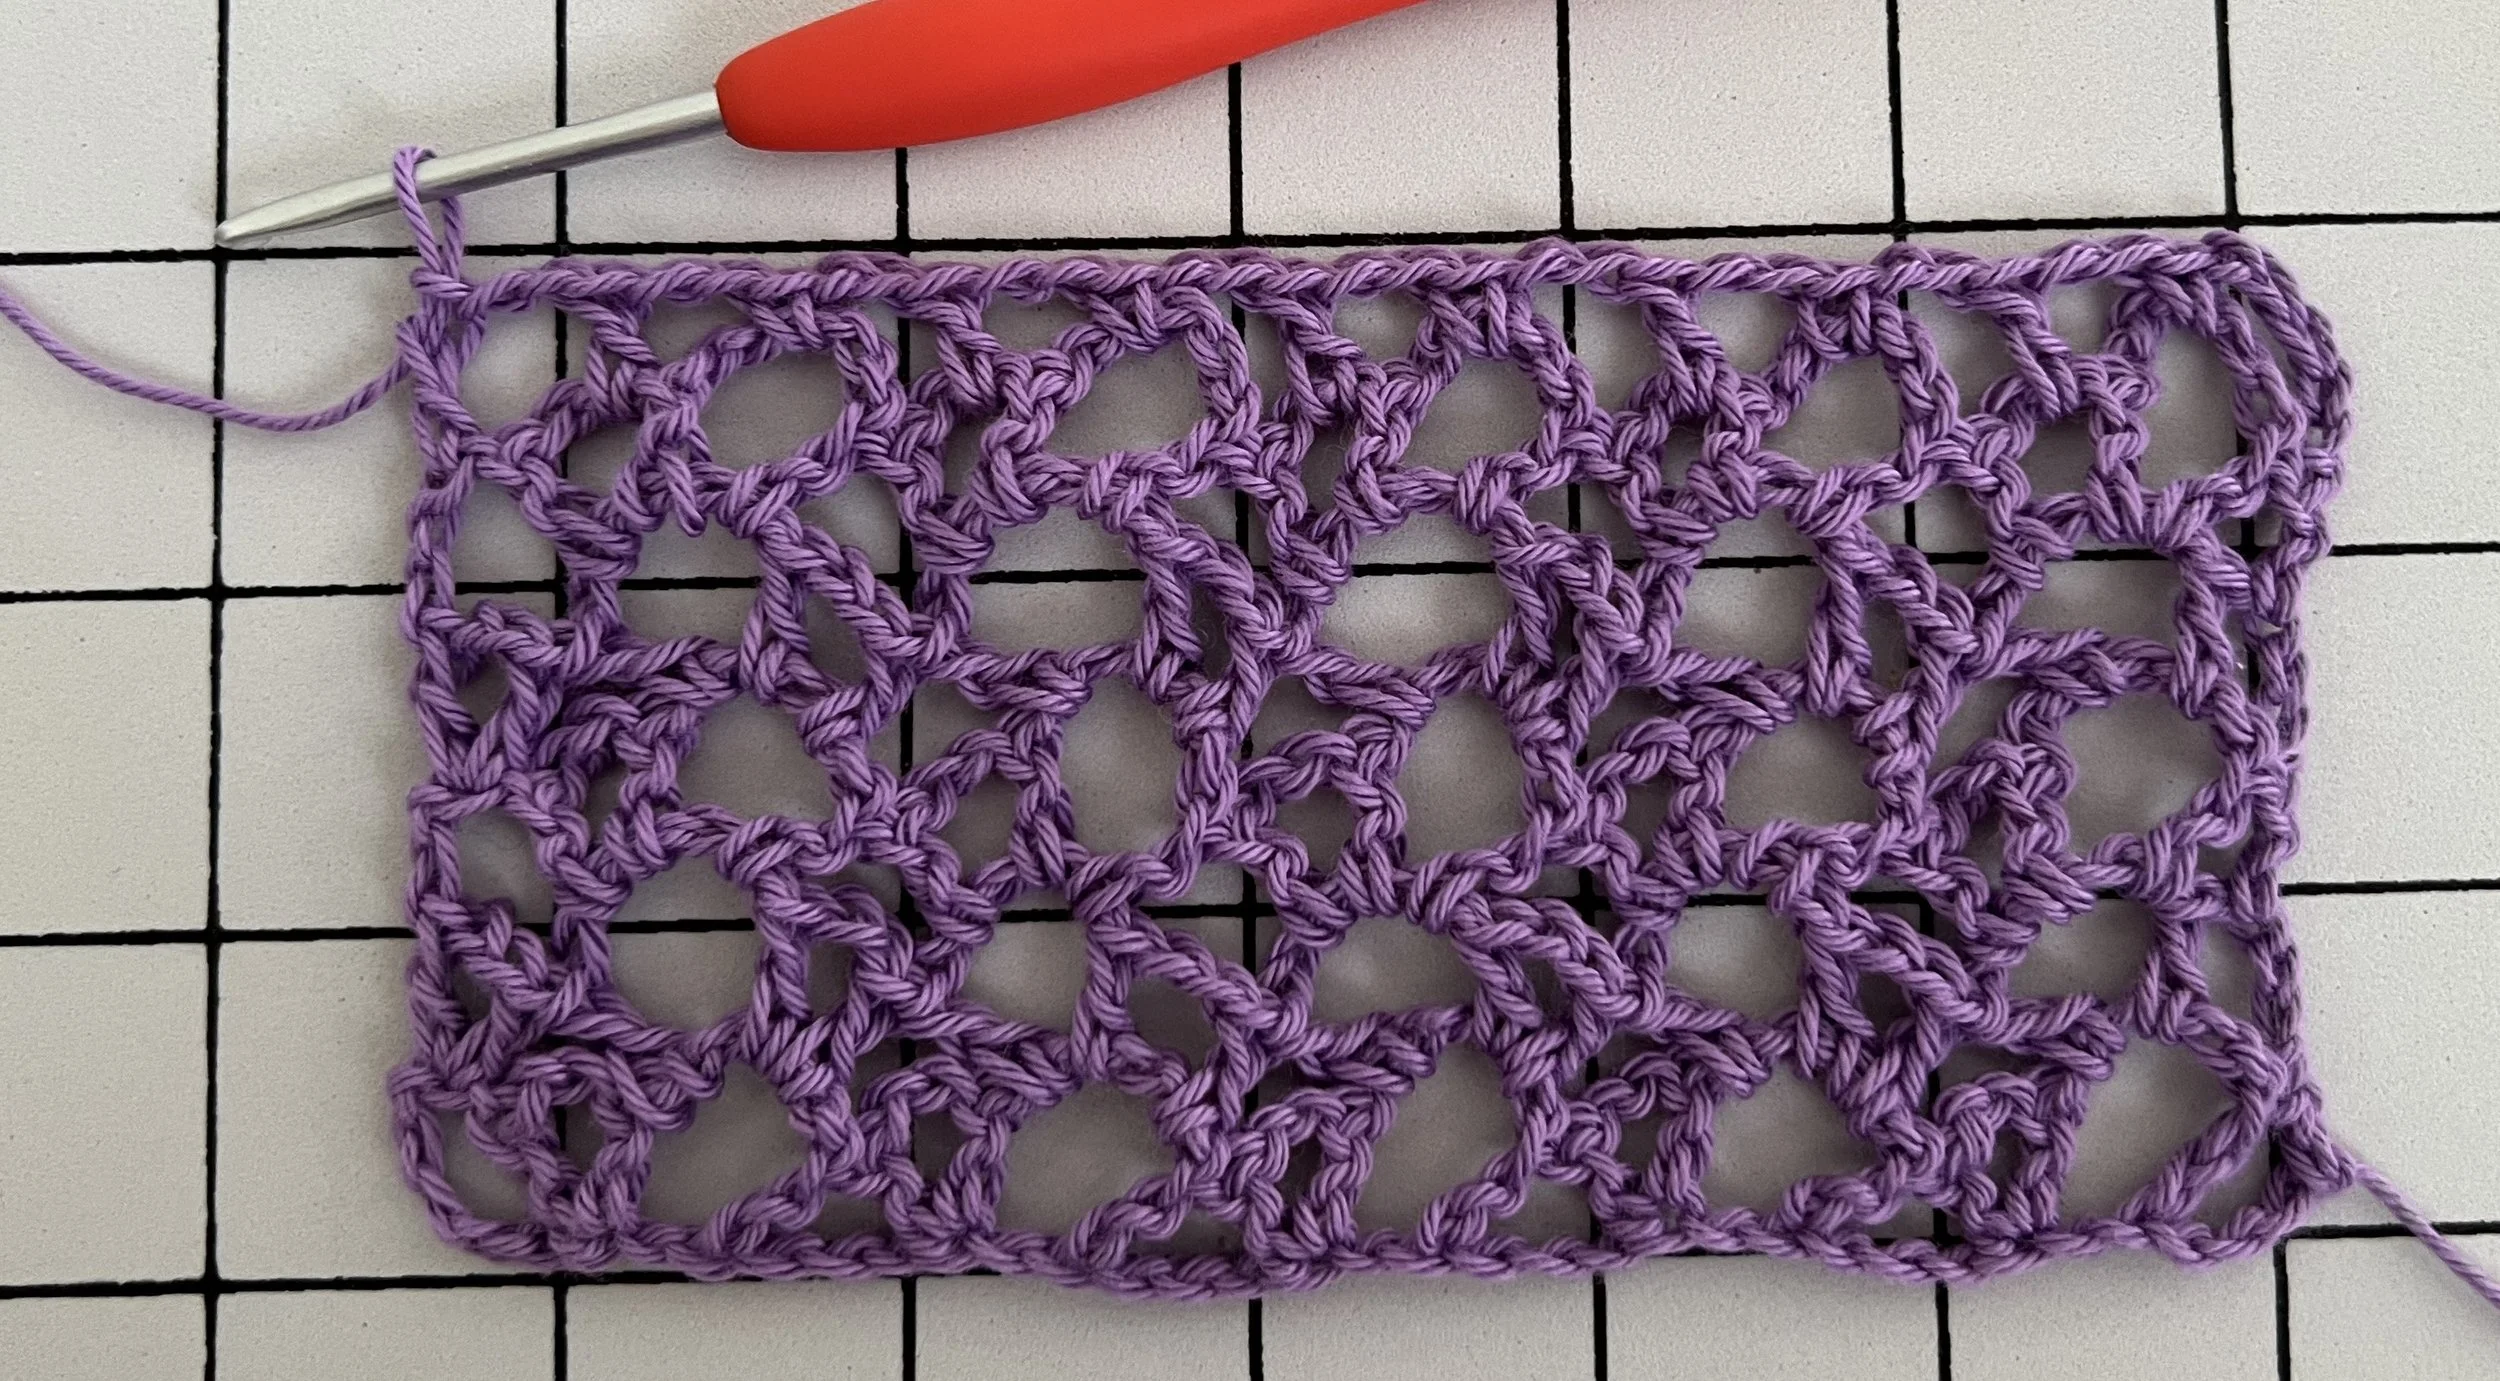
The swatch in the step by step photos is photographed in the direction it is facing as you crochet it, which means the fabric orientation is flipped for each row. Sample swatch was crocheted in a fingering weight cotton yarn for a clearer stitch definition.
Pattern
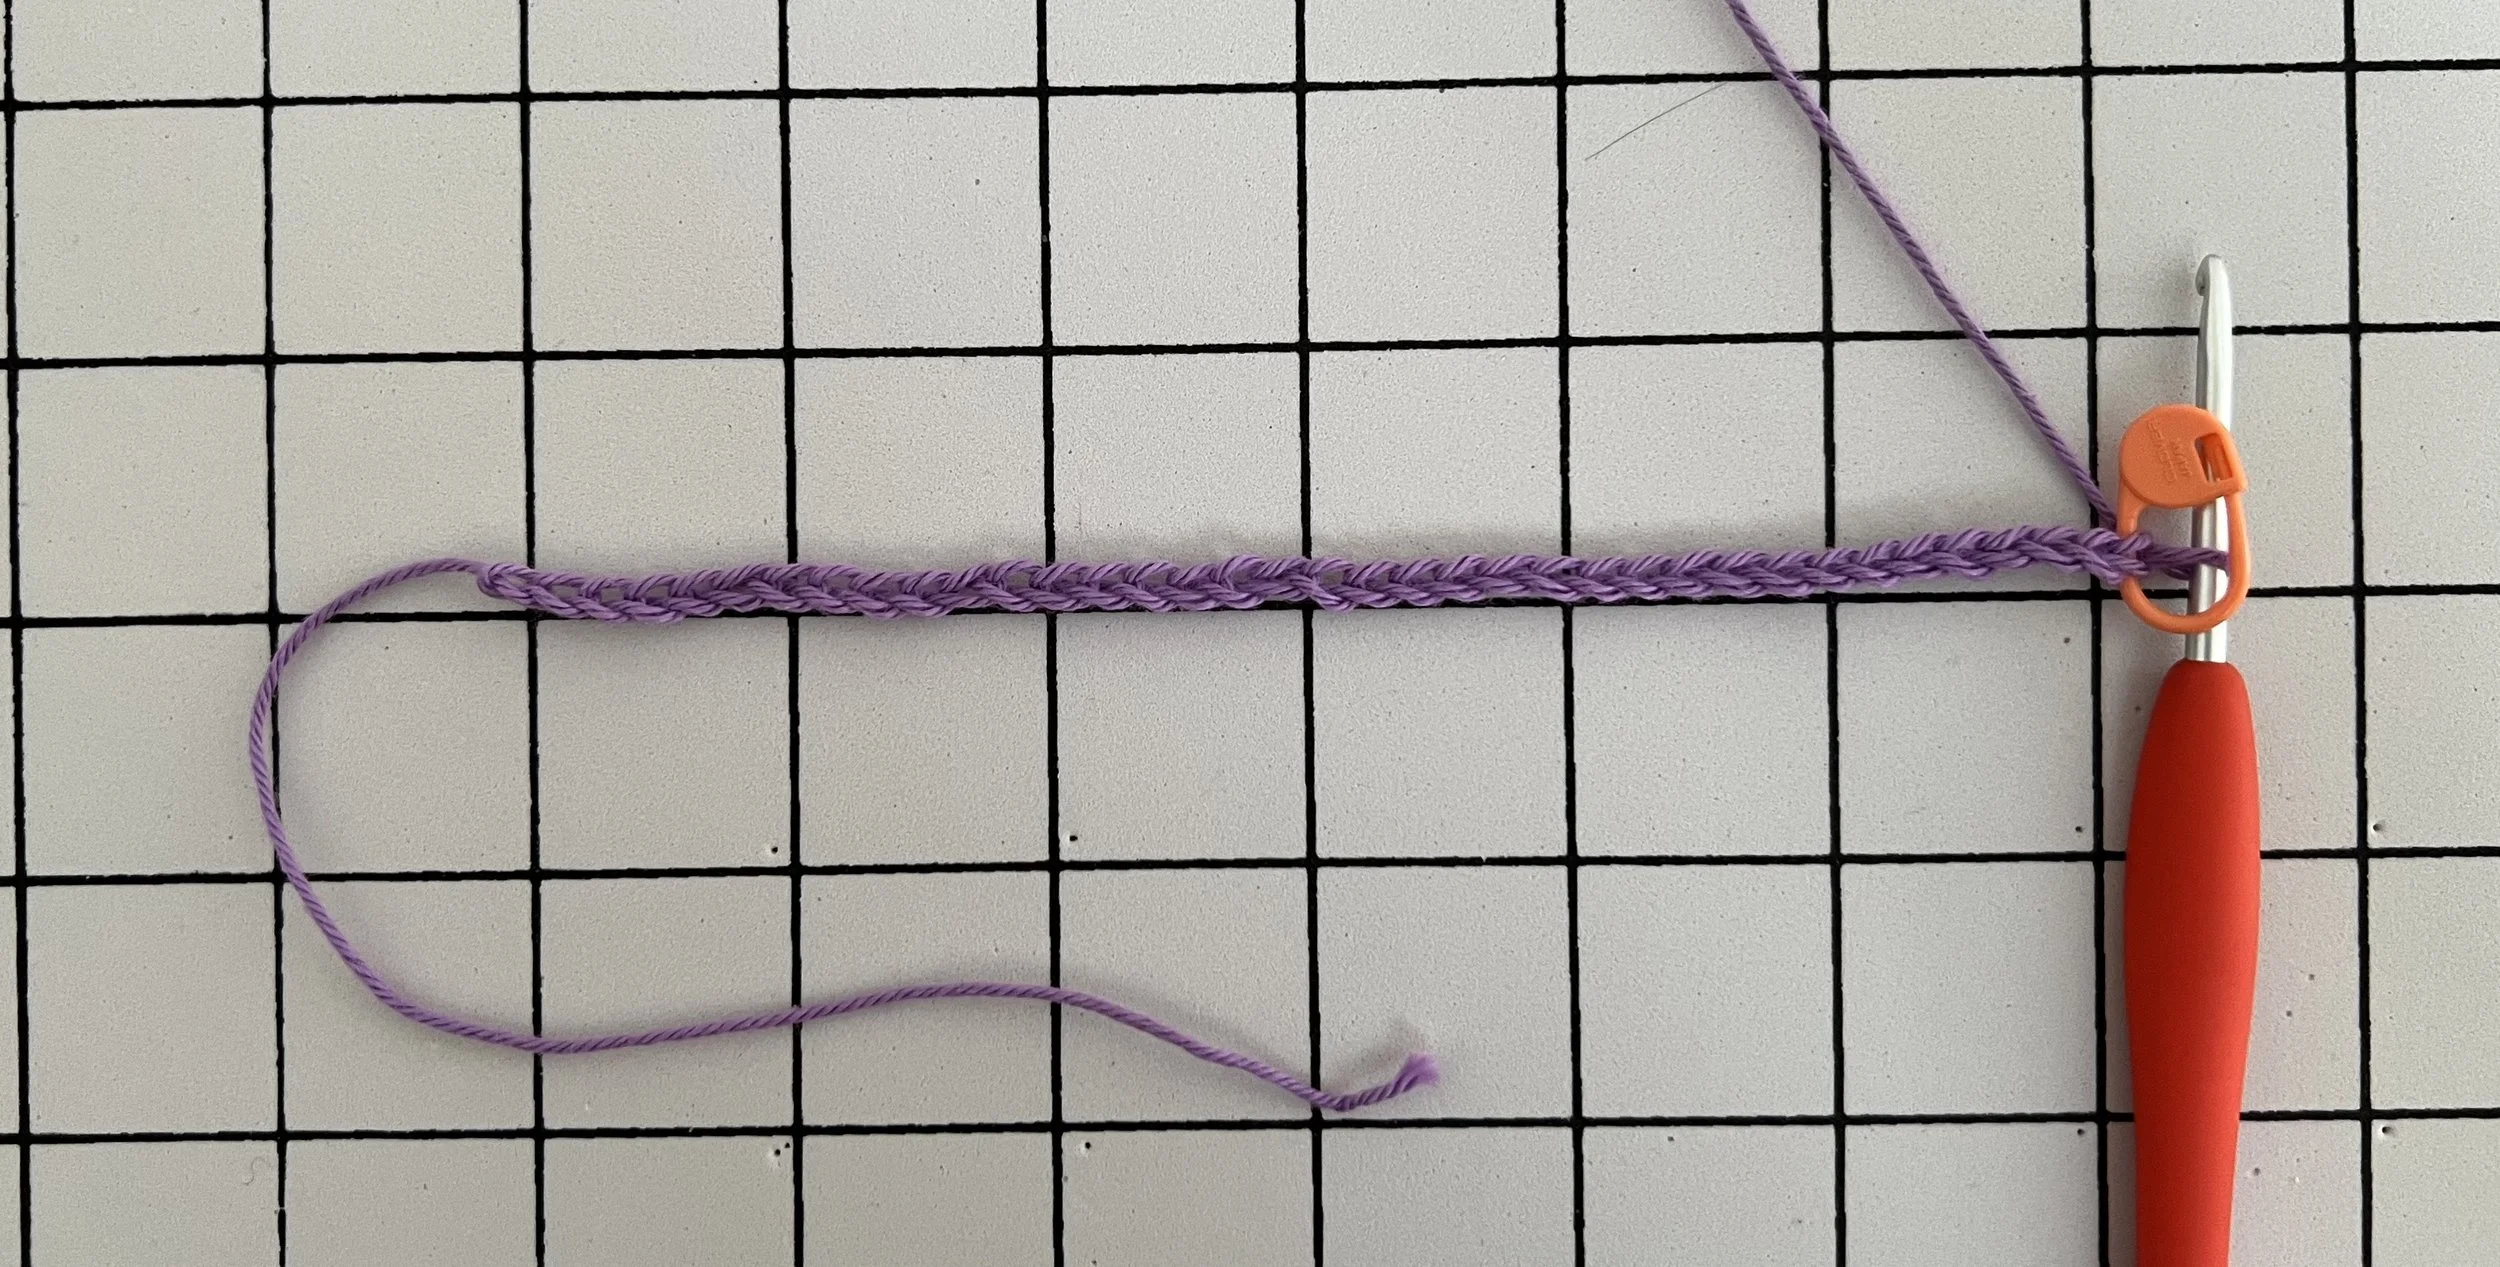
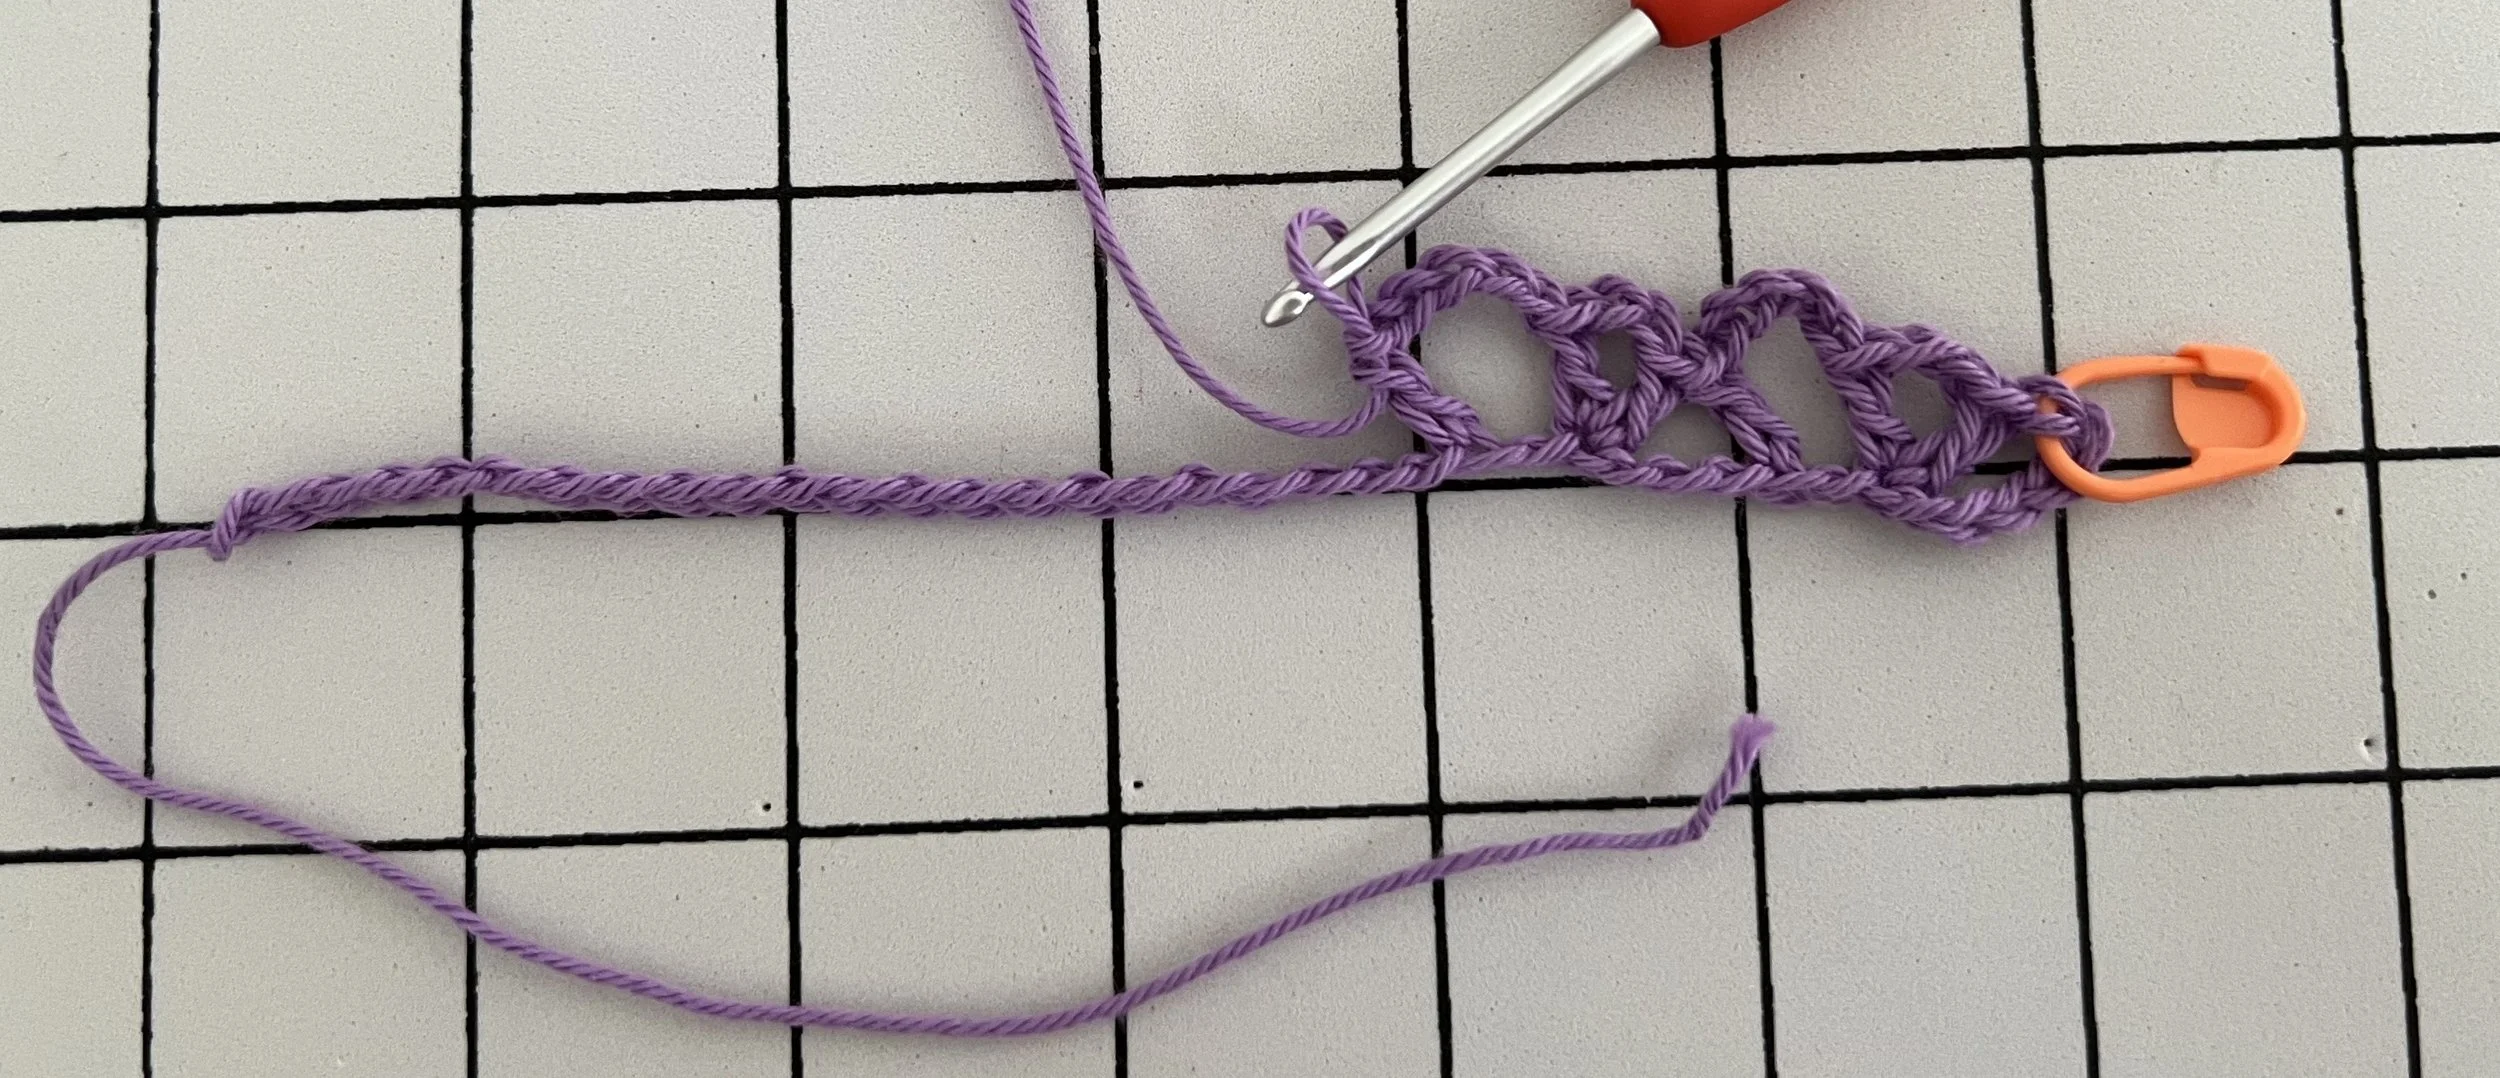
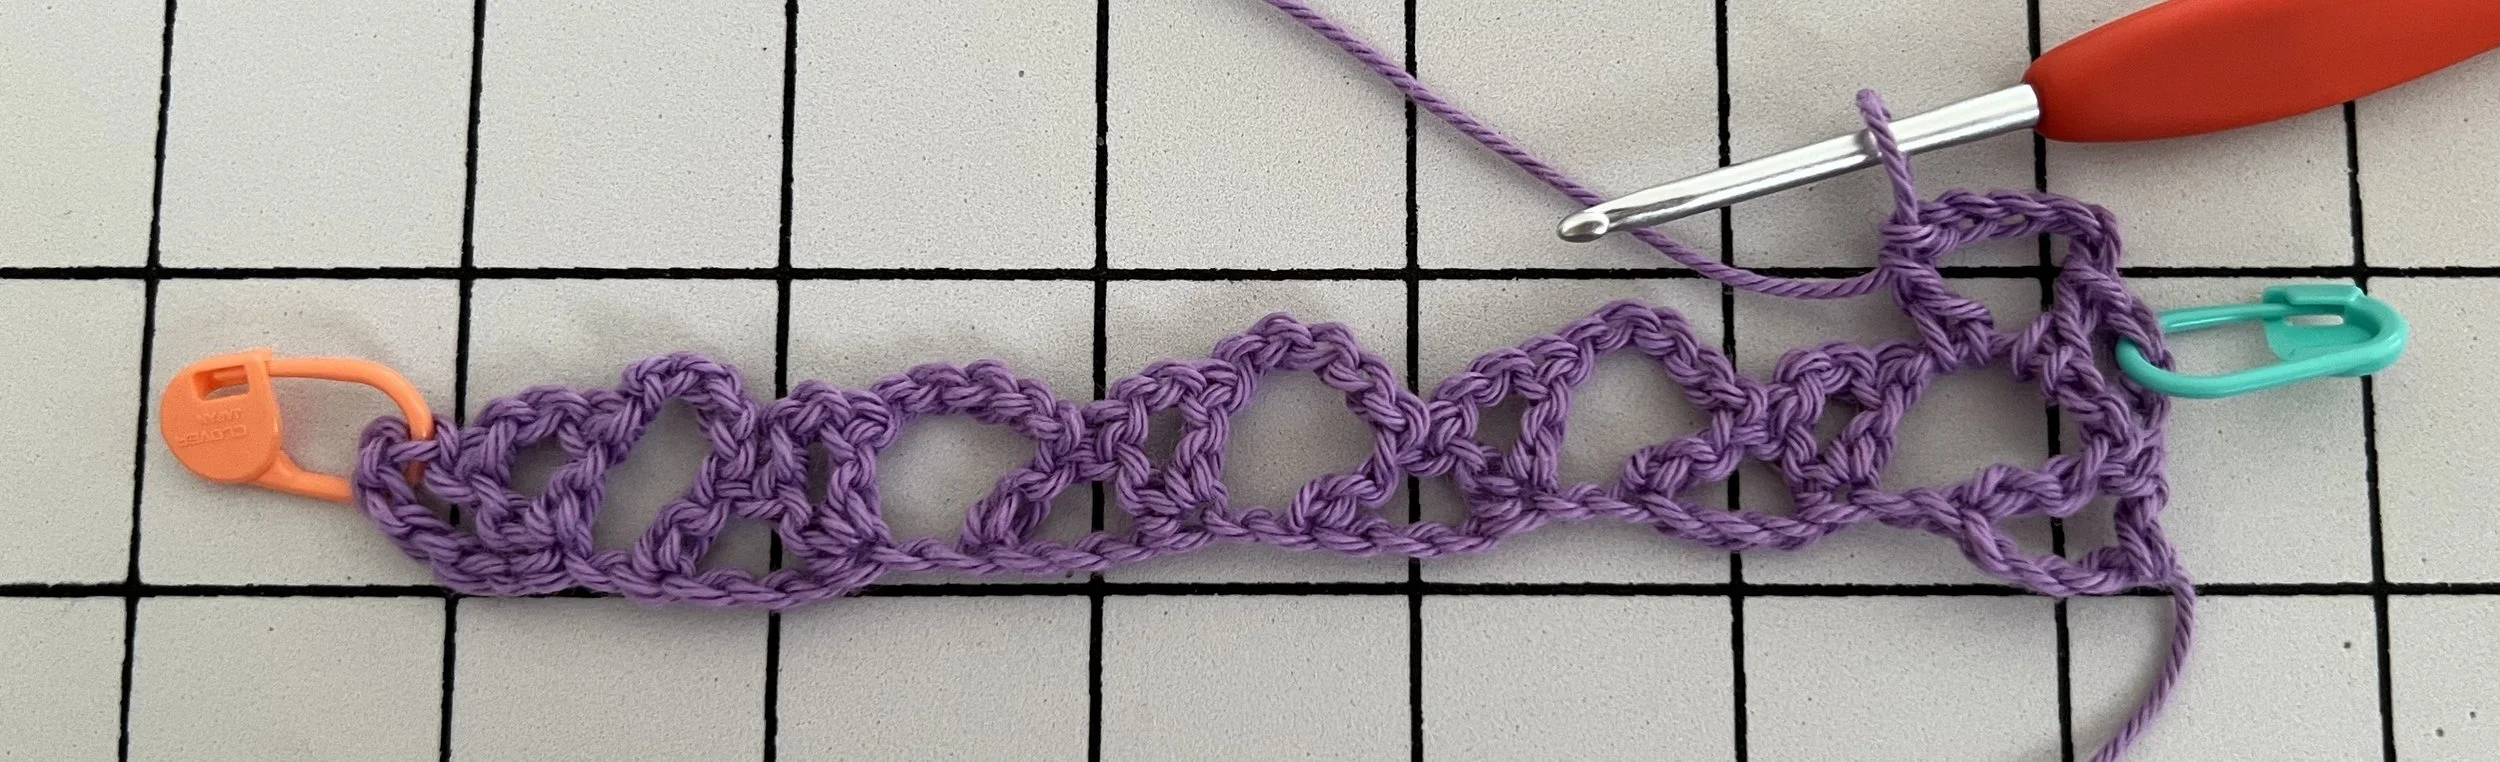
R0 – Chain (a multiple of 6) + 1 ch. Place a stitch marker in the last stitch.
The fluffy sample scarf has a foundation chain of 67 ch, which results in rows with 10 mesh clusters. Photographs here show a truncated “scarf” where the foundation chain is 37 ch and each row has 5 mesh clusters.
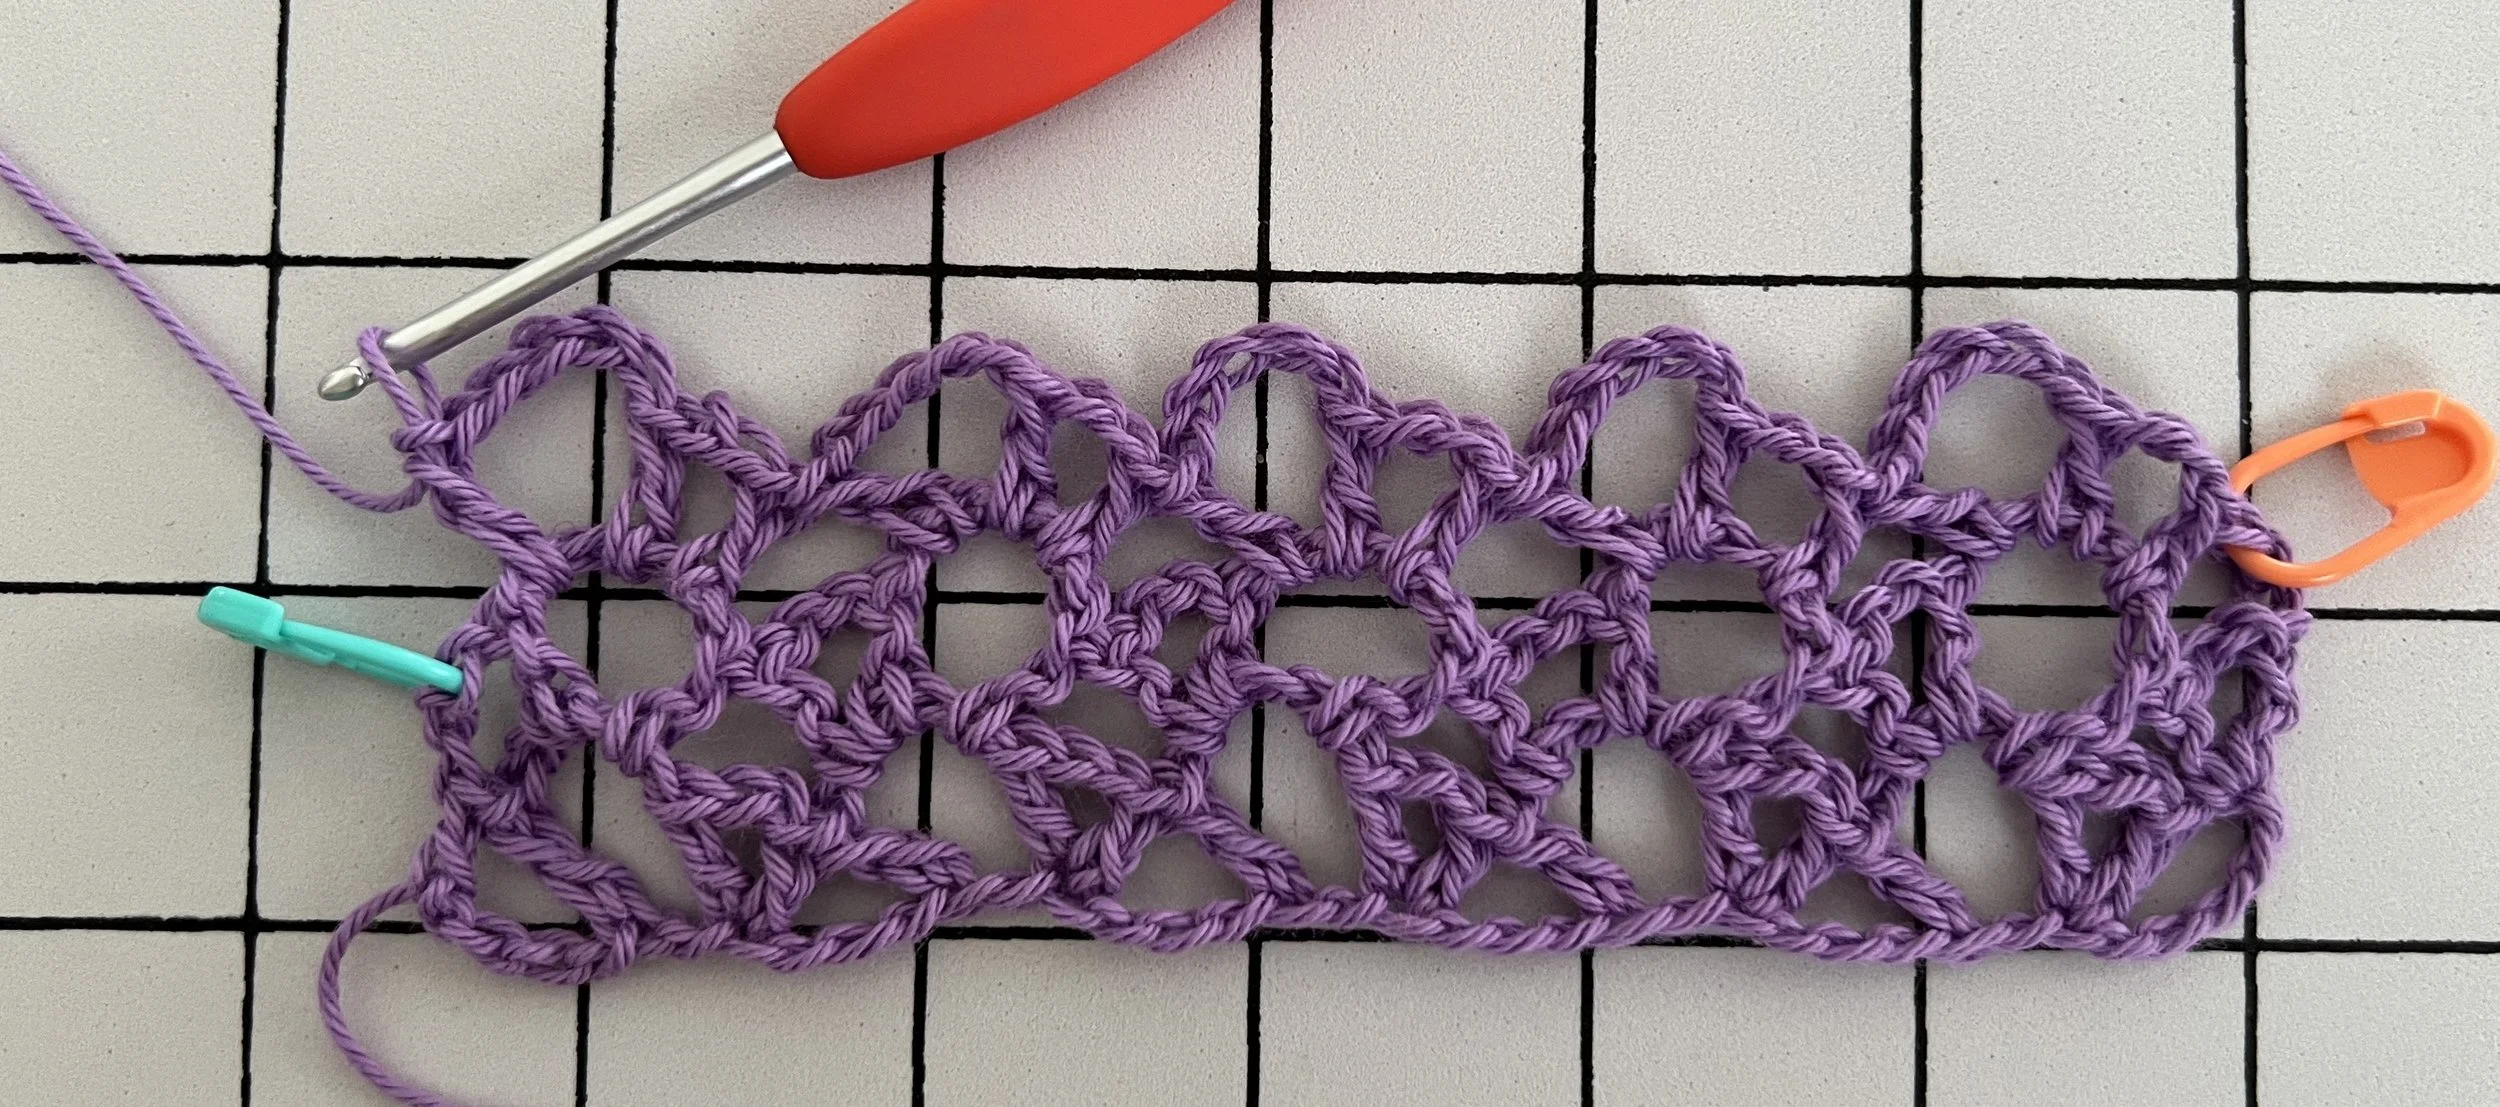
R1 work into the back bumps of the chains – Skip 6 stitches, make 1 mesh cluster. (See the Pattern Syntax section above for how to make the mesh cluster.)
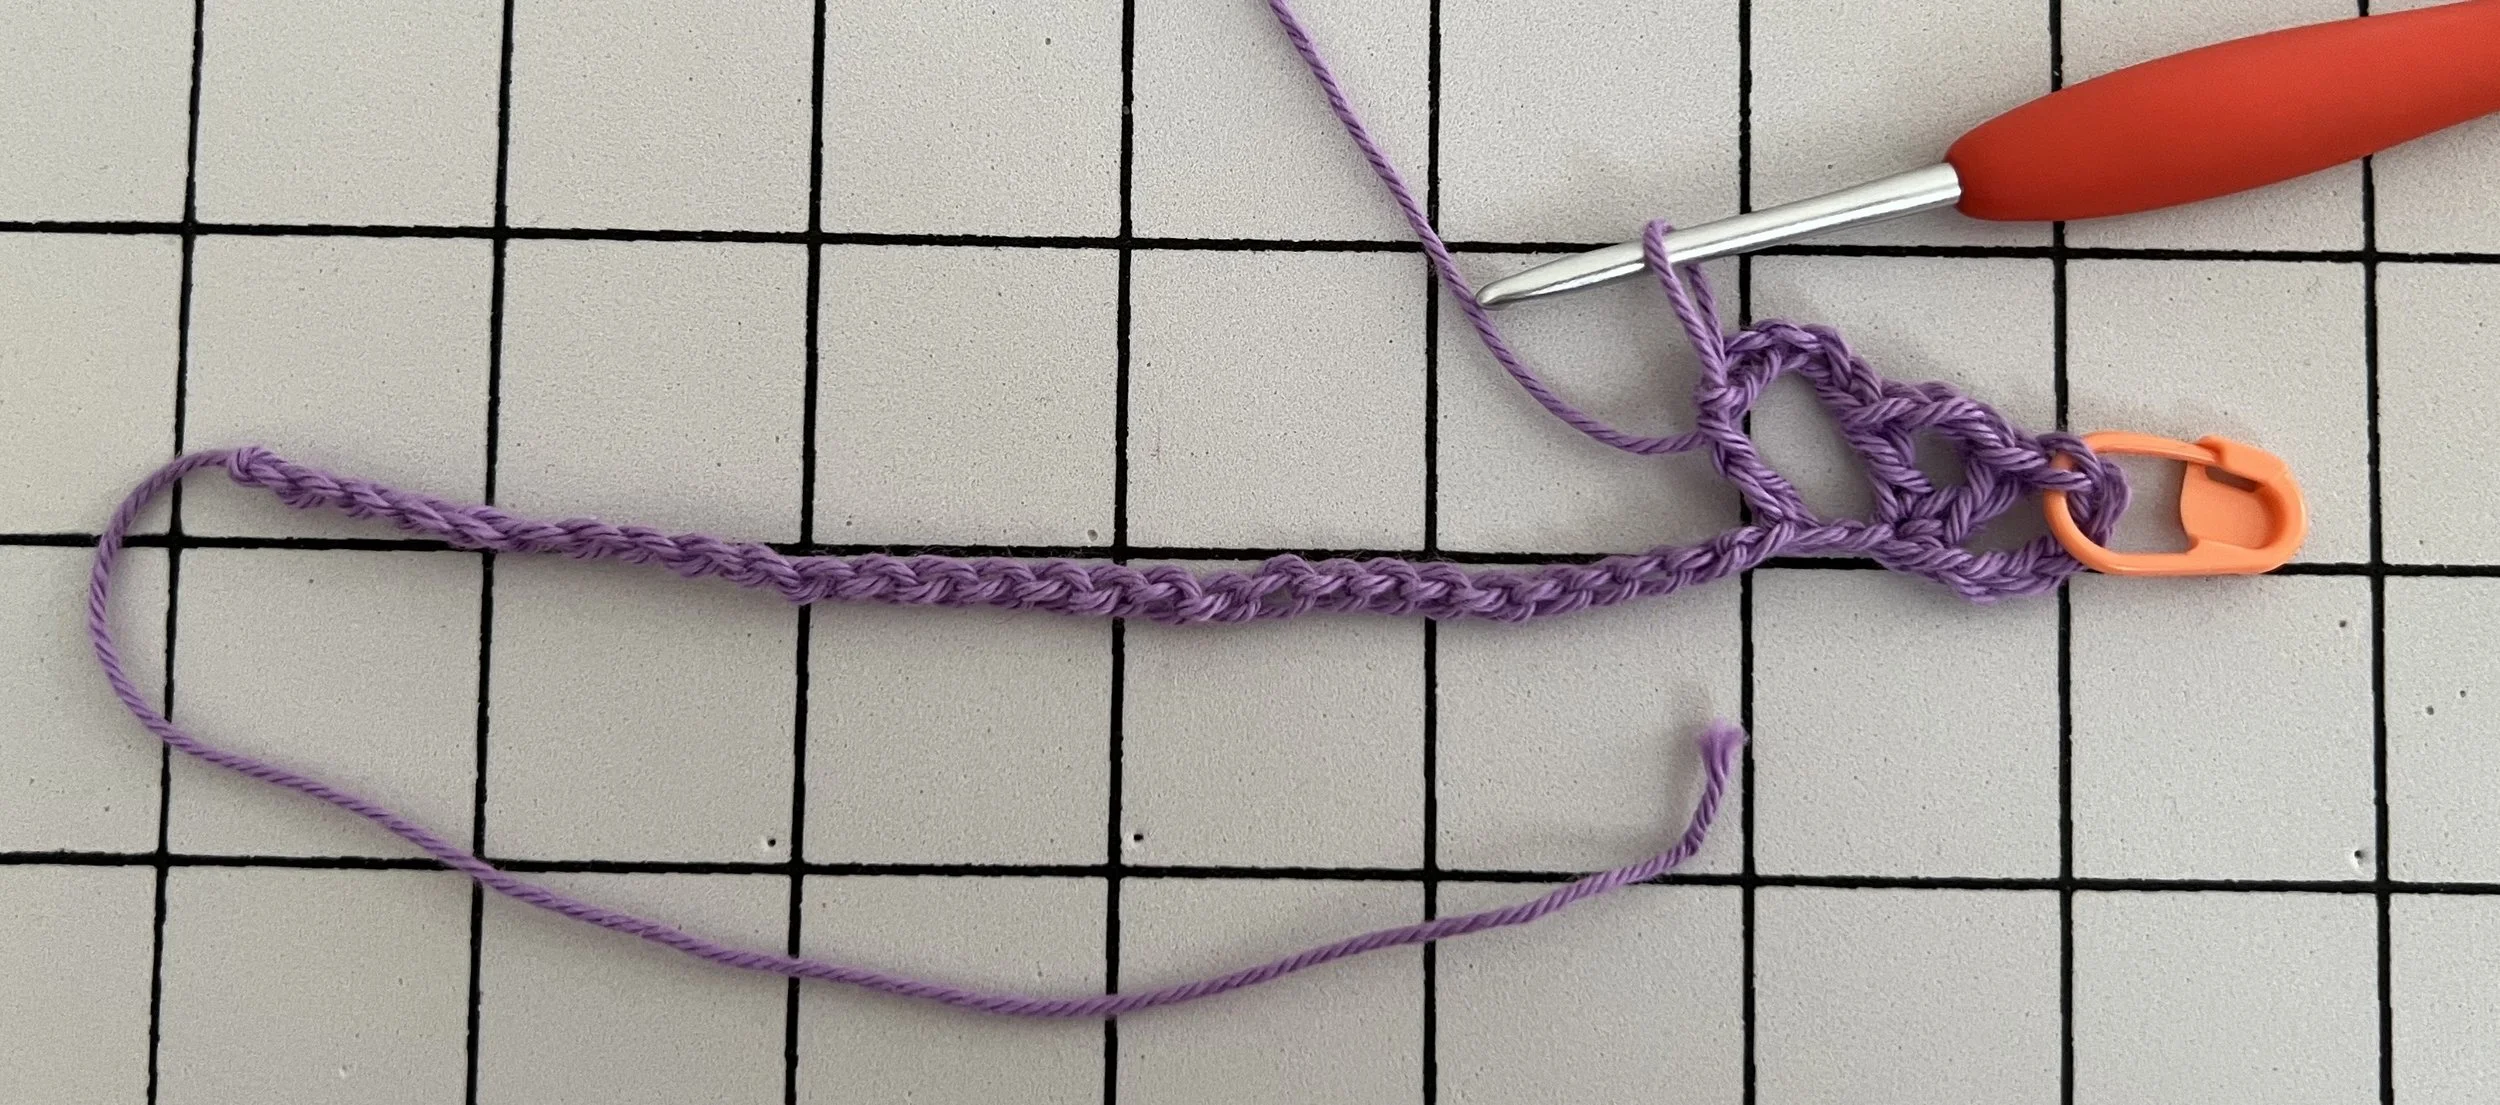
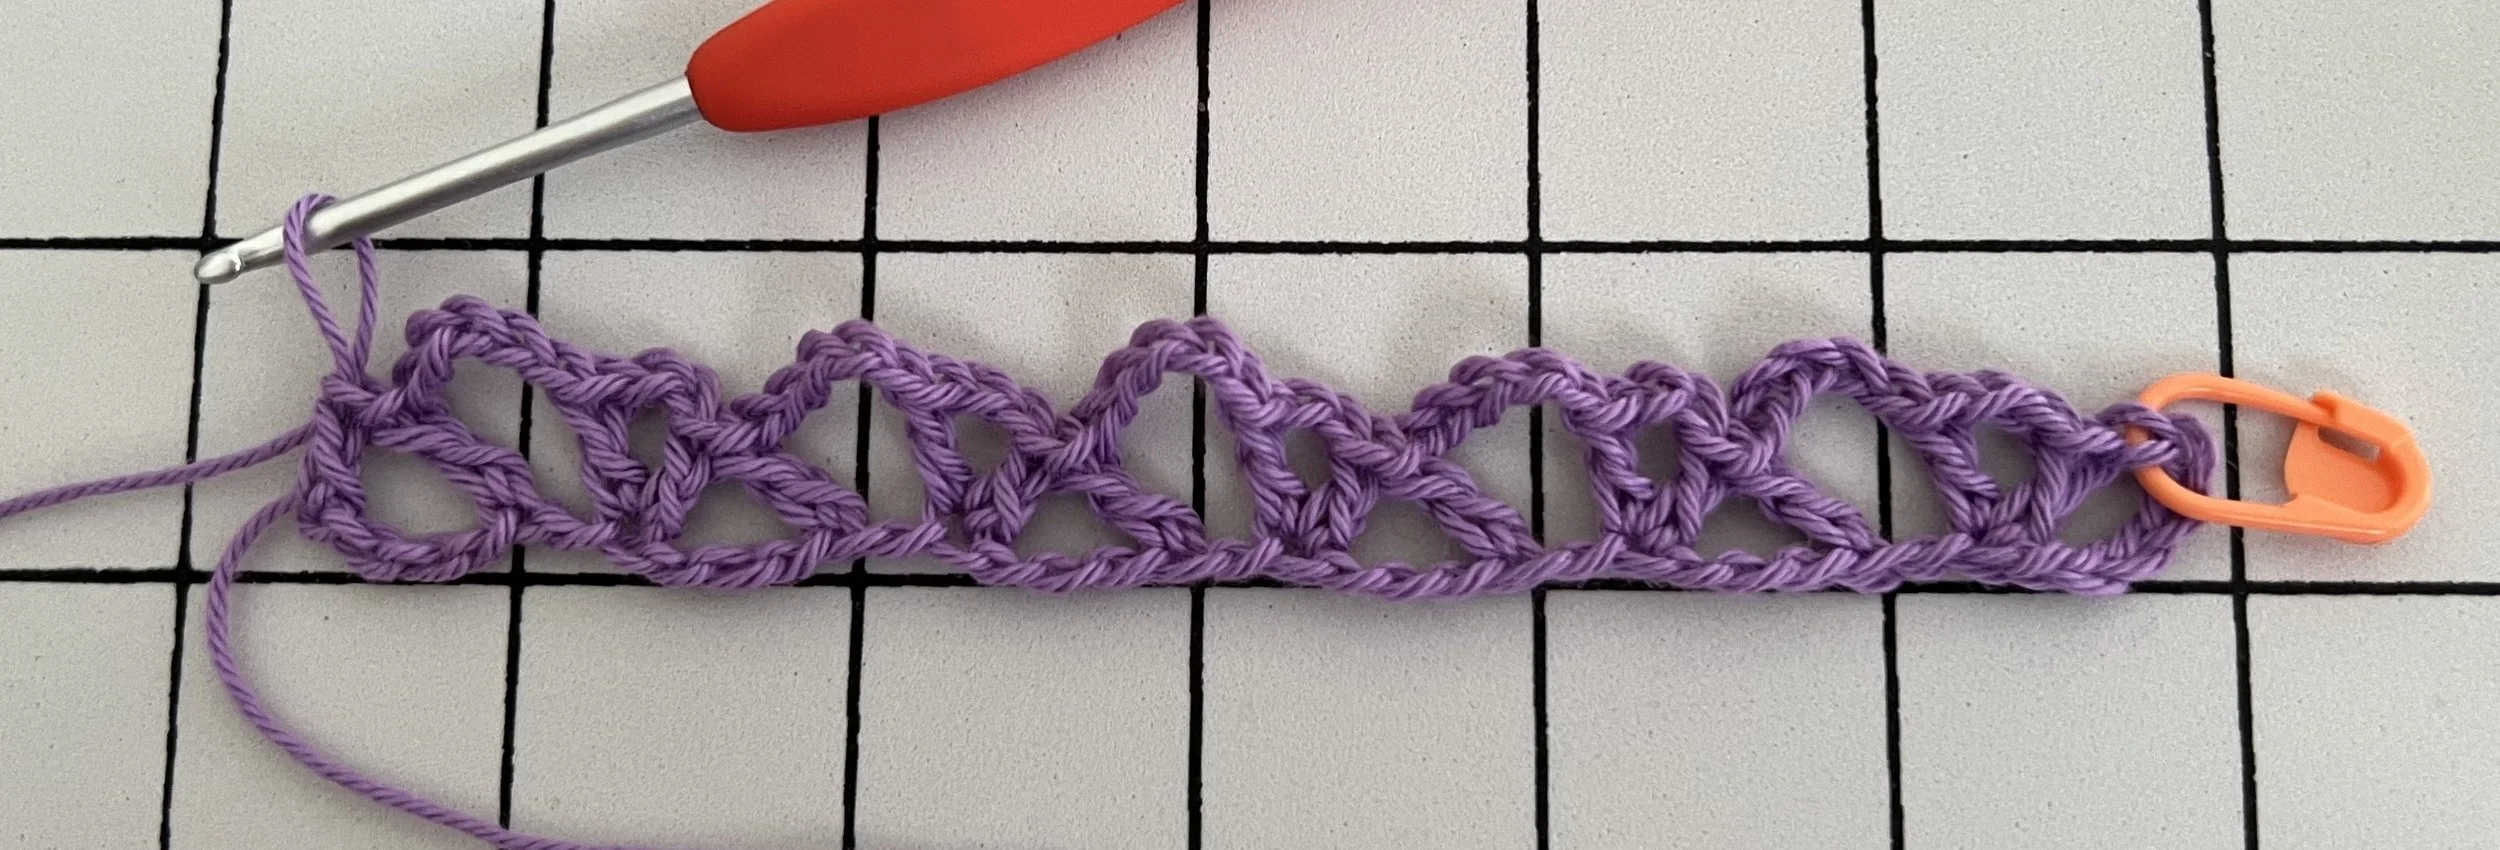
Then repeat (skip 3 stitches, make 1 mesh cluster) until there are 4 stitches remaining in the foundation chain.
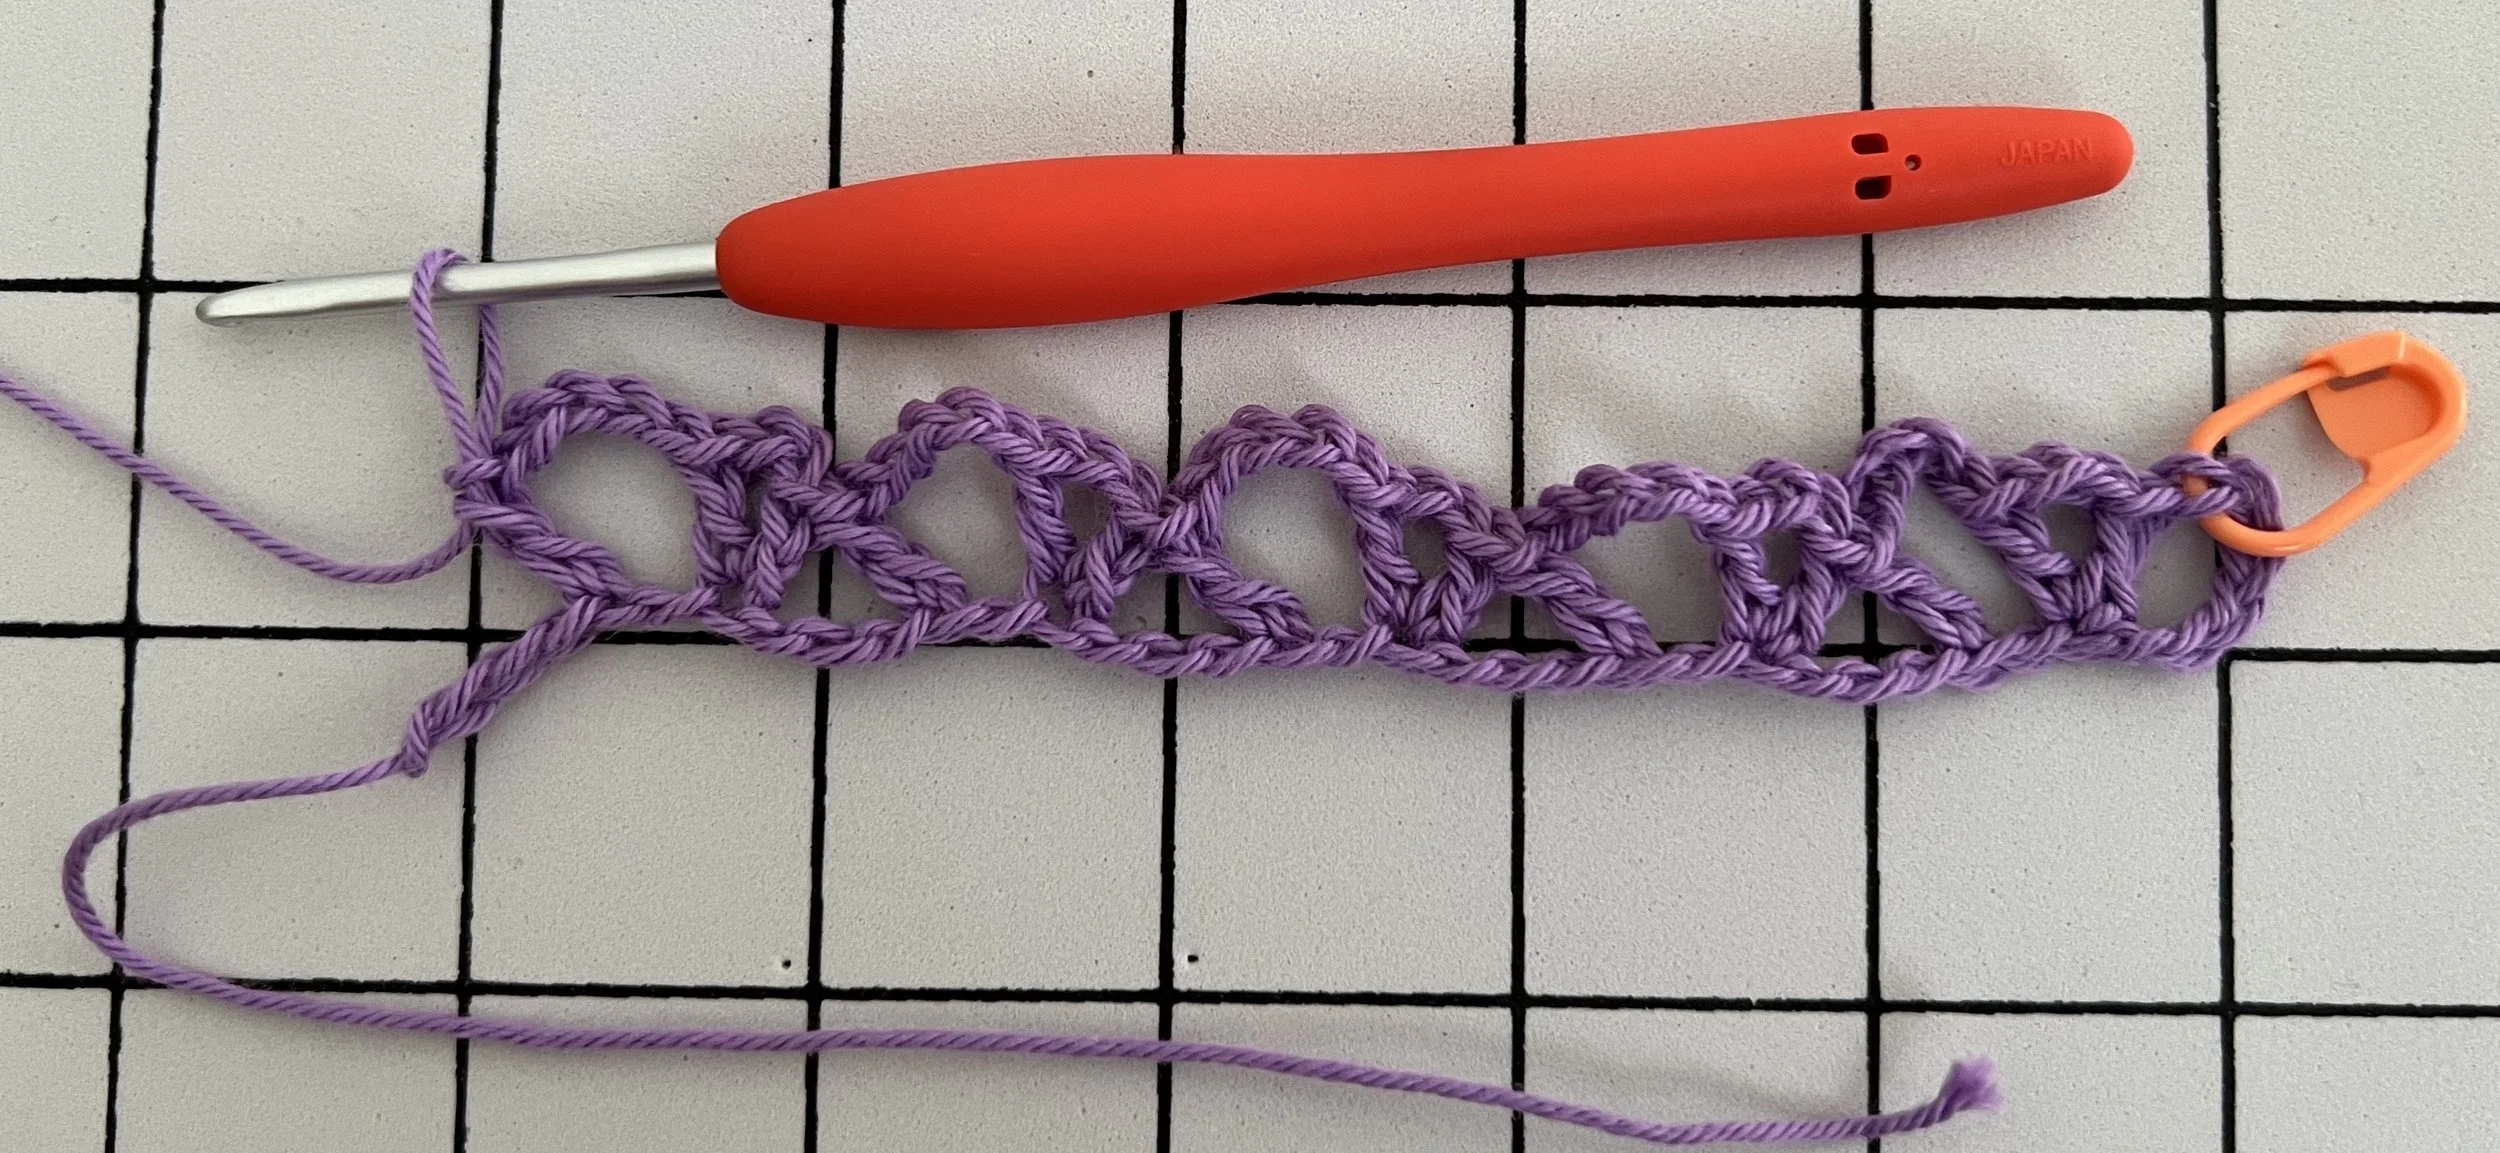
Finally, make 1 dc in the last stitch in the foundation chain.
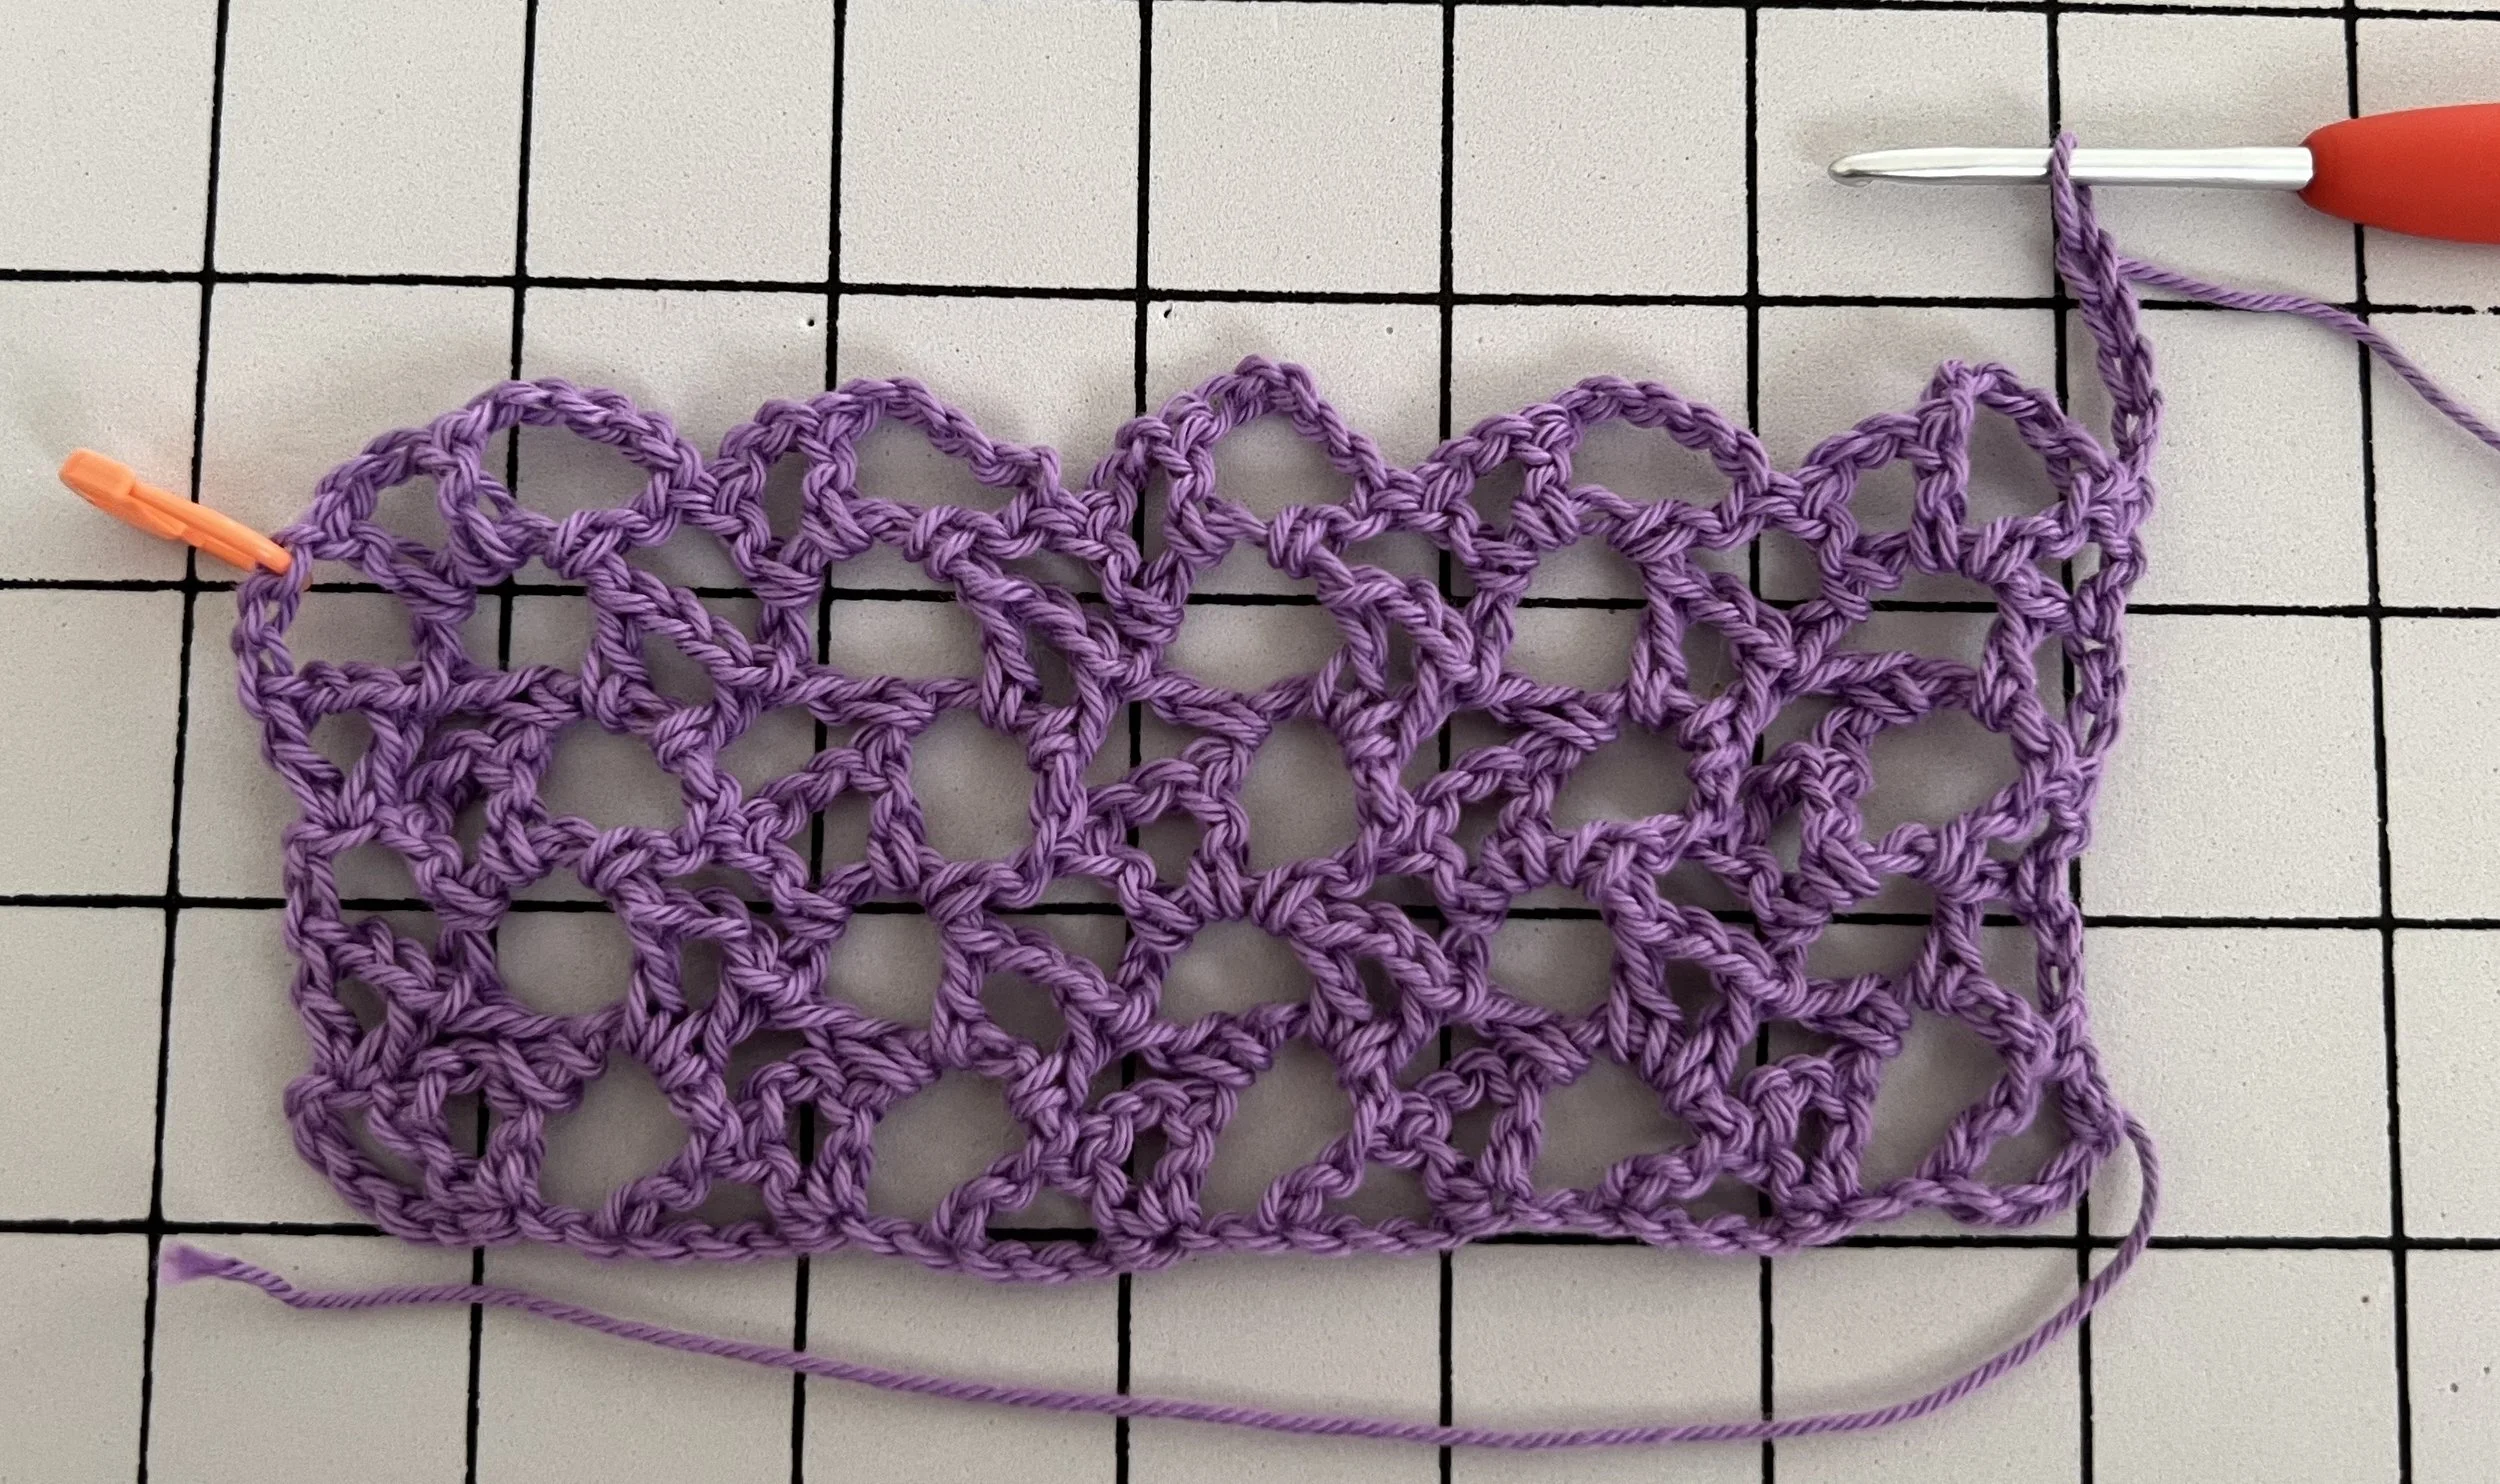
R2 – Turn your work. 3 ch and place a stitch marker in the third ch.
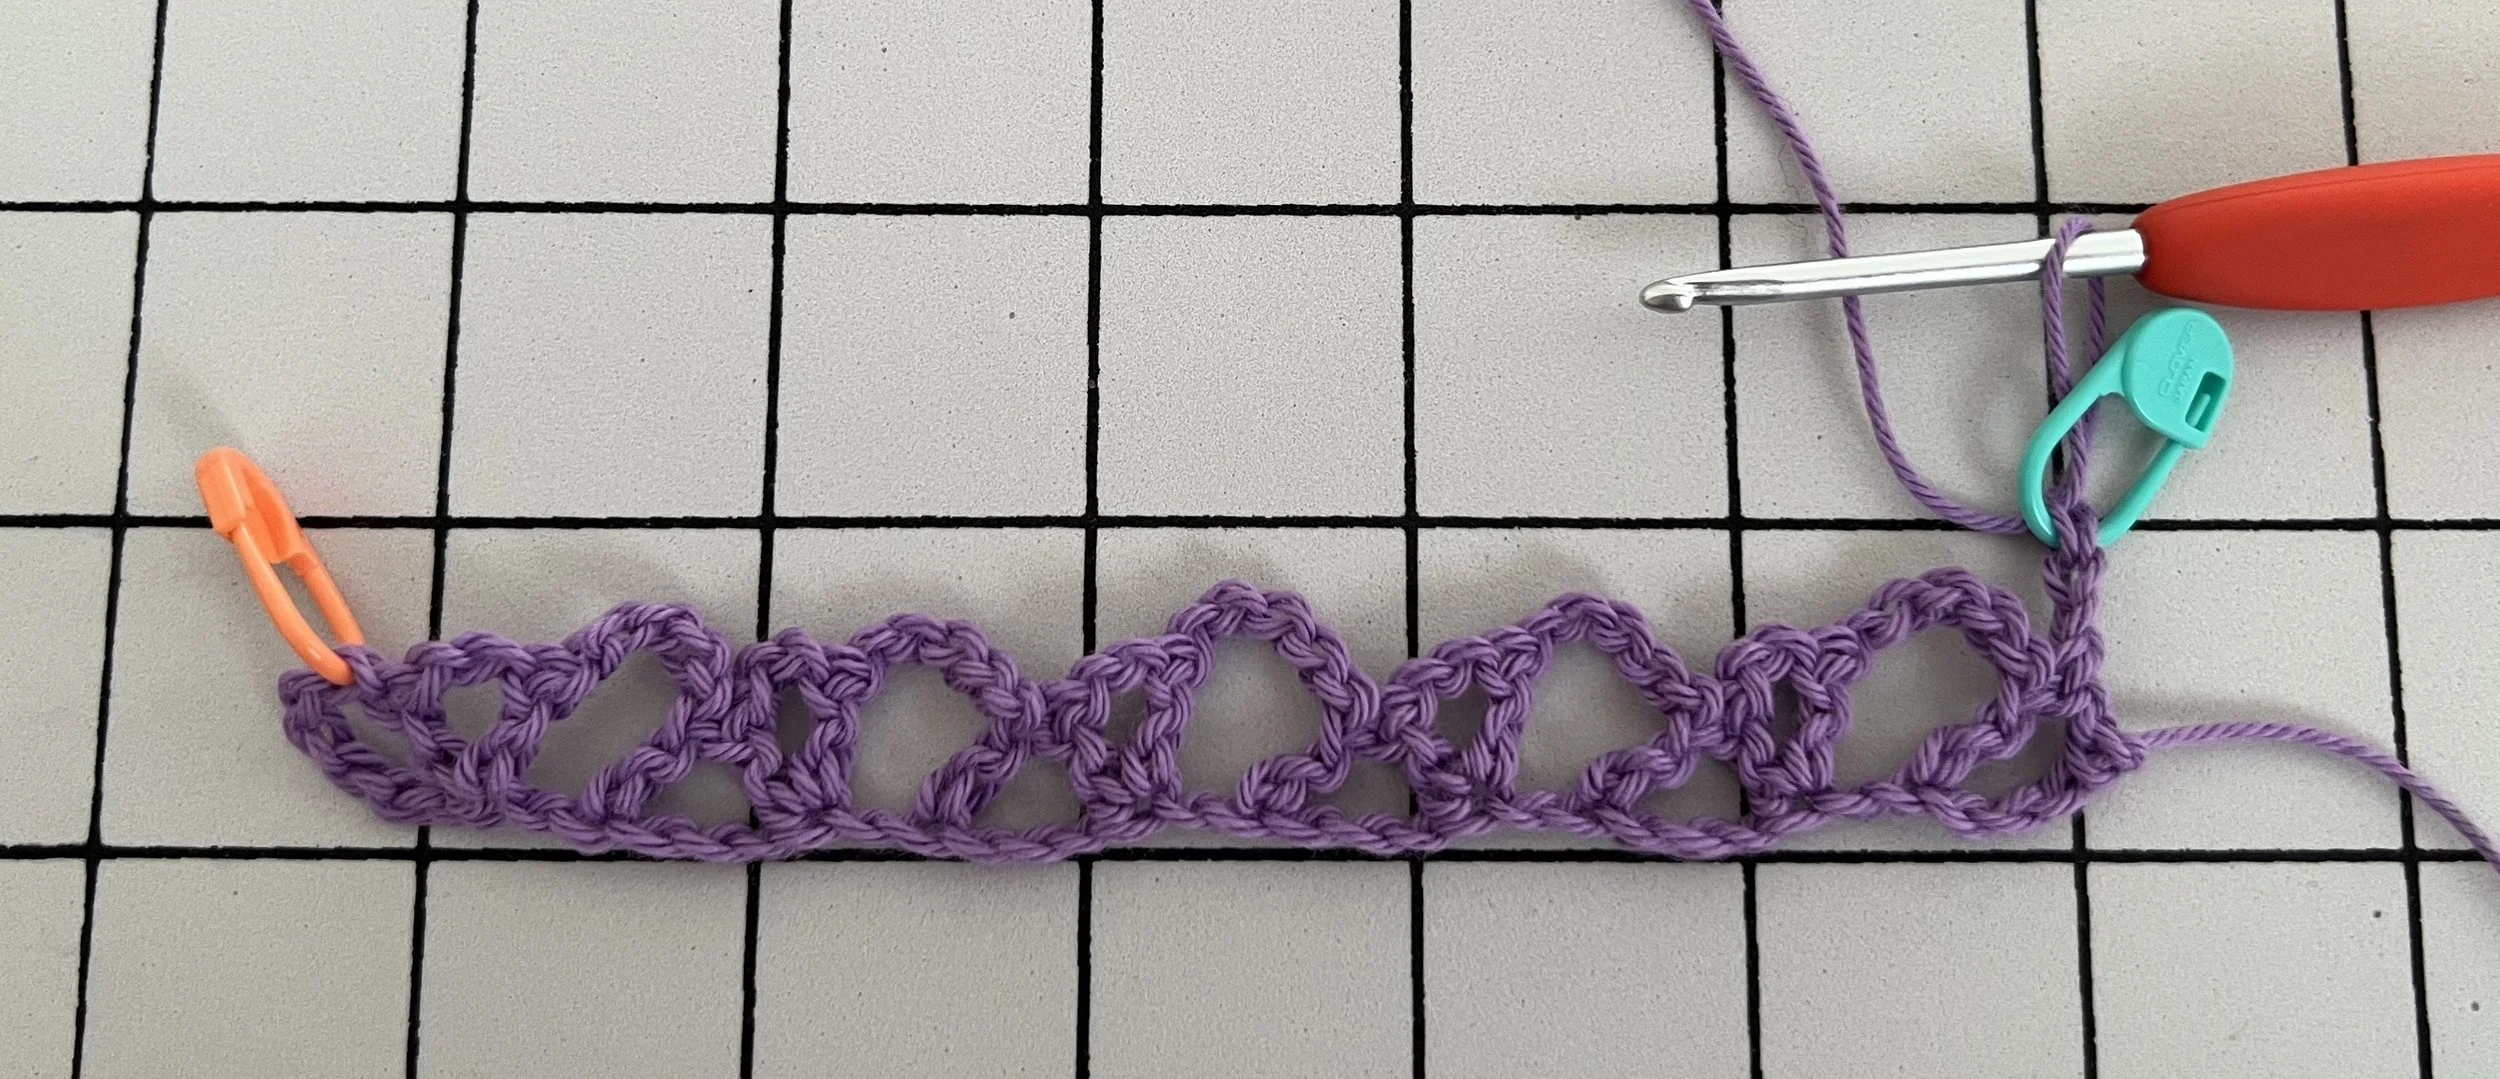
Then in the next 5-ch-space make (1 dc, 5 ch, 1 dc).
Then in each 5-ch-space in the row, make 1 mesh cluster.
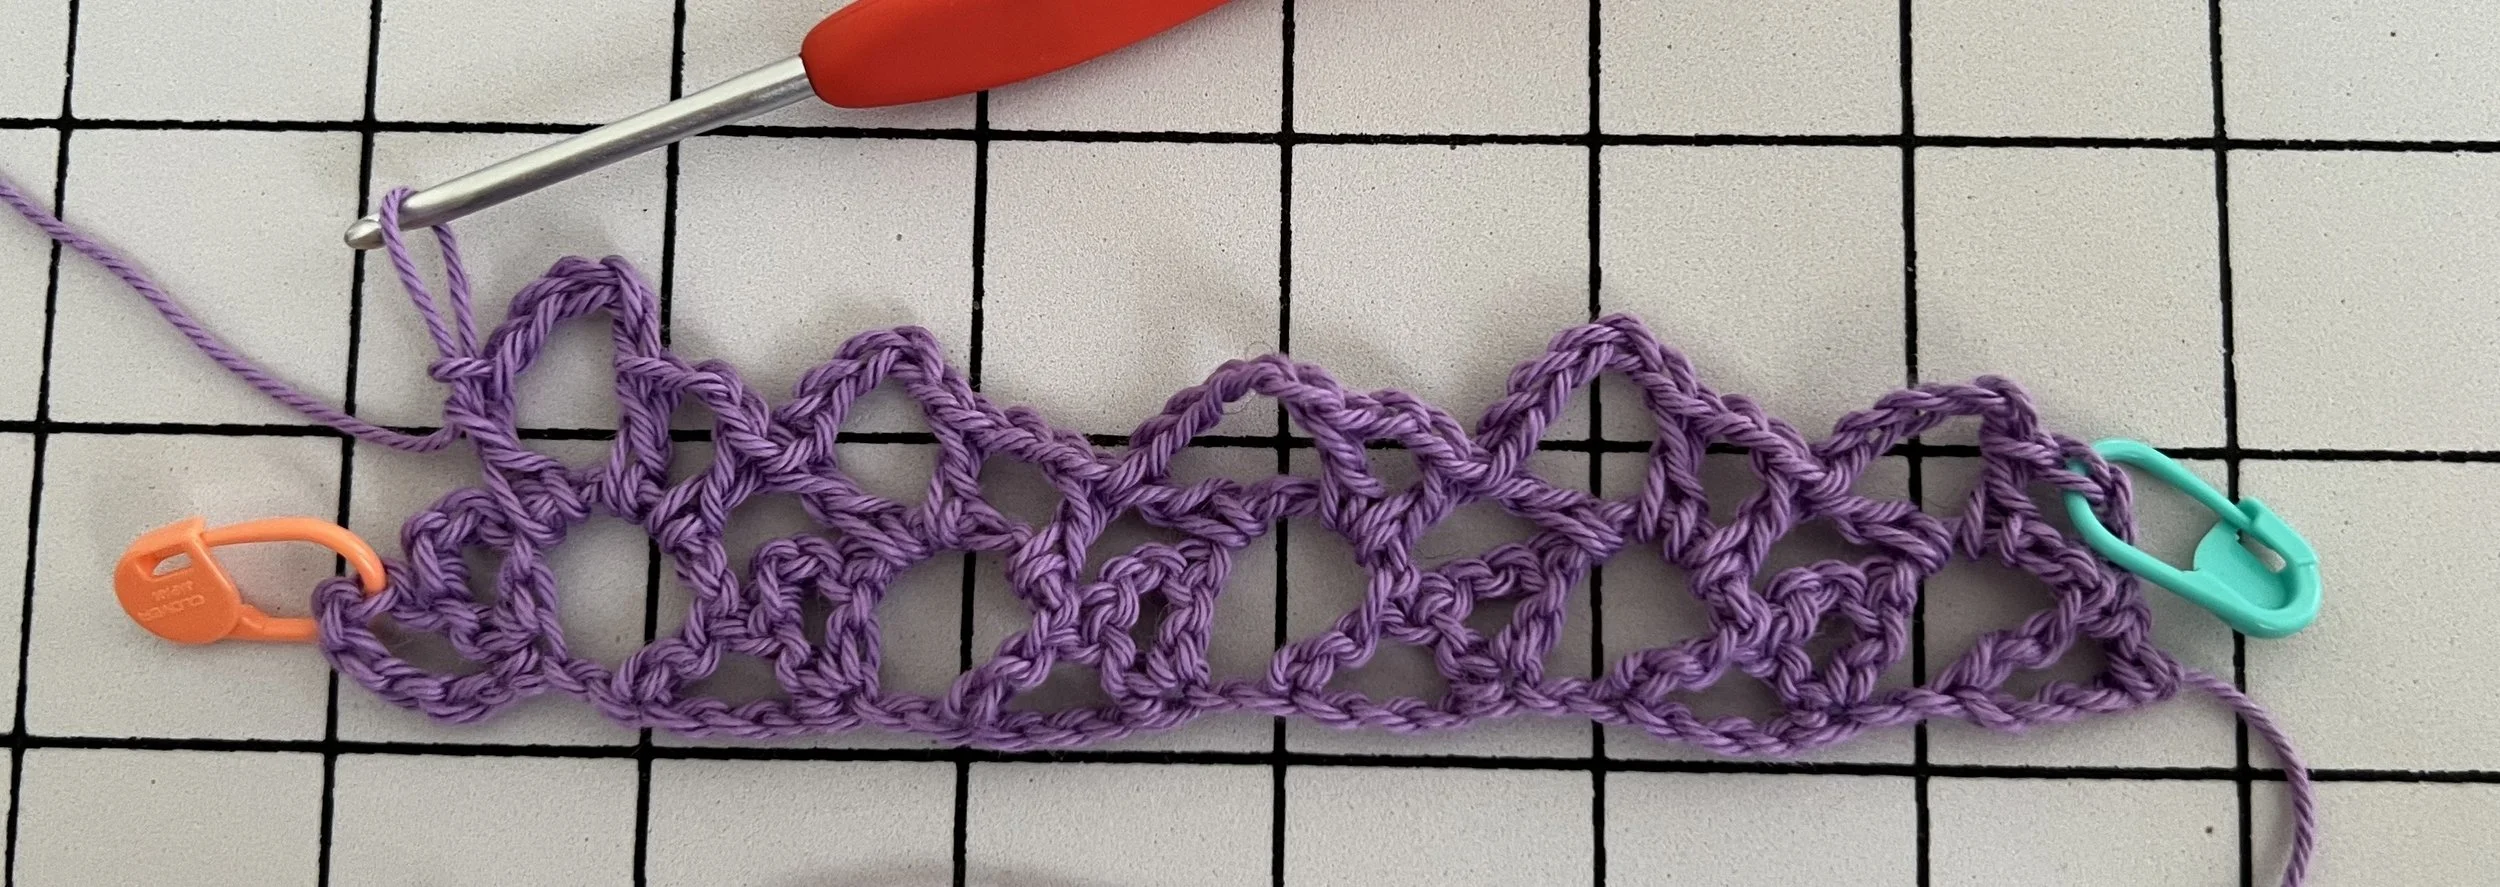
Finally, in the first chain after the last mesh cluster in the previous row (this is the ch with a stitch marker in it) remove the stitch marker then make (1 dc, 2 ch, 1 dc) in that stitch.
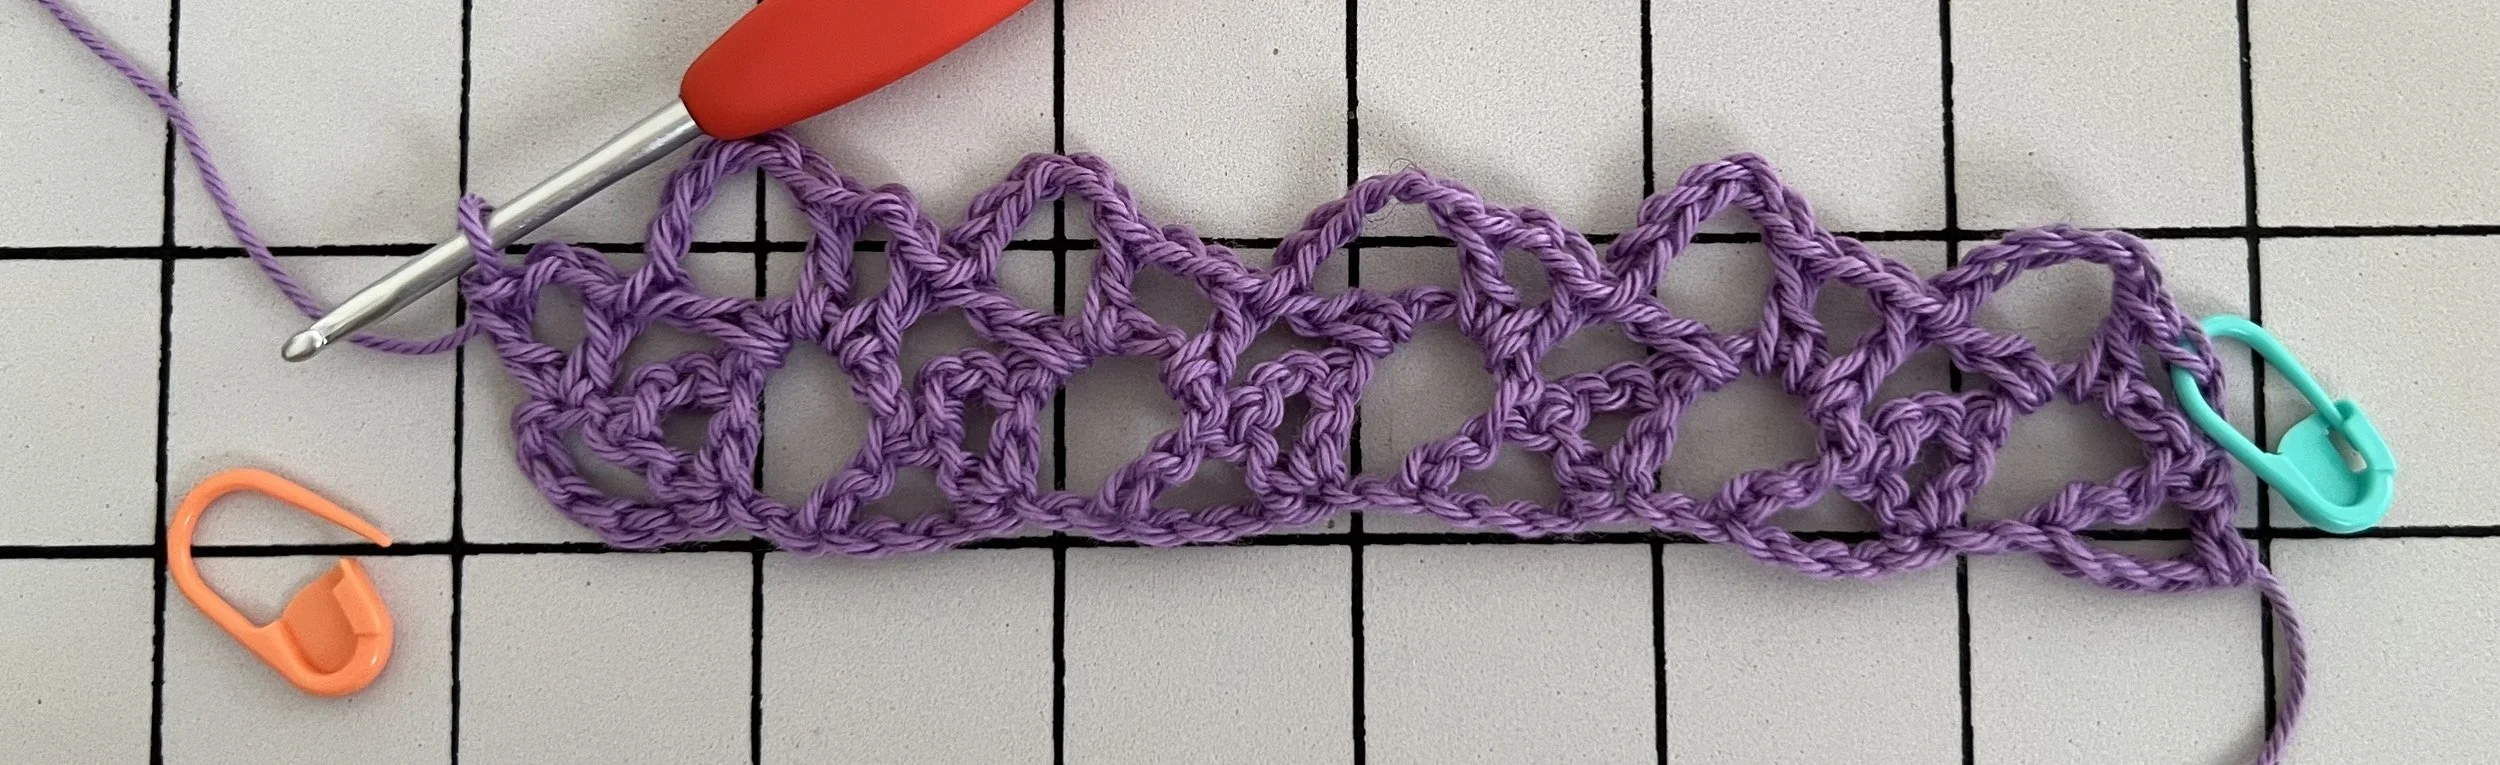
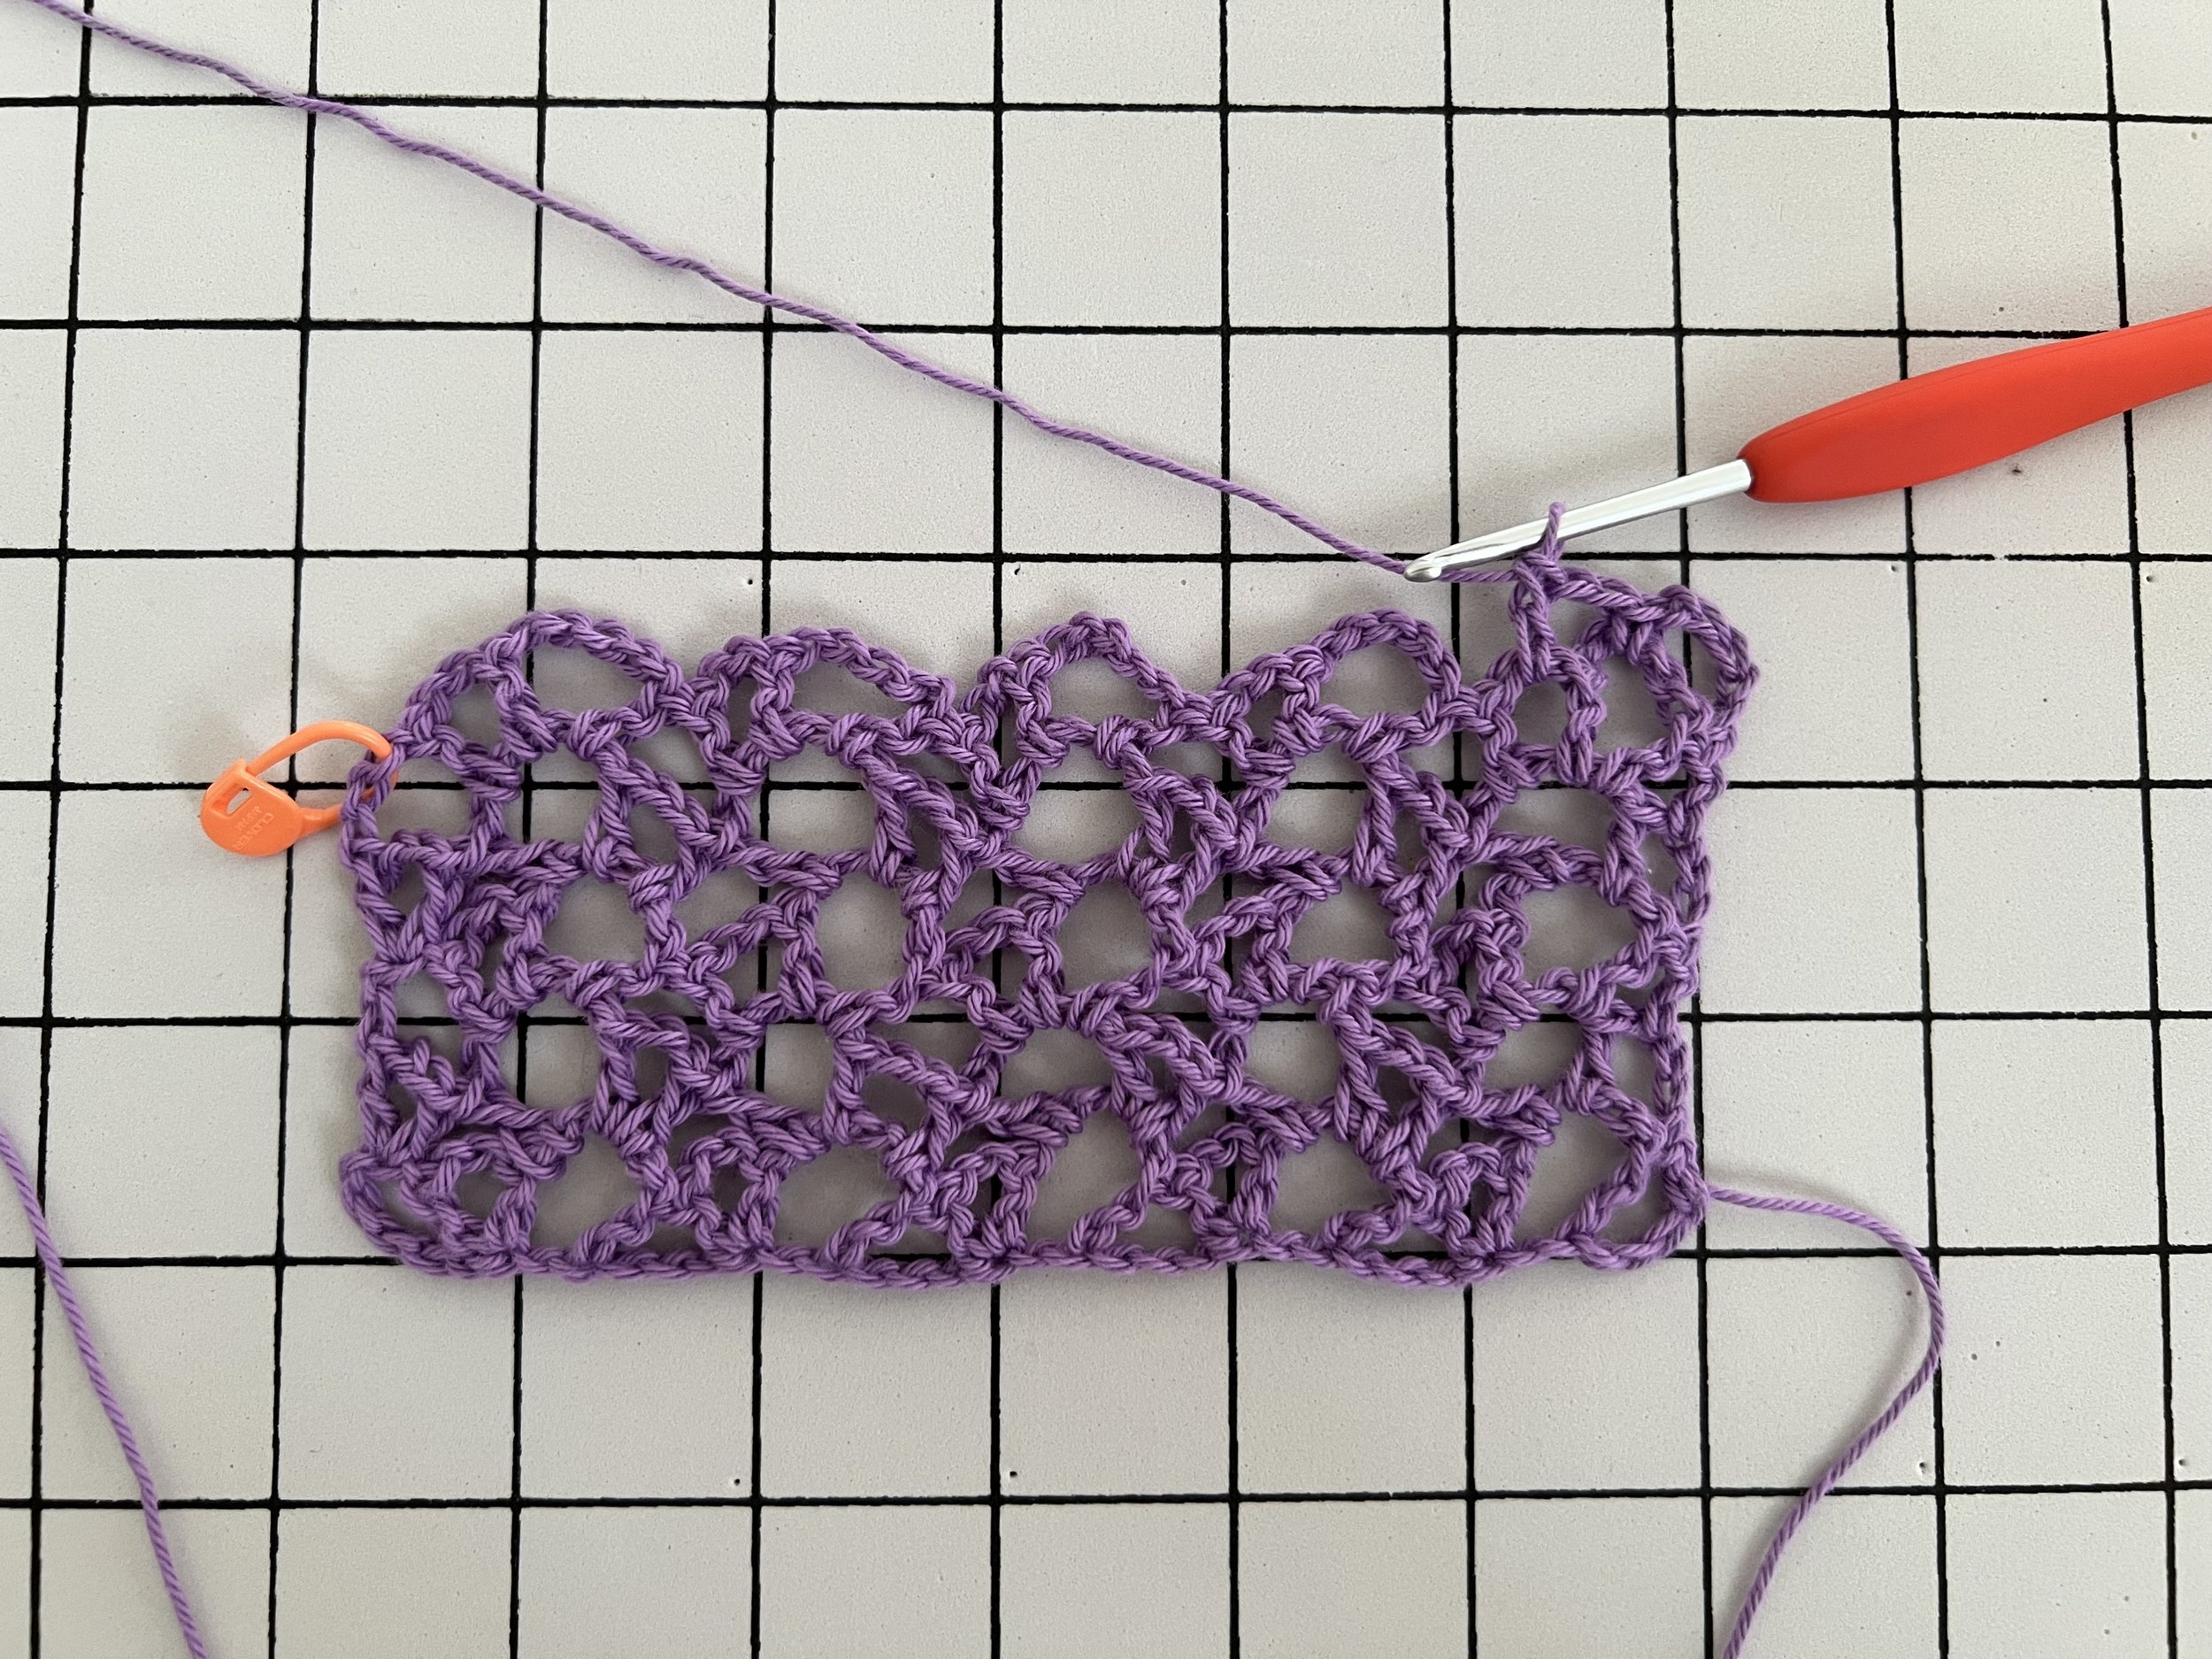
R3 – Turn your work. 3 ch and place a stitch marker in the third ch.
Then in each 5-ch-space make 1 mesh cluster until you reach the end of the row.
Finally, in the third ch stitch that started the previous row (this is the ch with a stitch marker in it), remove the stitch marker and then make 1 dc.

Repeat R2 and R3 until the scarf is your desired length. To reach a length of 72”, I made 121 rows (foundation chain not included in row count).
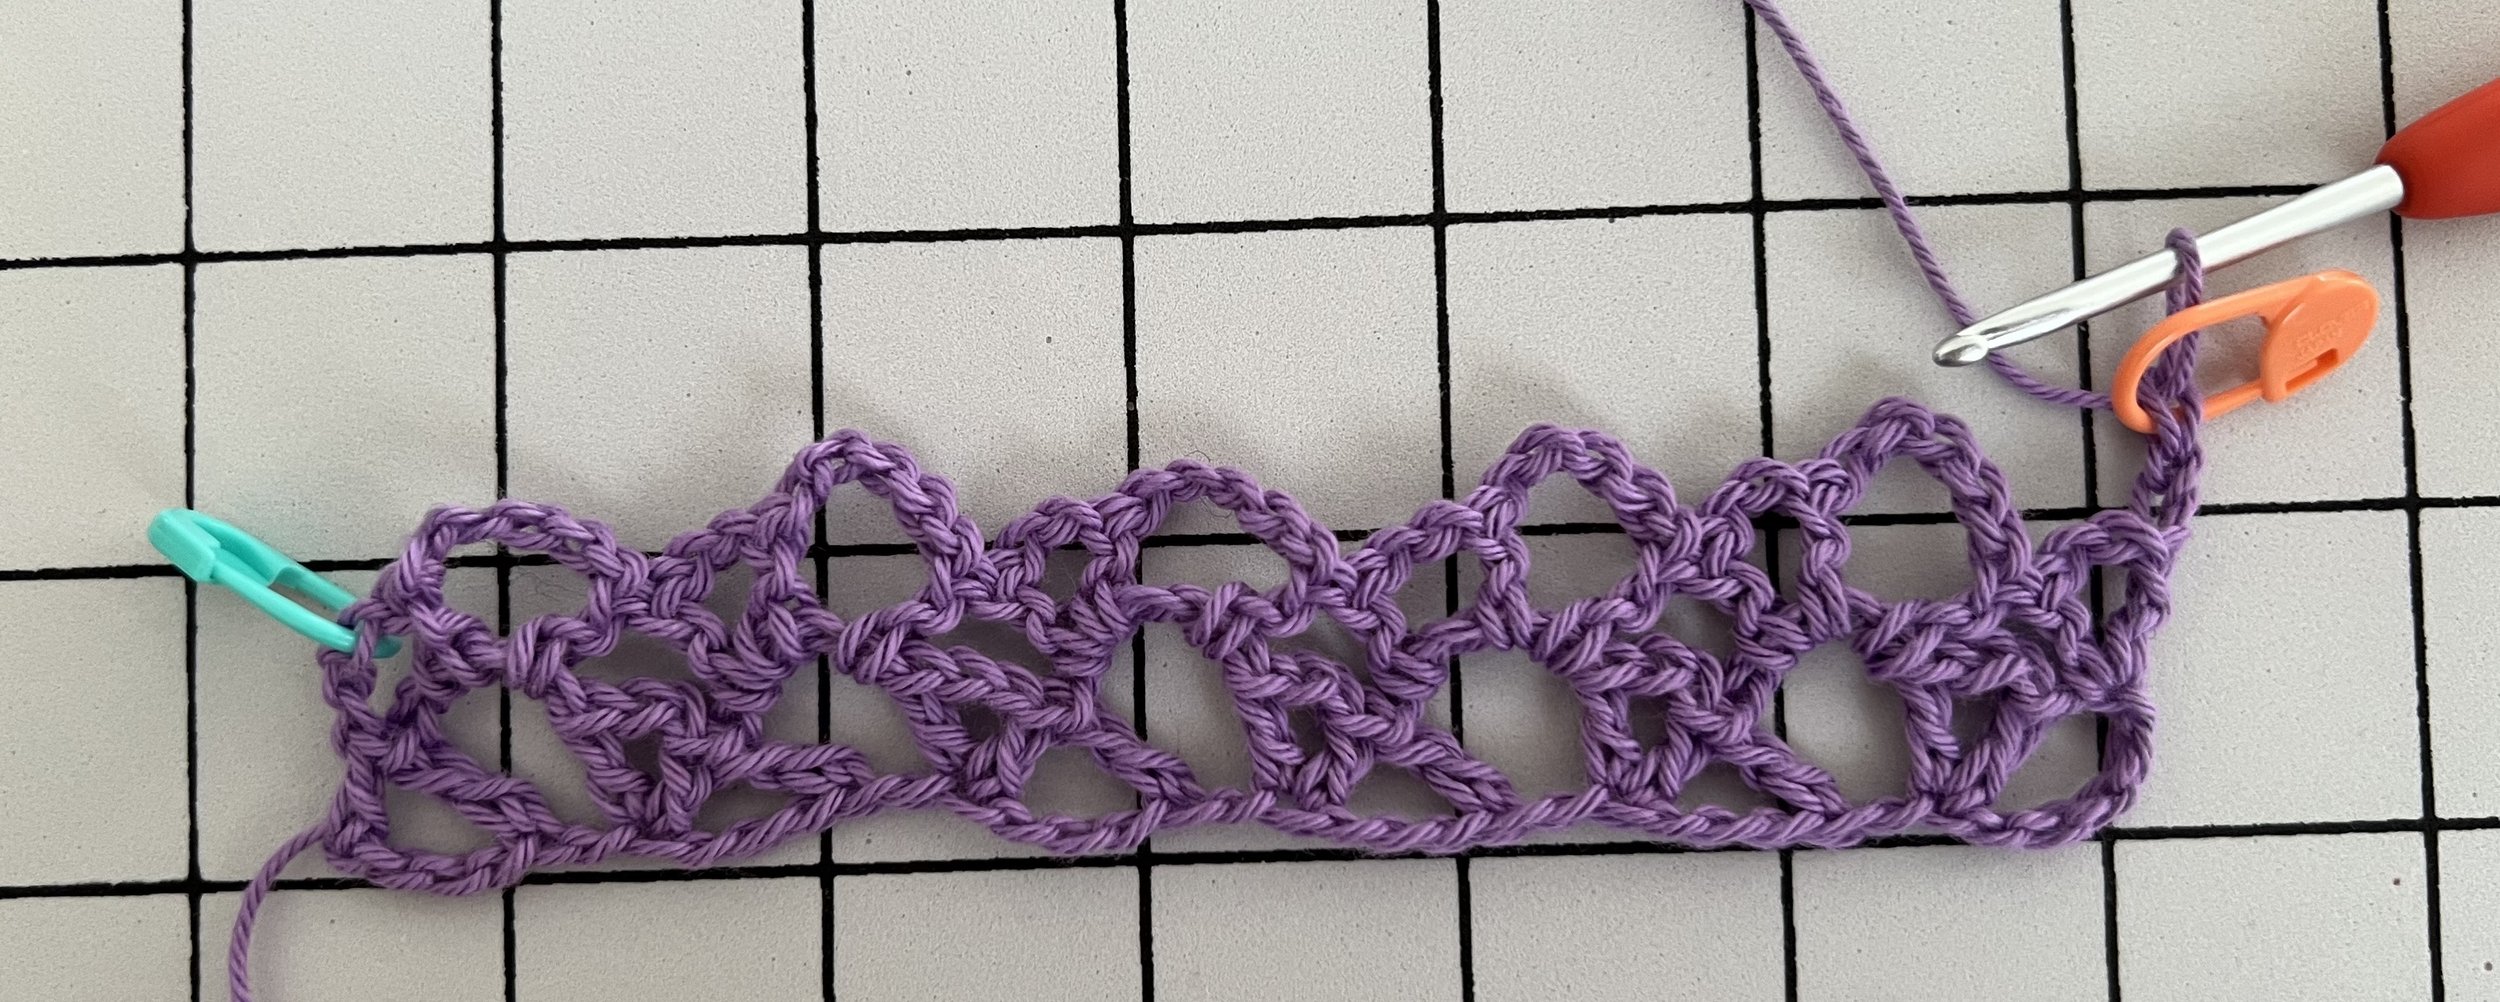
Final Row (in the photo, there are 5 rows of the mesh cluster repeat before we start the final row) – Turn your work. 3 ch, then…
…(2 ch, and in the next 5-ch-space make 1 sc, 2 ch, and in the next 2-ch-space make 1 dc.) and repeat for each mesh cluster to the end of the row.
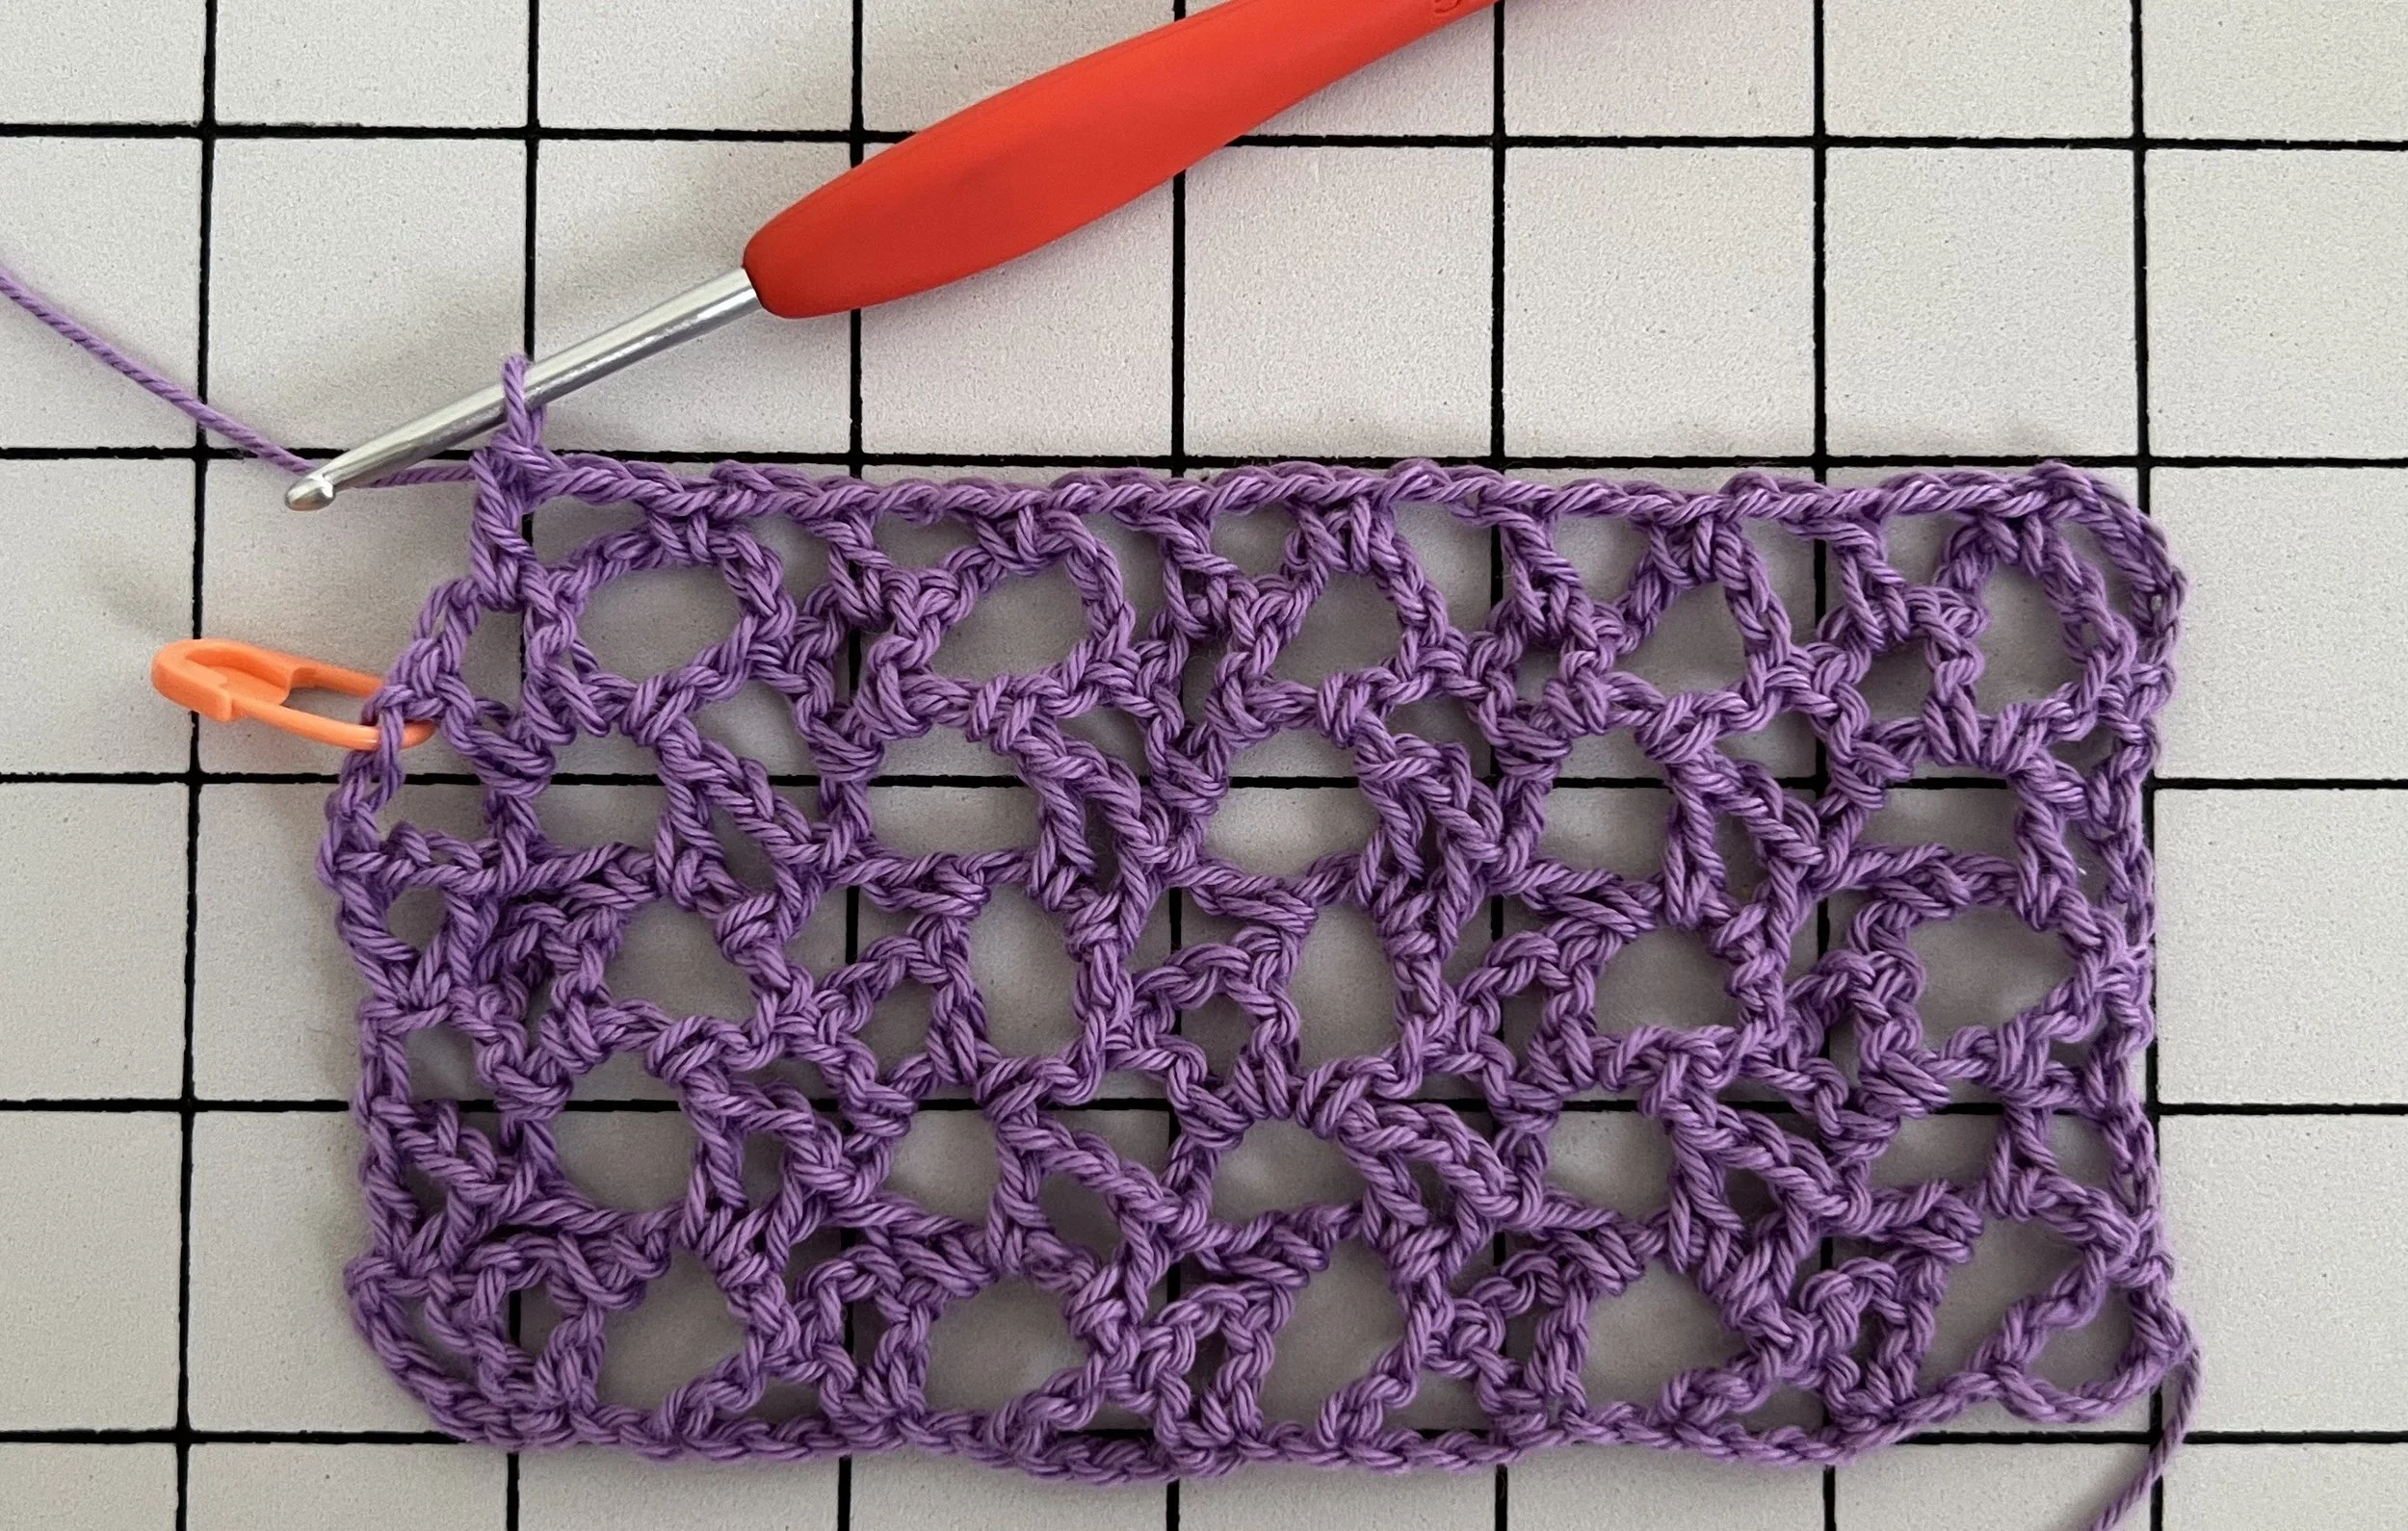
Finish with 2 ch, 1 dc. Cut the yarn and finish off, then weave in your ends.
This is what the end of the scarf looks like in Hobbii Diablo Glitter (Syringa Silver):
Sample scarf in Queensland Perth (King’s Canyon):
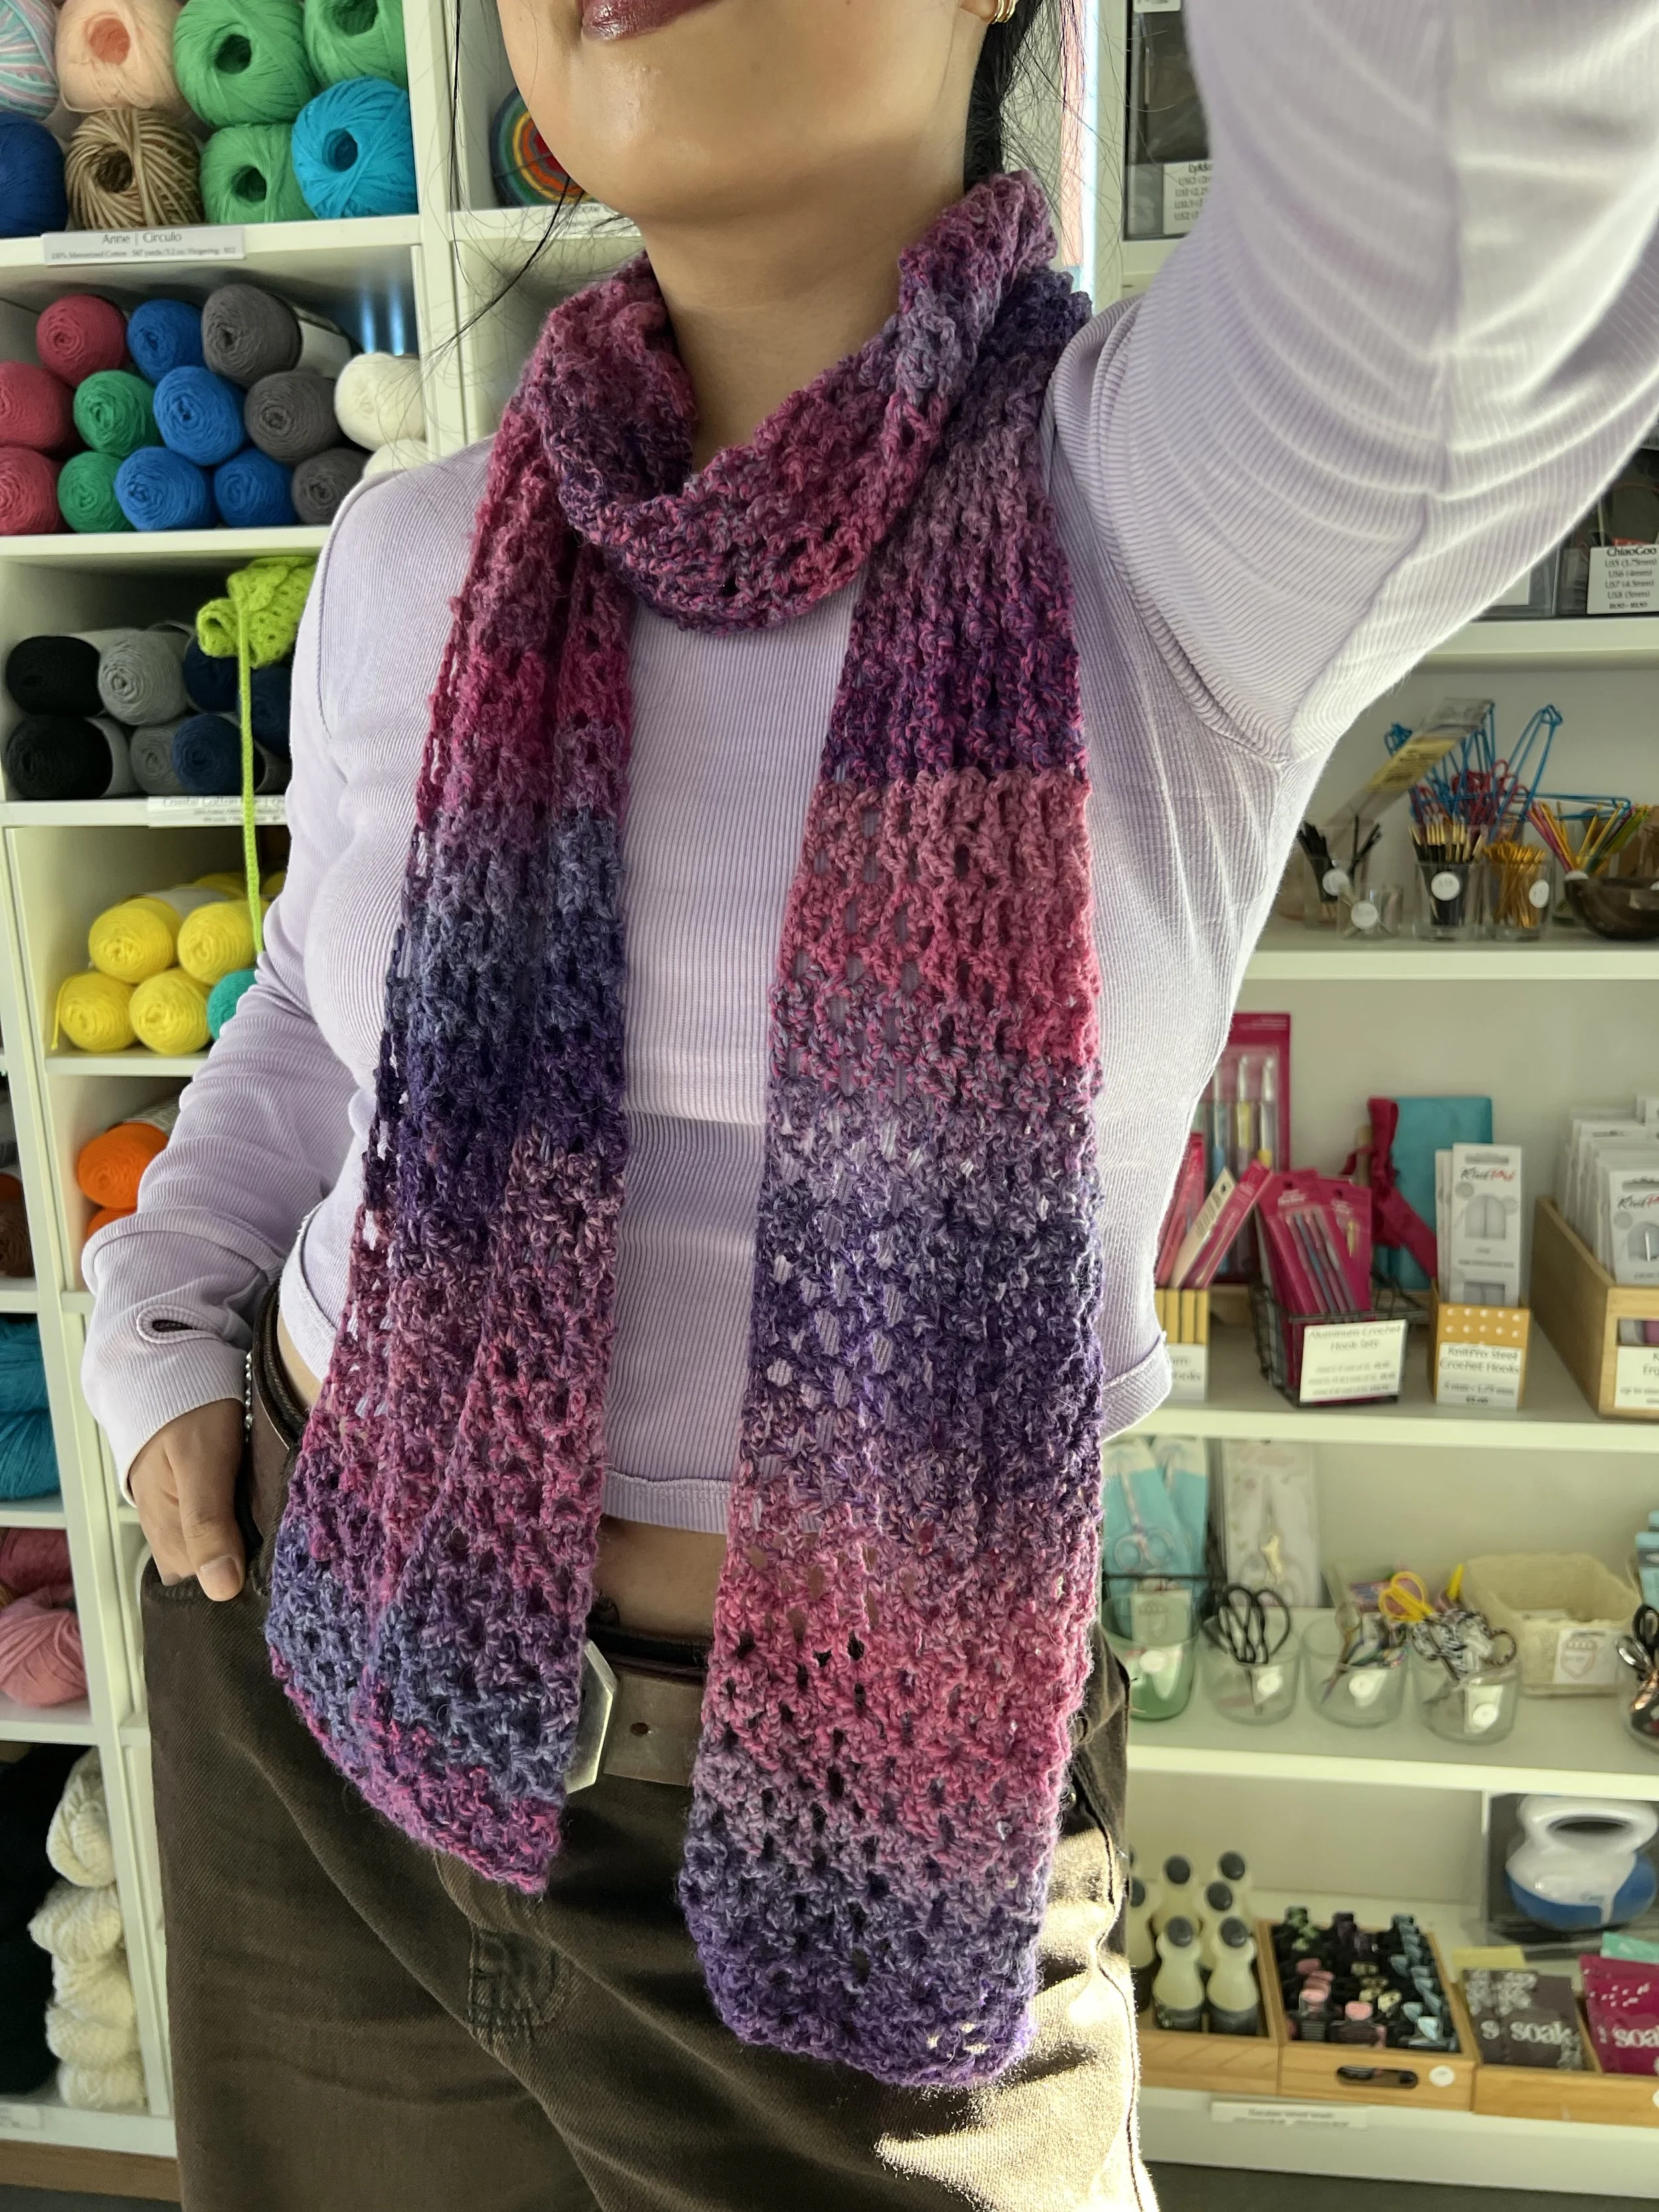
Fairy Mesh Scarf made with 120 g of Queensland Perth in Victor Harbor, but starting with 67 ch instead of 55 ch and working the mesh stitch for 123 rows:
I’d love to see your finished scarves!
If you’re sharing your beanie on Instagram, use the tag #fairymeshcrochetscarf and tag me @margaretmakesthings